Kako uravnotežiti industrijsku centrifugu: Vodič korak po korak i uobičajene pogreške koje treba izbjegavati
Jeste li ikada vidjeli centrifugu kako se trese kao da će se lansirati u orbitu? U industrijskim okruženjima, neuravnotežena centrifuga može uzrokovati intenzivne vibracije, što dovodi do skupih zastoja, sigurnosnih rizika i gubitka proizvoda. Nedavno smo tome svjedočili u tvornici kućnog tekstila koja proizvodi jastuke i deke od perja: jedna centrifuga velike brzine snažno je vibrirala, prijeteći zaustavljanjem proizvodnje. Rješenje je bilo jasno - nakon što je rotor pravilno uravnotežen, razina vibracija pala je više od deset puta, a stroj je ponovno radio glatko.
U ovom sveobuhvatnom vodiču, provest ćemo vas kroz Kako izvesti balansiranje polja na industrijskoj centrifugi kako biste uklonili prekomjerne vibracije. Naučit ćete kako dijagnosticirati uzrok vibracija, izvršiti detaljan postupak balansiranja i izbjeći uobičajene zamke s kojima se inženjeri često susreću. Do kraja biste trebali biti u mogućnosti s pouzdanjem balansirati rotor centrifuge, osiguravajući njegov pouzdan rad, štedeći vrijeme održavanja i sprječavajući skupe kvarove.
- Dijagnosticiranje problema s vibracijama: Kako utvrditi je li neravnoteža rotora glavni uzrok vibracija ili su u pitanju drugi mehanički problemi.
- Postupak balansiranja korak po korak: Detaljan postupak za balansiranje rotora centrifuge na terenu korištenjem ispitnih utega i mjerenja vibracija.
- Uobičajene pogreške koje treba izbjegavati: Šest čestih pogrešaka u balansiranju centrifuga (poput balansiranja prljavog stroja) i kako ih spriječiti.
- Profesionalni savjeti za pouzdanost: Važni savjeti o čišćenju, odabiru težine, sigurnosnim mjerama opreza i korištenju naprednih dijagnostičkih alata kako bi vaša centrifuga radila nesmetano.
Zašto je važno pravilno balansiranje centrifuge
Neuravnotežena centrifuga nije samo manja neugodnost – to je ozbiljan problem koji može utjecati na vaš rad. vrijeme, novac, pouzdanost i kvalitetaKada je rotor nebalansiran pri tisućama okretaja u minuti, čak i mala razlika u težini može generirati ogromne sile. (Na primjer, neravnoteža od 2 grama pri oko 4600 okretaja u minuti može izazvati silu ekvivalentnu otprilike 9 kg!) Te sile tresu stroj, što može dovesti do:
- Prekomjerno trošenje i oštećenja: Ležajevi, brtve i ostale komponente brže se troše. U ekstremnim slučajevima, dijelovi se mogu slomiti, što dovodi do skupih popravaka ili čak potpunog kvara stroja.
- Neplanirani zastoj: Vibracije mogu aktivirati sigurnosne senzore ili prisiliti isključenja. Svaki sat neočekivanog zastoja znači gubitak proizvodnje i povećane troškove.
- Safety risks: Jake vibracije povećavaju rizik od katastrofalnog kvara. Labavi dio ili težina mogu se pretvoriti u opasan projektil, ugrožavajući osoblje i opremu.
- Loše performanse: Centrifuga možda neće postići optimalno odvajanje ili protok ako ne može raditi punom brzinom zbog vibracija. Kvaliteta proizvoda mogla bi patiti ili procesi trajati dulje.
Pravilnim balansiranjem centrifuge osiguravate glatkiji rad. To produžuje vijek trajanja stroja (poboljšava pouzdanost), smanjuje kvarove i troškove održavanja te održava radno okruženje sigurnim. Ukratko, balansiranje je ključno za održavanje učinkovitosti i bezbrižnosti vaše proizvodnje.
Dijagnosticiranje vibracija: Provjere prije balansiranja
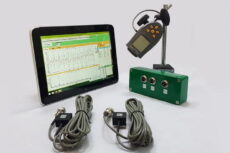
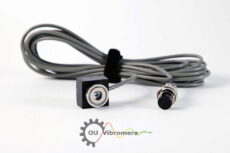
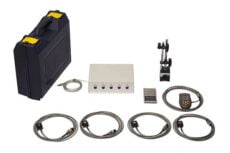
Prije nego što se odmah krene s dodavanjem težina, važno je provjeriti da neravnoteža je zapravo glavni uzrok vibracija. Moderni analizatori vibracija (ili instrumenti za balansiranje poput Balanset-1A) često imaju način rada vibrometra ili način spektralne analize kako bi se pomoglo u ovoj dijagnozi.
Provjerite komponente vibracija
Pokrenite centrifugu (praznu) radnom brzinom i promatrajte očitanja vibracija. Obratite pozornost na ukupna razina vibracija i komponentu pri brzini rotacije (često nazvanu 1× ili obrnuta komponenta).
- Ako je vibracija pri 1× gotovo jednaka ukupnoj razini vibracija, to snažno ukazuje na to da rotor neravnoteža je primarni uzrok vibracija. U ovom slučaju, nastavak balansiranja je ispravan pristup.
- Ako je ukupna vibracija puno veća od 1× komponente (na primjer, ako postoje značajne vibracije na drugim frekvencijama), tada bi nešto drugo moglo biti pogrešno osim same neravnoteže.
Pregledajte ima li drugih mehaničkih problema
Ako vibracije ne dolaze uglavnom zbog neravnoteže, trebali biste pregledati centrifugu zbog mehaničkih problema. prije pokušavajući uravnotežiti rotor. Potražite uobičajene probleme kao što su:
- Istrošeni ili oštećeni ležajevi: Loši ležajevi mogu uzrokovati prekomjerne vibracije i prvo ih je potrebno zamijeniti ili popraviti.
- Labavi temelji ili nosači: Osigurajte da je centrifuga čvrsto pričvršćena za temelj ili bazu. Labavi vijci za pričvršćivanje ili slaba potporna konstrukcija mogu pojačati vibracije.
- Kontakt ili trenje rotora: Provjerite da nijedan dio rotora ne struže ili ne udara o nepokretne dijelove (poput kućišta) tijekom rotacije.
Stabilnost očitanja vibracija
Također, promatrajte stabilnost mjerenja vibracija. U načinu rada vibrometra, očitanja amplitude i faznog kuta trebala bi biti relativno stabilna (fluktuirajući ne više od oko 10–15%). Ako očitanja skaču više od toga, to bi moglo ukazivati na povremene probleme poput labavih komponenti ili čak strukturne rezonancije. Prije nego što nastavite, trebali biste riješiti te probleme ili odabrati stabilnu brzinu mjerenja.
Bottom line: Tek kada ste sigurni da je centrifuga mehanički ispravna (osim neravnoteže) i da su vibracije prvenstveno posljedica neravnoteže rotora, trebali biste prijeći na proces balansiranja.
Kako uravnotežiti industrijsku centrifugu (korak po korak)
Sada ćemo prijeći na srž problema: izvođenje ravnoteže rotora centrifuge. Provjerite je li centrifuga čisto i prazno prije nego što počnete. Osnovna ideja je izmjeriti trenutne vibracije, dodati poznati testni uteg kako bi se utvrdila neravnoteža, a zatim dodati korekcijske utege kako bi se neutralizirala neravnoteža. Slijedite ove korake:
- Pokrenite program balansiranja: Pomoću instrumenta za balansiranje ili upravljačke ploče centrifuge pokrenite način rada ili program balansiranja. (Na nekim uređajima to može biti poseban izbornik "Balansiranje" ili softverski način rada.) Provjerite radi li centrifuga ispravnom brzinom za balansiranje - obično normalnom radnom brzinom ili određenom brzinom ispitivanja. To će biti brzina kojom ćete provoditi sva mjerenja.
- Izmjerite početnu vibraciju (osnovnu vrijednost): Pustite centrifugu da radi bez ikakvih ispitnih utega i promatrajte očitanja vibracija u softveru za balansiranje (ili vibrometru). Zabilježite početnu amplitudu i fazu vibracija za svaki senzor/ravninu. Na primjer, tijekom našeg testa, osnovne razine vibracija bile su oko 4,44 mm/s na Ravnini 1 i 9,34 mm/s na Ravnini 2. Ove osnovne vrijednosti daju vam početnu točku i kasnije će se koristiti za procjenu poboljšanja.
- Unesite podatke o rotoru (ako je primjenjivo): Mnogi sustavi za balansiranje omogućuju vam unos detalja poput naziva ili ID-a rotora, lokacije stroja i parametara za ispitne utege. Ako vaš sustav traži masu ispitnog utega i radijus na kojem će biti montiran, unesite te vrijednosti (ako planirate koristiti pomoć softvera za izračun neravnoteže u jedinicama poput gram-milimetara). Ovaj korak pomaže u generiranju izvješća i pretvorbi jedinica, ali nije strogo potreban za balansiranje - možete ga preskočiti ako nije potreban.
- Izvršite probni rad s probnim utegom na Ravnini 1: Zaustavite stroj i pričvrstite mali probna težina na rotor na prvoj korekcijskoj ravnini (ravnina koju senzor 1 prati). Označite položaj gdje dodajete ovaj uteg (mnogi balanseri koriste kutnu referencu, često nula stupnjeva na toj oznaci). Probni uteg trebao bi biti umjeren - dovoljan da vidljivo promijeni vibracije, ali ne toliko težak da bi mogao oštetiti stroj pri brzini. Nastavite s radom centrifuge i pustite je da postigne brzinu. Ponovno izmjerite amplitudu i fazu vibracija. Idealno bi bilo da se vibracije promijene za najmanje 20% (bilo po veličini ili pomaku faze) nakon dodavanja ovog utega. Uočljiva promjena potvrđuje da uteg utječe na vibracije, što je potrebno za izračune.
- Premjestite probni uteg u ravninu 2 i ponovno testirajte: Isključite napajanje i sigurno premjestite isti probni uteg (ili uteg jednake mase) u drugu korekcijsku ravninu (gdje se nalazi senzor 2). Obavezno ga postavite u referentni kutni položaj na toj ravnini (npr. poravnajte ga s istom oznakom nula stupnjeva ako je moguće). Ponovno pokrenite centrifugu do brzine i zabilježite podatke o vibracijama za ovu konfiguraciju. Sada imate dva seta podataka: jedan s probnog utega na Ravnini 1 i jedan iz Ravnine 2.
- Izračunajte potrebnu korekciju: S osnovnim podacima i dva probna mjerenja, instrument ili softver za balansiranje sada može izračunati količinu neravnoteže i predložiti korekcijske utege. U osnovi, sustav rješava koliko će utega i pod kojim kutom na svakoj ravnini suzbiti izmjerenu neravnotežu. Izdat će preporuke, na primjer: „Dodajte X grama na Y° na ravnini 1 i Z grama na W° na ravnini 2.“ Ako ste izvršili raniji korak unosa mase i polumjera probnog utega, program će to upotrijebiti za izravno davanje korekcijske mase. U suprotnom, mogao bi dati rezultat u smislu neravnoteže (grami-milimetri) koju trebate prevesti u položaj utega.
- Pričvrstite korekcijske utege: Nakon što ste unijeli preporučene korekcije, isključite i zaključajte centrifugu (nikada ne smijete dodavati utege dok stroj radi). Pričvrstite određene korekcijske utege na svaku ravninu rotora pod kutovima koje određuje balanser. Koristite sigurnu metodu – utezi su obično zavarene ili vijčane na rotor. (U našem slučaju u tvornici smo zavarili utege kako bismo osigurali da ostanu na mjestu pri velikoj brzini.) Imajte na umu da se kut obično mjeri od referentne točke (gdje ste u početku postavili probni uteg) u smjeru rotacije (instrument bi trebao pojasniti kako definira 0° i smjer kuta).
- Provjerite rezultate (završni pokušaj): Uklonite sve probne utege koji su još uvijek na rotoru, dvaput provjerite jesu li svi alati ili labavi predmeti uklonjeni i još jednom pokrenite centrifugu brzinom balansiranja. Sada provjerite očitanja vibracija. Trebale bi biti znatno niže od početne osnovne vrijednosti. U našem primjeru, nakon dodavanja izračunatih korekcijskih utega, vibracije su pale na oko 0,399 mm/s na Ravnini 1 i 0,715 mm/s na Ravnini 2 – više od deseterostrukog smanjenja od početka. Time je potvrđeno da je balansiranje bilo uspješno. Ako su vaše razine vibracija sada unutar prihvatljivih granica (često postavljenih standardima za strojeve ili kriterijima vaše tvrtke), gotovi ste! Ako ne, postupak će možda trebati ponoviti ili fino podesiti, ali obično je dovoljna jedna iteracija ako se pravilno izvede.
U ovom trenutku, rotor centrifuge trebao bi biti dobro uravnotežen. Odmah ćete primijetiti razliku: glatkiji rad, manje buke i bez pretjeranog tresenja. Uvijek dokumentirajte konačne razine vibracija i sve dodane težine, jer su te informacije korisne za evidenciju održavanja i buduće praćenje.
6 uobičajenih pogrešaka pri balansiranju industrijskih centrifuga (i kako ih izbjeći)
Čak i uz dobro razumijevanje postupka balansiranja, postoje zamke u koje tehničari i inženjeri mogu upasti. Balansiranje industrijskih centrifuga predstavlja jedinstvene izazove – ovi strojevi često rade vrlo velikim brzinama i rukuju teškim procesnim materijalima, što znači da pogreške mogu biti skupe ili opasne. Evo šest uobičajenih pogrešaka koje ljudi čine prilikom balansiranja rotora centrifuga i kako ih možete izbjeći:
-
Pokušaj balansiranja prljave ili neispravne centrifuge. Ovo je greška broj jedan kod centrifuga. Za razliku od jednostavnog ventilatora ili rotora motora, vibracije industrijske centrifuge obično su dominantno procesno neravnoteža – što znači neravnomjerna raspodjela proizvoda (poput mulja, krutih tvari itd.) unutar stroja. Ako je rotor prljav ili prekriven stvrdnutim materijalom, to nakupljanje vjerojatno uzrokuje većinu vibracija. U takvom slučaju, pokušaj "balansiranja" rotora dodavanjem utega samo je borba protiv simptoma, a ne uzroka. Nadalje, ako stroj ima ozbiljan mehanički kvar (loši ležajevi itd.), balansiranje neće pomoći.
Savjet: Uvijek temeljito očistite centrifugu prije pokušaja bilo kakvog balansiranja. Uklonite sve ostatke proizvoda, naslage i prljavštinu iz posude ili košare rotora. Nakon što je čista (i nakon što su izvršeni svi mehanički popravci), ponovno izmjerite vibracije – možda ćete otkriti da su vibracije već puno niže. Tek tada, ako još uvijek postoje značajne vibracije, nastavite s balansiranjem praznog rotora. Također, dvaput provjerite stanje ležajeva i čvrstoću temelja. Visoke vibracije mogu brzo otkriti i pogoršati sve postojeće probleme u tim područjima, stoga je najbolje da stroj bude u dobrom stanju prije balansiranja.
-
Pod pretpostavkom da će balansiranje trajno ukloniti sve vibracije. Mnogi početnici očekuju da će, nakon što uravnoteže centrifugu, ona zauvijek raditi bez vibracija. Stvarnost je takva da postoje dvije vrste neravnoteže u centrifugi: (1) inherentna mehanička (preostala) neravnoteža samog rotora i (2) neravnoteža tekućeg procesa uzrokovana proizvodom. Balansiranje na terenu ispravlja samo mehaničku neravnotežu praznog rotora. Ne sprječava vibracije uzrokovane neravnomjernim opterećenjem ili nakupljanjem tijekom rada.
Savjet: Razumjeti razliku između mehanička i procesna neravnotežaVaš cilj kod balansiranja na terenu je postići što veću mehaničku ravnotežu rotora kada je čist i prazan. To će poboljšati pouzdanost i smanjiti osnovne vibracije. Međutim, kada se centrifuga koristi, materijal će neizbježno postati malo neravnomjeran (na primjer, kolač će se lijepiti za posudu), što će ponovno uzrokovati vibracije. Redoviti rasporedi čišćenja i radni postupci i dalje su potrebni. Ukratko, balansiranje rotora poboljšava performanse i produžuje vijek trajanja stroja (jer se bolje nosi sa silama izazvanim procesom), ali nije jednokratni lijek za sve vibracije zauvijek.
-
Korištenje neodgovarajućeg probnog utega (preteškog ili prelakog). Odabir pravog probnog utega je ključan. Ako je probni uteg premalen, možda neće proizvesti mjerljivu promjenu vibracija i imat ćete poteškoća s dobivanjem korisnih podataka. Ako je prevelik, posebno na centrifugi velike brzine, mogao bi preopteretiti stroj ili čak uzrokovati oštećenje (zamislite da udarite veliki uteg po rotoru koji se vrti tisućama okretaja u minuti - centrifugalna sila je ogromna). Delikatna je ravnoteža kako bi se dobio uteg koji je učinkovit, ali siguran.
Savjet: Budite oprezni i počnite s mala probna težinaUvijek možete provesti više probnih vožnji, postupno povećavajući težinu dok ne vidite jasnu promjenu vibracija od 20–30%. Ovaj postupni pristup je puno sigurniji od rizika s prevelikom težinom od samog početka. Koristite dostupne resurse kao vodič za odabir: na primjer, možete koristiti online kalkulator probne težine kako bi se dobila gruba procjena odgovarajuće težine na temelju mase i brzine rotora. Imajte na umu koliko su visoke centrifugalne sile – bolje je napraviti nekoliko dodatnih pokušaja nego baciti ogromnu težinu i uzrokovati katastrofu.
-
Balansiranje u promjenjivim ili neodgovarajućim uvjetima. Uobičajena pogreška je pokušaj balansiranja centrifuge u nestabilnim uvjetima - na primjer, dok obrađuje materijal ili pri različitim brzinama. Ako se proizvod kreće ili se ubacuje i izbacuje, vibracije će se stalno mijenjati i učiniti vaše podatke o balansiranju nevažećima. Drugi aspekt su temperatura i radni uvjeti: ako se ponašanje stroja promijeni kada je vruće u odnosu na hladno, to također može utjecati na balansiranje.
Savjet: Uvijek balansirajte u kontrolirano, konzistentno stanjeCentrifuga bi trebala biti prazna (kao što je ranije spomenuto) i raditi konstantnom brzinom za sva mjerenja - obično se radi o normalnim radnim okretajima u minuti ili određenoj brzini uravnoteženja koja izbjegava bilo kakve kritične rezonancije. Nemojte pokušavati balansirati tijekom proizvodnih ciklusa; pauzirajte proces ili izolirajte stroj. Ako se karakteristike centrifuge mijenjaju s temperaturom (na primjer, zazori mogu biti uži kada je hladna), možda biste je trebali zagrijati na radnu temperaturu prije mjerenja kako biste je balansirali u stvarnom radnom stanju. Dosljednost je ključna za točne rezultate balansiranja.
-
Nepravilno pričvršćivanje korekcijskih utega. Zamislite da prolazite kroz cijeli postupak balansiranja, samo da biste dobili korekcijski uteg koji odleti kada se centrifuga vrati u rad. Kod tipičnog ventilatora, bačeni uteg može jednostavno pasti unutar kućišta; ali kod industrijske centrifuge, labavi uteg postaje brzi projektil. Može ozbiljno oštetiti kućište stroja ili, još gore, ozlijediti nekoga u blizini. Korištenje slabih metoda za pričvršćivanje utega (poput trake, ljepila ili neadekvatnih stezaljki) ili nepoštivanje pravilnog postupka montaže izuzetno je opasno.
Savjet: Sigurnost na prvom mjestu! Koristite samo odobrene metode za pričvršćivanje utega i provjerite jesu li vrlo sigurnoNajbolja praksa je zavariti ili pričvrstiti utege na rotor na određenim mjestima za korekciju ravnoteže (mnoge industrijske centrifuge imaju posebna područja na rotoru gdje možete dodati utege). Nikada ne koristite privremene dodatke poput voska, gline ili trake za ispitne utege pri punoj radnoj brzini - ako ih trebate koristiti za ispitivanje pri maloj brzini, to je jedno, ali uklonite ih prije nego što se zavrtite. Uvijek dvaput provjerite jesu li svi utezi (i pričvršćivači) zategnuti i neće li se olabaviti. Također je mudro stajati podalje od "ravnine rotacije" (ekvatorijalne ravnine rotora) kada stroj radi pri brzini tijekom ispitivanja, samo kao dodatnu mjeru opreza.
-
Ignoriranje dijagnostičkih alata izvan osnovnog balansiranja. Moderna oprema za balansiranje može učiniti više od pukog postavljanja utega. Ako ne iskoristite značajke poput spektralne analize ili ispitivanja usporavanja, mogli biste propustiti važne tragove. Na primjer, visoka vibracija od 1× ukazuje na neravnotežu, ali ako postoje i vrhovi na drugim frekvencijama (poput 2×, 3× ili nesinkronih frekvencija), to bi moglo ukazivati na probleme s neusklađenošću, labavošću ili rezonancijom. Ako se usredotočite samo na balansiranje bez dijagnosticiranja ovih problema, mogli biste propustiti dublji problem.
Savjet: Iskoristite pune mogućnosti svog alati za analizu vibracijaNakon balansiranja, ili čak tijekom faze dijagnostike, provjerite spektar vibracija. Ispravno balansiran rotor imat će dominantnu vibraciju na 1× (brzina rada) i vrlo niske razine na ostalim frekvencijama. Ako vidite značajne vrhove negdje drugdje, istražite ih – možda imate kvar ležaja (često vibracije više frekvencije), strukturnu rezonancu (vrhovi vibracija pri određenim brzinama) ili druge mehaničke probleme. Izvršite ispitivanje usporavanja (istrošenosti) ako vaš uređaj to dopušta: dok se centrifuga usporava, pratite sve skokove vibracija pri određenim brzinama – oni ukazuju na kritične brzine ili rezonantne frekvencije sustava. Poznavanje ovih vrijednosti može vam pomoći da izbjegnete mjerenja točno pri tim brzinama (gdje bi podaci bili iskrivljeni), a također vas informira o radnim brzinama koje treba izbjeći ili pojačati. Ukratko, koristite spektralnu i analizu zastoja kako biste bili sigurni da se doista radi o jednostavnoj neravnoteži i da biste potvrdili da je vaš rad na balansiranju riješio problem.
Zaključno: Uspješno balansiranje industrijske centrifuge zahtijeva metodičan pristup i pažnju prema detaljima. Uvijek počnite s čistim, mehanički ispravnim strojem; zatim dijagnosticirajte kako biste potvrdili da je problem neravnoteža; i tek tada pažljivo provedite postupak balansiranja, uz sve sigurnosne mjere. Isplata se isplati - vaša centrifuga će raditi s minimalnim vibracijama, što znači manje zastoja, manje popravaka i sigurniji okoliš. Izbjegavanjem gore navedenih uobičajenih pogrešaka uštedjet ćete vrijeme i novac, a istovremeno produljiti vijek trajanja svoje opreme.
Nemojte čekati da problem s vibracijama uzrokuje krizu. Primjenjujte ove postupke tijekom redovitog održavanja i proaktivno pratite stanje svoje centrifuge. Uz pravilno balansiranje i održavanje, vaša će se centrifuga glatko okretati, pružajući pouzdane performanse godinama koje dolaze. Ako ikada niste sigurni, posavjetujte se sa stručnjacima za analizu vibracija ili se obratite proizvođaču opreme – uvijek je bolje dobiti stručno vodstvo nego nagađati kada su u pitanju strojevi velike brzine. Sretno balansiranje!
Često postavljana pitanja
Zašto se centrifuga mora temeljito očistiti prije balansiranja?
Nečista centrifuga često ima ostatke proizvoda zalijepljene za rotor, što uzrokuje većinu vibracija. Ako pokušate uravnotežiti rotor bez čišćenja, samo kompenzirate to privremeno nakupljanje. Čim se proces promijeni ili kasnije očistite stroj, ravnoteža će ponovno biti poremećena. Stoga biste uvijek trebali potpuno očistiti rotor i popraviti sve mehaničke probleme prije balansiranja kako biste se pozabavili pravom temeljnom neravnotežom samog rotora.
Uklanja li balansiranje industrijske centrifuge sve vibracije?
Balansiranje uvelike smanjuje vibracije uzrokovane inherentnom neravnotežom rotora, pa će centrifuga raditi puno glatkije kada je prazna. Međutim, ne sprječava vibracije koje nastaju tijekom procesa (na primjer, ako se materijal lijepi za posudu ili nije ravnomjerno raspoređen). Vjerojatno ćete i dalje s vremenom vidjeti neke vibracije kako stroj radi i prlja se – zbog čega je rutinsko čišćenje važno. Ukratko, balansiranje popravlja neravnotežu rotora, ali ne može zaustaviti sve vibracije u radnim uvjetima, posebno ako proces uvodi novu neravnotežu.
Kako odabrati odgovarajući probni uteg za balansiranje industrijske centrifuge?
Trebali biste započeti s malim probnim utegom i vidjeti kako utječe na vibracije. Pravilo je težiti promjeni amplitude vibracija od otprilike 20% kada se doda probni uteg. Ako dodate mali uteg i ništa se ne promijeni, možete pokušati s malo većim. Ključno je postupno povećavati – nemojte odjednom prelaziti na vrlo teški uteg. Budući da se centrifuge vrte tako brzo, čak i mali uteg stvara veliku silu. Prekoračenje s velikim utegom može biti opasno. Korištenje izračuna ili alata za procjenu razumne težine (na temelju veličine i brzine rotora) može biti korisno, ali uvijek budite oprezni.
Može li se centrifuga balansirati dok se u njoj nalazi proizvod?
Ne – centrifugu biste trebali balansirati samo kada je prazna (i po mogućnosti čista). Ako se unutra nalazi proizvod (poput tekućine ili mulja), vjerojatno neće biti ravnomjerno raspoređen i klizat će ili se pomicati, što znači da će se očitanja vibracija stalno mijenjati. Svaka korekcija ravnoteže koju napravite u tim uvjetima bit će nepouzdana. Uvijek balansirajte u stabilnim uvjetima: prazan rotor, konstantna brzina i bez aktivnih procesa.
Kako se korektivni utezi trebaju sigurno pričvrstiti na rotor centrifuge?
Uvijek vrlo sigurno pričvrstite korekcijske utege, koristeći metode poput zavarivanja ili pričvršćivanja vijcima prema preporuci proizvođača centrifuge. Utezi bi trebali biti postavljeni na predviđena mjesta za korekciju ravnoteže ako ih rotor ima. Privremene metode (ljepilo, traka, kit) nisu sigurne za rad punom brzinom – mogu se odlijepiti i uzrokovati ozbiljna oštećenja ili ozljede. Nakon postavljanja utega, ako je moguće, napravite sporo probno okretanje kako biste bili sigurni da sve drži i nikada ne stojte u liniji s ravninom rotora dok se okreće, za svaki slučaj.
Kako spektralna analiza i testovi usporavanja mogu pomoći u balansiranju centrifuge?
Spektralna analiza (promatranje spektra frekvencija vibracija) pomaže vam da potvrdite da je glavni problem u brzini rada (1×). Ako spektar pokazuje veliki vrh pri 1× RPM i ne mnogo više, to je dobar znak da se uglavnom radi o neravnoteži. Ako postoje i drugi vrhovi (poput 2× ili nasumičnih frekvencija), upozorava vas na potencijalne druge probleme (poput neusklađenosti, labavosti ili problema s ležajevima) koje samo balansiranje neće riješiti. Testovi usporavanja (bilježenje vibracija dok se stroj usporava) mogu otkriti rezonantne frekvencije - ako centrifuga prolazi kroz brzinu pri kojoj se jako trese, a zatim se izgladi pri radnoj brzini, taj skok je rezonancija. Znajući to, možete izbjeći mjerenja točno pri toj problematičnoj brzini ili ćete biti svjesni da stroj može uvijek vibrirati pri prolasku kroz taj raspon. Oba alata u biti vam daju dublje razumijevanje ponašanja stroja, tako da možete osigurati da primjenjujete pravo rješenje (i balansirate samo ono što zaista treba balansirati).
