ਇੱਕ ਉਦਯੋਗਿਕ ਸੈਂਟਰੀਫਿਊਜ ਨੂੰ ਕਿਵੇਂ ਬੈਲੇਂਸ ਕਰੀਏ: ਕਦਮ-ਦਰ-ਕਦਮ ਗਾਈਡ ਅਤੇ ਬਚਣ ਵਾਲੀਆਂ ਆਮ ਗਲਤੀਆਂ
ਕੀ ਤੁਸੀਂ ਕਦੇ ਕਿਸੇ ਸੈਂਟਰੀਫਿਊਜ ਨੂੰ ਇਸ ਤਰ੍ਹਾਂ ਹਿੱਲਦੇ ਦੇਖਿਆ ਹੈ ਜਿਵੇਂ ਇਹ ਹੁਣੇ ਹੀ ਪੁਲਾੜ ਵਿੱਚ ਉਡਾਣ ਭਰਨ ਵਾਲਾ ਹੋਵੇ? ਉਦਯੋਗਿਕ ਸੈਟਿੰਗਾਂ ਵਿੱਚ, ਇੱਕ ਅਨਬੈਲੰਸਡ ਸੈਂਟਰੀਫਿਊਜ ਤੀਬਰ ਵਾਈਬ੍ਰੇਸ਼ਨ ਦਾ ਕਾਰਨ ਬਣ ਸਕਦਾ ਹੈ, ਜਿਸ ਨਾਲ ਮਹਿੰਗਾ ਡਾਊਨਟਾਈਮ, ਸੁਰੱਖਿਆ ਖ਼ਤਰੇ ਅਤੇ ਉਤਪਾਦ ਨੁਕਸਾਨ ਹੋ ਸਕਦੇ ਹਨ। ਅਸੀਂ ਹਾਲ ਹੀ ਵਿੱਚ ਇਸਨੂੰ ਡਾਊਨ ਸਿਰਹਾਣੇ ਅਤੇ ਕੰਬਲ ਬਣਾਉਣ ਵਾਲੀ ਇੱਕ ਹੋਮ ਟੈਕਸਟਾਈਲ ਫੈਕਟਰੀ ਵਿੱਚ ਦੇਖਿਆ: ਇੱਕ ਹਾਈ-ਸਪੀਡ ਸੈਂਟਰੀਫਿਊਜ ਹਿੰਸਕ ਢੰਗ ਨਾਲ ਕੰਬ ਰਿਹਾ ਸੀ, ਜੋ ਉਤਪਾਦਨ ਨੂੰ ਰੋਕਣ ਦੀ ਧਮਕੀ ਦੇ ਰਿਹਾ ਸੀ। ਹੱਲ ਸਪਸ਼ਟ ਸੀ – ਇੱਕ ਵਾਰ ਰੋਟਰ ਸਹੀ ਢੰਗ ਨਾਲ ਬੈਲੇਂਸ ਹੋ ਜਾਣ 'ਤੇ, ਵਾਈਬ੍ਰੇਸ਼ਨ ਪੱਧਰ ਦਸ ਗੁਣਾ ਤੋਂ ਵੱਧ ਘੱਟ ਗਏ, ਅਤੇ ਮਸ਼ੀਨ ਦੁਬਾਰਾ ਸੁਚਾਰੂ ਢੰਗ ਨਾਲ ਚੱਲਣ ਲੱਗੀ।
ਇਸ ਵਿਆਪਕ ਗਾਈਡ ਵਿੱਚ, ਅਸੀਂ ਤੁਹਾਨੂੰ ਦੱਸਾਂਗੇ ਇੱਕ ਉਦਯੋਗਿਕ ਸੈਂਟਰੀਫਿਊਜ 'ਤੇ ਫੀਲਡ ਬੈਲੇਂਸਿੰਗ ਕਿਵੇਂ ਕਰੀਏ ਬਹੁਤ ਜ਼ਿਆਦਾ ਵਾਈਬ੍ਰੇਸ਼ਨਾਂ ਨੂੰ ਖਤਮ ਕਰਨ ਲਈ। ਤੁਸੀਂ ਸਿੱਖੋਗੇ ਕਿ ਵਾਈਬ੍ਰੇਸ਼ਨ ਦੇ ਕਾਰਨ ਦੀ ਜਾਂਚ ਕਿਵੇਂ ਕਰਨੀ ਹੈ, ਕਦਮ-ਦਰ-ਕਦਮ ਬੈਲੇਂਸਿੰਗ ਪ੍ਰਕਿਰਿਆ ਨੂੰ ਕਿਵੇਂ ਲਾਗੂ ਕਰਨਾ ਹੈ, ਅਤੇ ਉਹਨਾਂ ਆਮ ਗਲਤੀਆਂ ਤੋਂ ਕਿਵੇਂ ਬਚਣਾ ਹੈ ਜਿਹਨਾਂ ਦਾ ਇੰਜੀਨੀਅਰਾਂ ਨੂੰ ਅਕਸਰ ਸਾਹਮਣਾ ਕਰਨਾ ਪੈਂਦਾ ਹੈ। ਅੰਤ ਤੱਕ, ਤੁਸੀਂ ਭਰੋਸੇ ਨਾਲ ਇੱਕ ਸੈਂਟਰੀਫਿਊਜ ਰੋਟਰ ਨੂੰ ਬੈਲੇਂਸ ਕਰਨ ਦੇ ਯੋਗ ਹੋਵੋਗੇ, ਇਹ ਯਕੀਨੀ ਬਣਾਉਂਦੇ ਹੋਏ ਕਿ ਇਹ ਭਰੋਸੇਯੋਗ ਢੰਗ ਨਾਲ ਕੰਮ ਕਰੇ, ਰੱਖ-ਰਖਾਅ ਦਾ ਸਮਾਂ ਬਚਾਵੇ, ਅਤੇ ਮਹਿੰਗੇ ਬ੍ਰੇਕਡਾਊਨ ਨੂੰ ਰੋਕੇ।
- ਵਾਈਬ੍ਰੇਸ਼ਨ ਸਮੱਸਿਆਵਾਂ ਦੀ ਜਾਂਚ: ਕਿਵੇਂ ਪਤਾ ਲਗਾਈਏ ਕਿ ਰੋਟਰ ਅਨਬੈਲੰਸ ਵਾਈਬ੍ਰੇਸ਼ਨ ਦਾ ਮੁੱਖ ਕਾਰਨ ਹੈ ਜਾਂ ਹੋਰ ਮਕੈਨੀਕਲ ਸਮੱਸਿਆਵਾਂ ਸ਼ਾਮਲ ਹਨ।
- ਕਦਮ-ਦਰ-ਕਦਮ ਬੈਲੇਂਸਿੰਗ ਪ੍ਰਕਿਰਿਆ: ਟੈਸਟ ਵਜ਼ਨ ਅਤੇ ਵਾਈਬ੍ਰੇਸ਼ਨ ਮਾਪਾਂ ਦੀ ਵਰਤੋਂ ਕਰਦੇ ਹੋਏ ਫੀਲਡ ਵਿੱਚ ਸੈਂਟਰੀਫਿਊਜ ਰੋਟਰ ਨੂੰ ਬੈਲੇਂਸ ਕਰਨ ਲਈ ਇੱਕ ਵਿਸਤ੍ਰਿਤ ਪ੍ਰਕਿਰਿਆ।
- ਬਚਣ ਵਾਲੀਆਂ ਆਮ ਗਲਤੀਆਂ: ਸੈਂਟਰੀਫਿਊਜ ਬੈਲੇਂਸਿੰਗ ਵਿੱਚ ਛੇ ਆਮ ਗਲਤੀਆਂ (ਜਿਵੇਂ ਕਿ ਗੰਦੀ ਮਸ਼ੀਨ ਨੂੰ ਬੈਲੇਂਸ ਕਰਨਾ) ਅਤੇ ਉਹਨਾਂ ਨੂੰ ਕਿਵੇਂ ਰੋਕਿਆ ਜਾਵੇ।
- ਭਰੋਸੇਯੋਗਤਾ ਲਈ ਪ੍ਰੋ ਸੁਝਾਅ: ਆਪਣੇ ਸੈਂਟਰੀਫਿਊਜ ਨੂੰ ਸੁਚਾਰੂ ਢੰਗ ਨਾਲ ਚਲਾਉਣ ਲਈ ਸਫਾਈ, ਵਜ਼ਨ ਚੋਣ, ਸੁਰੱਖਿਆ ਸਾਵਧਾਨੀਆਂ, ਅਤੇ ਉੱਨਤ ਡਾਇਗਨੌਸਟਿਕ ਟੂਲਾਂ ਦੀ ਵਰਤੋਂ ਬਾਰੇ ਮਹੱਤਵਪੂਰਨ ਸਲਾਹ।


ਸੈਂਟਰਿਫਿਊਜ ਦੀ ਸਹੀ ਬੈਲੈਂਸਿੰਗ ਕਿਉਂ ਮਹੱਤਵਪੂਰਨ ਹੈ
ਅਸੰਤੁਲਿਤ ਸੈਂਟਰਿਫਿਊਜ ਸਿਰਫ਼ ਇੱਕ ਛੋਟੀ ਜਿਹੀ ਅਸੁਵਿਧਾ ਨਹੀਂ ਹੈ – ਇਹ ਇੱਕ ਗੰਭੀਰ ਸਮੱਸਿਆ ਹੈ ਜੋ ਤੁਹਾਡੇ ਸੰਚਾਲਨ ਦੇ ਸਮੇਂ, ਪੈਸੇ, ਭਰੋਸੇਯੋਗਤਾ ਅਤੇ ਗੁਣਵੱਤਾ ਨੂੰ ਪ੍ਰਭਾਵਿਤ ਕਰ ਸਕਦੀ ਹੈ। ਜਦੋਂ ਕੋਈ ਰੋਟਰ ਹਜ਼ਾਰਾਂ RPM 'ਤੇ ਅਸੰਤੁਲਿਤ ਹੁੰਦਾ ਹੈ, ਤਾਂ ਥੋੜ੍ਹਾ ਜਿਹਾ ਵਜ਼ਨ ਦਾ ਫ਼ਰਕ ਵੀ ਬਹੁਤ ਵੱਡੀਆਂ ਤਾਕਤਾਂ ਪੈਦਾ ਕਰ ਸਕਦਾ ਹੈ। (ਉਦਾਹਰਨ ਲਈ, ਲਗਭਗ 4,600 RPM 'ਤੇ 2 ਗ੍ਰਾਮ ਦਾ ਅਸੰਤੁਲਨ ਲਗਭਗ 9 ਕਿਲੋ ਦੇ ਬਰਾਬਰ ਬਲ ਪੈਦਾ ਕਰ ਸਕਦਾ ਹੈ!) ਇਹ ਤਾਕਤਾਂ ਮਸ਼ੀਨ ਨੂੰ ਹਿਲਾਉਂਦੀਆਂ ਹਨ, ਜਿਸ ਨਾਲ ਇਹ ਹੋ ਸਕਦਾ ਹੈ:
- ਬਹੁਤ ਜ਼ਿਆਦਾ ਘਿਸਾਈ ਅਤੇ ਨੁਕਸਾਨ: ਬੇਅਰਿੰਗਾਂ, ਸੀਲਾਂ, ਅਤੇ ਹੋਰ ਪੁਰਜ਼ੇ ਜਲਦੀ ਘਿਸ ਜਾਂਦੇ ਹਨ। ਬਹੁਤ ਜ਼ਿਆਦਾ ਸਥਿਤੀਆਂ ਵਿੱਚ, ਪੁਰਜ਼ੇ ਟੁੱਟ ਸਕਦੇ ਹਨ, ਜਿਸ ਨਾਲ ਮਹਿੰਗੀ ਮੁਰੰਮਤ ਜਾਂ ਪੂਰੀ ਮਸ਼ੀਨ ਫੇਲ੍ਹ ਹੋ ਸਕਦੀ ਹੈ।
- ਅਣਯੋਜਿਤ ਡਾਊਨਟਾਈਮ: ਵਾਈਬ੍ਰੇਸ਼ਨ ਸੁਰੱਖਿਆ ਸੈਂਸਰਾਂ ਨੂੰ ਚਾਲੂ ਕਰ ਸਕਦੀ ਹੈ ਜਾਂ ਮਸ਼ੀਨ ਬੰਦ ਕਰਵਾ ਸਕਦੀ ਹੈ। ਅਚਾਨਕ ਡਾਊਨਟਾਈਮ ਦਾ ਹਰ ਘੰਟਾ ਉਤਪਾਦਨ ਦੇ ਨੁਕਸਾਨ ਅਤੇ ਵਧੀ ਹੋਈ ਲਾਗਤ ਦਾ ਮਤਲਬ ਹੈ।
- ਸੁਰੱਖਿਆ ਜੋਖਮ: ਗੰਭੀਰ ਵਾਈਬ੍ਰੇਸ਼ਨ ਵਿਨਾਸ਼ਕਾਰੀ ਫੇਲ੍ਹ ਹੋਣ ਦੇ ਖ਼ਤਰੇ ਨੂੰ ਵਧਾਉਂਦੀ ਹੈ। ਇੱਕ ਢਿੱਲਾ ਪੁਰਜ਼ਾ ਜਾਂ ਵਜ਼ਨ ਇੱਕ ਖ਼ਤਰਨਾਕ ਪ੍ਰੋਜੈਕਟਾਈਲ ਬਣ ਸਕਦਾ ਹੈ, ਜਿਸ ਨਾਲ ਕਰਮਚਾਰੀਆਂ ਅਤੇ ਉਪਕਰਣਾਂ ਨੂੰ ਖ਼ਤਰਾ ਹੋ ਸਕਦਾ ਹੈ।
- ਮਾੜੀ ਕਾਰਗੁਜ਼ਾਰੀ: ਜੇਕਰ ਵਾਈਬ੍ਰੇਸ਼ਨ ਕਾਰਨ ਸੈਂਟਰਿਫਿਊਜ ਪੂਰੀ ਗਤੀ 'ਤੇ ਨਹੀਂ ਚੱਲ ਸਕਦਾ, ਤਾਂ ਇਹ ਬਿਹਤਰੀਨ ਵਿਭਾਜਨ ਜਾਂ ਥ੍ਰੂਪੁੱਟ ਹਾਸਲ ਨਹੀਂ ਕਰ ਸਕਦਾ। ਉਤਪਾਦ ਦੀ ਗੁਣਵੱਤਾ ਪ੍ਰਭਾਵਿਤ ਹੋ ਸਕਦੀ ਹੈ, ਜਾਂ ਪ੍ਰਕਿਰਿਆਵਾਂ ਵਿੱਚ ਵੱਧ ਸਮਾਂ ਲੱਗ ਸਕਦਾ ਹੈ।
ਸੈਂਟਰਿਫਿਊਜ ਦੀ ਸਹੀ ਬੈਲੈਂਸਿੰਗ ਕਰਕੇ, ਤੁਸੀਂ ਵਧੇਰੇ ਸੁਚਾਰੂ ਸੰਚਾਲਨ ਯਕੀਨੀ ਬਣਾਉਂਦੇ ਹੋ। ਇਹ ਮਸ਼ੀਨ ਦੀ ਉਮਰ ਵਧਾਉਂਦਾ ਹੈ (ਭਰੋਸੇਯੋਗਤਾ ਨੂੰ ਸੁਧਾਰਦਾ ਹੈ), ਖ਼ਰਾਬੀਆਂ ਅਤੇ ਰੱਖ-ਰਖਾਅ ਦੀ ਲਾਗਤ ਨੂੰ ਘਟਾਉਂਦਾ ਹੈ, ਅਤੇ ਕੰਮ ਦੇ ਮਾਹੌਲ ਨੂੰ ਸੁਰੱਖਿਅਤ ਰੱਖਦਾ ਹੈ। ਸੰਖੇਪ ਵਿੱਚ, ਬੈਲੈਂਸਿੰਗ ਤੁਹਾਡੇ ਉਤਪਾਦਨ ਨੂੰ ਕੁਸ਼ਲ ਅਤੇ ਪਰੇਸ਼ਾਨੀ-ਮੁਕਤ ਰੱਖਣ ਲਈ ਬਹੁਤ ਜ਼ਰੂਰੀ ਹੈ।
ਵਾਈਬ੍ਰੇਸ਼ਨ ਦਾ ਨਿਦਾਨ: ਬੈਲੈਂਸਿੰਗ ਤੋਂ ਪਹਿਲਾਂ ਦੀ ਜਾਂਚ
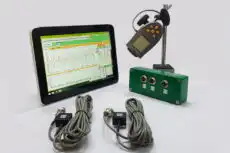
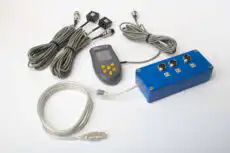
ਸਿੱਧਾ ਵਜ਼ਨ ਜੋੜਨ ਵਿੱਚ ਕੁੱਦਣ ਤੋਂ ਪਹਿਲਾਂ, ਇਹ ਪੁਸ਼ਟੀ ਕਰਨਾ ਜ਼ਰੂਰੀ ਹੈ ਕਿ ਅਸੰਤੁਲਨ ਹੀ ਵਾਈਬ੍ਰੇਸ਼ਨ ਦਾ ਮੁੱਖ ਕਾਰਨ ਹੈ ਆਧੁਨਿਕ ਵਾਈਬ੍ਰੇਸ਼ਨ ਵਿਸ਼ਲੇਸ਼ਕਾਂ (ਜਾਂ Balanset-1A ਵਰਗੇ ਬੈਲੈਂਸਿੰਗ ਯੰਤਰਾਂ) ਵਿੱਚ ਅਕਸਰ ਇਸ ਨਿਦਾਨ ਵਿੱਚ ਮਦਦ ਲਈ ਇੱਕ ਵਾਈਬ੍ਰੋਮੀਟਰ ਮੋਡ ਜਾਂ ਸਪੈਕਟ੍ਰਮ ਵਿਸ਼ਲੇਸ਼ਣ ਮੋਡ ਹੁੰਦਾ ਹੈ।
ਵਾਈਬ੍ਰੇਸ਼ਨ ਕੰਪੋਨੈਂਟਾਂ ਦੀ ਜਾਂਚ ਕਰੋ
ਸੈਂਟਰਿਫਿਊਜ ਨੂੰ (ਖਾਲੀ) ਸੰਚਾਲਨ ਗਤੀ 'ਤੇ ਚਲਾਓ ਅਤੇ ਵਾਈਬ੍ਰੇਸ਼ਨ ਰੀਡਿੰਗਾਂ ਦਾ ਨਿਰੀਖਣ ਕਰੋ। ਕੁੱਲ ਵਾਈਬ੍ਰੇਸ਼ਨ ਪੱਧਰ ਅਤੇ ਘੁੰਮਣ ਗਤੀ 'ਤੇ ਕੰਪੋਨੈਂਟ (ਜਿਸਨੂੰ ਅਕਸਰ 1× ਜਾਂ ਰਿਵਰਸ ਕੰਪੋਨੈਂਟ ਕਿਹਾ ਜਾਂਦਾ ਹੈ) ਵੱਲ ਧਿਆਨ ਦਿਓ।
- ਜੇਕਰ 1× 'ਤੇ ਵਾਈਬ੍ਰੇਸ਼ਨ ਕੁੱਲ ਵਾਈਬ੍ਰੇਸ਼ਨ ਪੱਧਰ ਦੇ ਲਗਭਗ ਬਰਾਬਰ ਹੈ, ਤਾਂ ਇਹ ਮਜ਼ਬੂਤੀ ਨਾਲ ਦਰਸਾਉਂਦਾ ਹੈ ਕਿ ਰੋਟਰ ਅਸੰਤੁਲਨ ਵਾਈਬ੍ਰੇਸ਼ਨ ਦਾ ਮੁੱਖ ਕਾਰਨ ਹੈ। ਇਸ ਸਥਿਤੀ ਵਿੱਚ, ਬੈਲੈਂਸਿੰਗ ਨਾਲ ਅੱਗੇ ਵਧਣਾ ਸਹੀ ਪਹੁੰਚ ਹੈ।
- ਜੇਕਰ ਕੁੱਲ ਵਾਈਬ੍ਰੇਸ਼ਨ 1× ਕੰਪੋਨੈਂਟ ਨਾਲੋਂ ਬਹੁਤ ਜ਼ਿਆਦਾ ਹੈ (ਉਦਾਹਰਨ ਲਈ, ਜੇਕਰ ਹੋਰ ਫ੍ਰੀਕੁਐਂਸੀਆਂ 'ਤੇ ਮਹੱਤਵਪੂਰਨ ਵਾਈਬ੍ਰੇਸ਼ਨ ਹਨ), ਤਾਂ ਸਿਰਫ਼ ਅਸੰਤੁਲਨ ਤੋਂ ਇਲਾਵਾ ਕੁਝ ਹੋਰ ਗੜਬੜ ਹੋ ਸਕਦੀ ਹੈ।
ਹੋਰ ਮਕੈਨੀਕਲ ਸਮੱਸਿਆਵਾਂ ਦੀ ਜਾਂਚ ਕਰੋ
ਜੇਕਰ ਵਾਈਬ੍ਰੇਸ਼ਨ ਜ਼ਿਆਦਾਤਰ ਅਸੰਤੁਲਨ ਤੋਂ ਨਹੀਂ ਆ ਰਹੀ, ਤਾਂ ਤੁਹਾਨੂੰ ਸੈਂਟਰਿਫਿਊਜ ਦੀ ਮਕੈਨੀਕਲ ਸਮੱਸਿਆਵਾਂ ਲਈ ਜਾਂਚ ਕਰਨੀ ਚਾਹੀਦੀ ਹੈ ਪਹਿਲਾਂ ਰੋਟਰ ਨੂੰ ਬੈਲੈਂਸ ਕਰਨ ਦੀ ਕੋਸ਼ਿਸ਼ ਕਰਨ ਤੋਂ ਪਹਿਲਾਂ। ਆਮ ਸਮੱਸਿਆਵਾਂ ਜਿਵੇਂ ਕਿ ਇਹਨਾਂ ਦੀ ਭਾਲ ਕਰੋ:
- ਘਿਸੀਆਂ ਜਾਂ ਖ਼ਰਾਬ ਹੋਈਆਂ ਬੇਅਰਿੰਗਾਂ: ਖ਼ਰਾਬ ਬੇਅਰਿੰਗਾਂ ਬਹੁਤ ਜ਼ਿਆਦਾ ਵਾਈਬ੍ਰੇਸ਼ਨ ਦਾ ਕਾਰਨ ਬਣ ਸਕਦੀਆਂ ਹਨ ਅਤੇ ਪਹਿਲਾਂ ਬਦਲੀਆਂ ਜਾਂ ਮੁਰੰਮਤ ਕੀਤੀਆਂ ਜਾਣੀਆਂ ਚਾਹੀਦੀਆਂ ਹਨ।
- ਢਿੱਲੀ ਬੁਨਿਆਦ ਜਾਂ ਮਾਊਂਟ: ਯਕੀਨੀ ਬਣਾਓ ਕਿ ਸੈਂਟਰਿਫਿਊਜ ਆਪਣੀ ਬੁਨਿਆਦ ਜਾਂ ਬੇਸ ਨਾਲ ਮਜ਼ਬੂਤੀ ਨਾਲ ਸੁਰੱਖਿਅਤ ਹੈ। ਢਿੱਲੇ ਹੋਲਡ-ਡਾਊਨ ਬੋਲਟ ਜਾਂ ਕਮਜ਼ੋਰ ਸਹਾਰਾ ਢਾਂਚਾ ਵਾਈਬ੍ਰੇਸ਼ਨਾਂ ਨੂੰ ਵਧਾ ਸਕਦਾ ਹੈ।
- ਰੋਟਰ ਦਾ ਸੰਪਰਕ ਜਾਂ ਰਗੜ: ਜਾਂਚ ਕਰੋ ਕਿ ਘੁੰਮਣ ਦੌਰਾਨ ਰੋਟਰ ਦਾ ਕੋਈ ਵੀ ਹਿੱਸਾ ਸਥਿਰ ਪੁਰਜ਼ਿਆਂ (ਜਿਵੇਂ ਕਿ ਹਾਊਸਿੰਗ) ਨਾਲ ਰਗੜ ਜਾਂ ਟਕਰਾ ਨਹੀਂ ਰਿਹਾ।
ਵਾਈਬ੍ਰੇਸ਼ਨ ਰੀਡਿੰਗਾਂ ਦੀ ਸਥਿਰਤਾ
ਨਾਲ ਹੀ, ਵਾਈਬ੍ਰੇਸ਼ਨ ਮਾਪਾਂ ਦੀ ਸਥਿਰਤਾ ਦਾ ਨਿਰੀਖਣ ਕਰੋ। ਵਾਈਬ੍ਰੋਮੀਟਰ ਮੋਡ ਵਿੱਚ, ਐਂਪਲੀਟਿਊਡ ਅਤੇ ਫੇਜ਼ ਐਂਗਲ ਰੀਡਿੰਗਾਂ ਮੁਕਾਬਲਤਨ ਸਥਿਰ ਹੋਣੀਆਂ ਚਾਹੀਦੀਆਂ ਹਨ (ਲਗਭਗ 10–15% ਤੋਂ ਵੱਧ ਉਤਰਾਅ-ਚੜ੍ਹਾਅ ਨਾ ਹੋਵੇ)। ਜੇਕਰ ਰੀਡਿੰਗਾਂ ਇਸ ਤੋਂ ਵੱਧ ਉਤਰਾਅ-ਚੜ੍ਹਾਅ ਕਰ ਰਹੀਆਂ ਹਨ, ਤਾਂ ਇਹ ਢਿੱਲੇ ਪੁਰਜ਼ਿਆਂ ਜਾਂ ਸਟ੍ਰਕਚਰਲ ਰੈਜ਼ੋਨੈਂਸ ਵਰਗੀਆਂ ਰੁਕ-ਰੁਕ ਕੇ ਹੋਣ ਵਾਲੀਆਂ ਸਮੱਸਿਆਵਾਂ ਦਾ ਸੰਕੇਤ ਦੇ ਸਕਦਾ ਹੈ। ਅੱਗੇ ਵਧਣ ਤੋਂ ਪਹਿਲਾਂ ਤੁਹਾਨੂੰ ਉਹਨਾਂ ਸਮੱਸਿਆਵਾਂ ਦਾ ਹੱਲ ਕਰਨਾ ਚਾਹੀਦਾ ਹੈ ਜਾਂ ਇੱਕ ਸਥਿਰ ਮਾਪ ਗਤੀ ਚੁਣਨੀ ਚਾਹੀਦੀ ਹੈ।
ਸਿੱਟਾ: ਸਿਰਫ਼ ਉਦੋਂ ਜਦੋਂ ਤੁਹਾਨੂੰ ਯਕੀਨ ਹੋ ਜਾਵੇ ਕਿ ਸੈਂਟਰਿਫਿਊਜ ਮਕੈਨੀਕਲ ਤੌਰ 'ਤੇ ਠੀਕ ਹੈ (ਅਸੰਤੁਲਨ ਨੂੰ ਛੱਡ ਕੇ) ਅਤੇ ਵਾਈਬ੍ਰੇਸ਼ਨ ਮੁੱਖ ਤੌਰ 'ਤੇ ਰੋਟਰ ਅਸੰਤੁਲਨ ਕਾਰਨ ਹੈ, ਤਾਂ ਹੀ ਤੁਹਾਨੂੰ ਬੈਲੈਂਸਿੰਗ ਪ੍ਰਕਿਰਿਆ ਵੱਲ ਵਧਣਾ ਚਾਹੀਦਾ ਹੈ।
ਇੱਕ ਉਦਯੋਗਿਕ ਸੈਂਟਰਿਫਿਊਜ ਨੂੰ ਕਿਵੇਂ ਬੈਲੈਂਸ ਕਰੀਏ (ਕਦਮ-ਦਰ-ਕਦਮ)
ਹੁਣ ਅਸੀਂ ਮੁੱਖ ਮੁੱਦੇ ਵੱਲ ਵਧਾਂਗੇ: ਸੈਂਟਰਿਫਿਊਜ ਰੋਟਰ ਦੀ ਫੀਲਡ ਬੈਲੈਂਸਿੰਗ ਕਰਨਾ। ਯਕੀਨੀ ਬਣਾਓ ਕਿ ਸੈਂਟਰਿਫਿਊਜ ਸਾਫ਼ ਅਤੇ ਖਾਲੀ ਹੈ ਸ਼ੁਰੂ ਕਰਨ ਤੋਂ ਪਹਿਲਾਂ। ਮੂਲ ਵਿਚਾਰ ਹੈ ਮੌਜੂਦਾ ਵਾਈਬ੍ਰੇਸ਼ਨ ਨੂੰ ਮਾਪਣਾ, ਅਸੰਤੁਲਨ ਦਾ ਪਤਾ ਲਗਾਉਣ ਲਈ ਇੱਕ ਜਾਣਿਆ-ਪਛਾਣਿਆ ਟੈਸਟ ਵਜ਼ਨ ਜੋੜਨਾ, ਅਤੇ ਫਿਰ ਅਸੰਤੁਲਨ ਨੂੰ ਸੰਤੁਲਿਤ ਕਰਨ ਲਈ ਸੁਧਾਰ ਵਜ਼ਨ ਜੋੜਨਾ। ਇਹਨਾਂ ਕਦਮਾਂ ਦੀ ਪਾਲਣਾ ਕਰੋ:
- ਬੈਲੈਂਸਿੰਗ ਪ੍ਰੋਗਰਾਮ ਸ਼ੁਰੂ ਕਰੋ: ਆਪਣੇ ਬੈਲੈਂਸਿੰਗ ਯੰਤਰ ਜਾਂ ਸੈਂਟਰਿਫਿਊਜ ਦੇ ਕੰਟਰੋਲ ਪੈਨਲ ਦੀ ਵਰਤੋਂ ਕਰਦੇ ਹੋਏ, ਬੈਲੈਂਸਿੰਗ ਮੋਡ ਜਾਂ ਪ੍ਰੋਗਰਾਮ ਸ਼ੁਰੂ ਕਰੋ। (ਕੁਝ ਯੰਤਰਾਂ 'ਤੇ, ਇਹ ਇੱਕ ਖ਼ਾਸ "Balance" ਮੀਨੂ ਜਾਂ ਸਾਫਟਵੇਅਰ ਮੋਡ ਹੋ ਸਕਦਾ ਹੈ।) ਯਕੀਨੀ ਬਣਾਓ ਕਿ ਸੈਂਟਰਿਫਿਊਜ ਬੈਲੈਂਸਿੰਗ ਲਈ ਸਹੀ ਗਤੀ 'ਤੇ ਚੱਲ ਰਿਹਾ ਹੈ – ਆਮ ਤੌਰ 'ਤੇ ਇਸਦੀ ਸਧਾਰਨ ਸੰਚਾਲਨ ਗਤੀ ਜਾਂ ਇੱਕ ਨਿਰਧਾਰਤ ਟੈਸਟ ਗਤੀ। ਇਹ ਉਹ ਗਤੀ ਹੋਵੇਗੀ ਜਿਸ 'ਤੇ ਤੁਸੀਂ ਸਾਰੇ ਮਾਪ ਲਓਗੇ।
- ਸ਼ੁਰੂਆਤੀ ਵਾਈਬ੍ਰੇਸ਼ਨ ਮਾਪੋ (ਬੇਸਲਾਈਨ): ਸੈਂਟਰਿਫਿਊਜ ਨੂੰ ਬਿਨਾਂ ਕਿਸੇ ਟੈਸਟ ਵਜ਼ਨ ਦੇ ਚੱਲਣ ਦਿਓ ਅਤੇ ਬੈਲੈਂਸਿੰਗ ਸਾਫਟਵੇਅਰ (ਜਾਂ ਵਾਈਬ੍ਰੋਮੀਟਰ) ਵਿੱਚ ਵਾਈਬ੍ਰੇਸ਼ਨ ਰੀਡਿੰਗਾਂ ਦਾ ਨਿਰੀਖਣ ਕਰੋ। ਹਰੇਕ ਸੈਂਸਰ/ਪਲੇਨ ਲਈ ਸ਼ੁਰੂਆਤੀ ਵਾਈਬ੍ਰੇਸ਼ਨ ਐਂਪਲੀਟਿਊਡ ਅਤੇ ਫੇਜ਼ ਦਰਜ ਕਰੋ। ਉਦਾਹਰਨ ਲਈ, ਸਾਡੇ ਟੈਸਟ ਦੌਰਾਨ, ਬੇਸਲਾਈਨ ਵਾਈਬ੍ਰੇਸ਼ਨ ਪੱਧਰ ਪਲੇਨ 1 'ਤੇ ਲਗਭਗ 4.44 mm/s ਅਤੇ ਪਲੇਨ 2 'ਤੇ 9.34 mm/s ਸਨ। ਇਹ ਬੇਸਲਾਈਨ ਮੁੱਲ ਤੁਹਾਨੂੰ ਇੱਕ ਸ਼ੁਰੂਆਤੀ ਬਿੰਦੂ ਦਿੰਦੇ ਹਨ ਅਤੇ ਬਾਅਦ ਵਿੱਚ ਸੁਧਾਰ ਨੂੰ ਮਾਪਣ ਲਈ ਵਰਤੇ ਜਾਣਗੇ।
- ਰੋਟਰ ਦੀ ਜਾਣਕਾਰੀ ਦਰਜ ਕਰੋ (ਜੇਕਰ ਲਾਗੂ ਹੋਵੇ): ਬਹੁਤ ਸਾਰੇ ਬੈਲੈਂਸਿੰਗ ਸਿਸਟਮ ਤੁਹਾਨੂੰ ਰੋਟਰ ਦਾ ਨਾਮ ਜਾਂ ID, ਮਸ਼ੀਨ ਦੀ ਸਥਿਤੀ, ਅਤੇ ਟੈਸਟ ਵਜ਼ਨਾਂ ਲਈ ਪੈਰਾਮੀਟਰ ਵਰਗੇ ਵੇਰਵੇ ਦਰਜ ਕਰਨ ਦੀ ਇਜਾਜ਼ਤ ਦਿੰਦੇ ਹਨ। ਜੇਕਰ ਤੁਹਾਡਾ ਸਿਸਟਮ ਟੈਸਟ ਵਜ਼ਨ ਦਾ ਮਾਸ ਅਤੇ ਉਹ ਰੇਡੀਅਸ ਪੁੱਛਦਾ ਹੈ ਜਿਸ 'ਤੇ ਇਸਨੂੰ ਮਾਊਂਟ ਕੀਤਾ ਜਾਵੇਗਾ, ਤਾਂ ਉਹ ਮੁੱਲ ਦਰਜ ਕਰੋ (ਜੇਕਰ ਤੁਸੀਂ ਗ੍ਰਾਮ-ਮਿਲੀਮੀਟਰ ਵਰਗੀਆਂ ਇਕਾਈਆਂ ਵਿੱਚ ਅਸੰਤੁਲਨ ਦੀ ਗਣਨਾ ਕਰਨ ਲਈ ਸਾਫਟਵੇਅਰ ਦੀ ਮਦਦ ਵਰਤਣ ਦੀ ਯੋਜਨਾ ਬਣਾ ਰਹੇ ਹੋ)। ਇਹ ਕਦਮ ਇੱਕ ਰਿਪੋਰਟ ਬਣਾਉਣ ਅਤੇ ਇਕਾਈ ਪਰਿਵਰਤਨ ਕਰਨ ਵਿੱਚ ਮਦਦ ਕਰਦਾ ਹੈ ਪਰ ਬੈਲੈਂਸਿੰਗ ਲਈ ਸਖ਼ਤੀ ਨਾਲ ਜ਼ਰੂਰੀ ਨਹੀਂ ਹੈ – ਜੇਕਰ ਲੋੜ ਨਾ ਹੋਵੇ ਤਾਂ ਤੁਸੀਂ ਇਸਨੂੰ ਛੱਡ ਸਕਦੇ ਹੋ।
- ਪਲੇਨ 1 'ਤੇ ਟ੍ਰਾਇਲ ਵਜ਼ਨ ਨਾਲ ਟੈਸਟ ਰਨ ਕਰੋ: ਮਸ਼ੀਨ ਨੂੰ ਰੋਕੋ ਅਤੇ ਇੱਕ ਛੋਟਾ ਟ੍ਰਾਇਲ ਵੇਟ (ਪਰਖ ਭਾਰ) ਨੂੰ ਰੋਟਰ 'ਤੇ ਪਹਿਲੇ ਸੁਧਾਰ ਪਲੇਨ (ਉਹ ਪਲੇਨ ਜਿੱਥੇ ਸੈਂਸਰ 1 ਨਿਗਰਾਨੀ ਕਰ ਰਿਹਾ ਹੈ) 'ਤੇ ਲਗਾਓ। ਉਸ ਸਥਿਤੀ ਨੂੰ ਚਿੰਨ੍ਹਿਤ ਕਰੋ ਜਿੱਥੇ ਤੁਸੀਂ ਇਹ ਵਜ਼ਨ ਜੋੜਦੇ ਹੋ (ਬਹੁਤ ਸਾਰੇ ਬੈਲੈਂਸਰ ਇੱਕ ਐਂਗਲ ਰੈਫਰੈਂਸ ਵਰਤਦੇ ਹਨ, ਅਕਸਰ ਉਸ ਨਿਸ਼ਾਨ 'ਤੇ ਜ਼ੀਰੋ ਡਿਗਰੀ)। ਟ੍ਰਾਇਲ ਵਜ਼ਨ ਮੱਧਮ ਹੋਣਾ ਚਾਹੀਦਾ ਹੈ – ਵਾਈਬ੍ਰੇਸ਼ਨ ਨੂੰ ਦਿਸਣਯੋਗ ਢੰਗ ਨਾਲ ਬਦਲਣ ਲਈ ਕਾਫ਼ੀ, ਪਰ ਇੰਨਾ ਭਾਰੀ ਨਹੀਂ ਕਿ ਇਹ ਗਤੀ 'ਤੇ ਮਸ਼ੀਨ ਨੂੰ ਨੁਕਸਾਨ ਪਹੁੰਚਾ ਸਕੇ। ਸੈਂਟਰਿਫਿਊਜ ਨੂੰ ਦੁਬਾਰਾ ਚਲਾਓ ਅਤੇ ਇਸਨੂੰ ਗਤੀ ਤੱਕ ਪਹੁੰਚਣ ਦਿਓ। ਵਾਈਬ੍ਰੇਸ਼ਨ ਐਂਪਲੀਟਿਊਡ ਅਤੇ ਫੇਜ਼ ਦੁਬਾਰਾ ਮਾਪੋ। ਆਦਰਸ਼ ਤੌਰ 'ਤੇ, ਇਹ ਵਜ਼ਨ ਜੋੜਨ ਨਾਲ ਵਾਈਬ੍ਰੇਸ਼ਨ ਘੱਟੋ-ਘੱਟ 20% (ਜਾਂ ਤਾਂ ਮਾਤਰਾ ਵਿੱਚ ਜਾਂ ਫੇਜ਼ ਸ਼ਿਫਟ ਵਿੱਚ) ਬਦਲਣੀ ਚਾਹੀਦੀ ਹੈ। ਇੱਕ ਧਿਆਨਯੋਗ ਬਦਲਾਅ ਪੁਸ਼ਟੀ ਕਰਦਾ ਹੈ ਕਿ ਵਜ਼ਨ ਵਾਈਬ੍ਰੇਸ਼ਨ ਨੂੰ ਪ੍ਰਭਾਵਿਤ ਕਰ ਰਿਹਾ ਹੈ, ਜੋ ਗਣਨਾਵਾਂ ਲਈ ਜ਼ਰੂਰੀ ਹੈ।
- ਟ੍ਰਾਇਲ ਵਜ਼ਨ ਨੂੰ ਪਲੇਨ 2 'ਤੇ ਲਿਜਾਓ ਅਤੇ ਦੁਬਾਰਾ ਟੈਸਟ ਕਰੋ: ਪਾਵਰ ਬੰਦ ਕਰੋ ਅਤੇ ਸੁਰੱਖਿਅਤ ਢੰਗ ਨਾਲ ਉਸੇ ਟ੍ਰਾਇਲ ਵਜ਼ਨ (ਜਾਂ ਬਰਾਬਰ ਮਾਸ ਦੇ ਵਜ਼ਨ) ਨੂੰ ਦੂਜੇ ਸੁਧਾਰ ਪਲੇਨ (ਜਿੱਥੇ ਸੈਂਸਰ 2 ਸਥਿਤ ਹੈ) 'ਤੇ ਲਿਜਾਓ। ਯਕੀਨੀ ਬਣਾਓ ਕਿ ਇਸਨੂੰ ਉਸ ਪਲੇਨ 'ਤੇ ਰੈਫਰੈਂਸ ਐਂਗਲ ਸਥਿਤੀ 'ਤੇ ਰੱਖਿਆ ਗਿਆ ਹੈ (ਉਦਾਹਰਨ ਲਈ, ਜੇਕਰ ਸੰਭਵ ਹੋਵੇ ਤਾਂ ਇਸਨੂੰ ਉਸੇ ਜ਼ੀਰੋ-ਡਿਗਰੀ ਨਿਸ਼ਾਨ ਨਾਲ ਇਕਸਾਰ ਕਰੋ)। ਸੈਂਟਰਿਫਿਊਜ ਨੂੰ ਇੱਕ ਵਾਰ ਫਿਰ ਗਤੀ ਤੱਕ ਚਲਾਓ ਅਤੇ ਇਸ ਸੰਰਚਨਾ ਲਈ ਵਾਈਬ੍ਰੇਸ਼ਨ ਡੇਟਾ ਦਰਜ ਕਰੋ। ਹੁਣ ਤੁਹਾਡੇ ਕੋਲ ਡੇਟਾ ਦੇ ਦੋ ਸੈੱਟ ਹਨ: ਇੱਕ ਪਲੇਨ 1 'ਤੇ ਟ੍ਰਾਇਲ ਵਜ਼ਨ ਤੋਂ ਅਤੇ ਇੱਕ ਪਲੇਨ 2 ਤੋਂ।
- ਲੋੜੀਂਦਾ ਸੁਧਾਰ ਗਣਨਾ ਕਰੋ: ਬੇਸਲਾਈਨ ਡੇਟਾ ਅਤੇ ਦੋ ਟ੍ਰਾਇਲ-ਰਨ ਮਾਪਾਂ ਨਾਲ, ਬੈਲੇਂਸਿੰਗ ਇੰਸਟਰੂਮੈਂਟ ਜਾਂ ਸਾਫਟਵੇਅਰ ਹੁਣ ਅਸੰਤੁਲਨ ਦੀ ਮਾਤਰਾ ਦੀ ਗਣਨਾ ਕਰ ਸਕਦਾ ਹੈ ਅਤੇ ਸੁਧਾਰ ਵਜ਼ਨ ਦਾ ਸੁਝਾਅ ਦੇ ਸਕਦਾ ਹੈ। ਅਸਲ ਵਿੱਚ, ਸਿਸਟਮ ਇਹ ਹੱਲ ਕਰ ਰਿਹਾ ਹੈ ਕਿ ਹਰੇਕ ਪਲੇਨ 'ਤੇ ਕਿੰਨਾ ਵਜ਼ਨ ਅਤੇ ਕਿਸ ਕੋਣ 'ਤੇ ਮਾਪੇ ਗਏ ਅਸੰਤੁਲਨ ਦਾ ਮੁਕਾਬਲਾ ਕਰੇਗਾ। ਇਹ ਸਿਫਾਰਸ਼ਾਂ ਆਊਟਪੁੱਟ ਕਰੇਗਾ, ਉਦਾਹਰਨ ਲਈ: "ਪਲੇਨ 1 'ਤੇ Y° 'ਤੇ X ਗ੍ਰਾਮ ਜੋੜੋ, ਅਤੇ ਪਲੇਨ 2 'ਤੇ W° 'ਤੇ Z ਗ੍ਰਾਮ।" ਜੇਕਰ ਤੁਸੀਂ ਪਹਿਲਾਂ ਟ੍ਰਾਇਲ ਵਜ਼ਨ ਮਾਸ ਅਤੇ ਰੇਡੀਅਸ ਦਾਖਲ ਕਰਨ ਦਾ ਕਦਮ ਕੀਤਾ ਹੈ, ਤਾਂ ਪ੍ਰੋਗਰਾਮ ਸਿੱਧਾ ਸੁਧਾਰ ਮਾਸ ਦੇਣ ਲਈ ਇਸਦੀ ਵਰਤੋਂ ਕਰੇਗਾ। ਨਹੀਂ ਤਾਂ, ਇਹ ਅਸੰਤੁਲਨ (ਗ੍ਰਾਮ-ਮਿਲੀਮੀਟਰ) ਦੇ ਰੂਪ ਵਿੱਚ ਨਤੀਜਾ ਦੇ ਸਕਦਾ ਹੈ ਜਿਸਨੂੰ ਤੁਹਾਨੂੰ ਵਜ਼ਨ ਪਲੇਸਮੈਂਟ ਵਿੱਚ ਬਦਲਣ ਦੀ ਲੋੜ ਹੈ।
- ਸੁਧਾਰ ਵਜ਼ਨ ਲਗਾਓ: ਇੱਕ ਵਾਰ ਜਦੋਂ ਤੁਹਾਡੇ ਕੋਲ ਸਿਫਾਰਸ਼ ਕੀਤੇ ਸੁਧਾਰ ਹੋਣ, ਸੈਂਟਰਿਫਿਊਜ ਨੂੰ ਬੰਦ ਕਰੋ ਅਤੇ ਲਾਕ ਆਊਟ ਕਰੋ (ਤੁਹਾਨੂੰ ਮਸ਼ੀਨ ਚੱਲਦੇ ਸਮੇਂ ਕਦੇ ਵੀ ਵਜ਼ਨ ਨਹੀਂ ਜੋੜਨਾ ਚਾਹੀਦਾ)। ਬੈਲੈਂਸਰ ਦੁਆਰਾ ਦਿੱਤੇ ਗਏ ਕੋਣਾਂ 'ਤੇ ਹਰੇਕ ਰੋਟਰ ਪਲੇਨ 'ਤੇ ਨਿਰਧਾਰਤ ਸੁਧਾਰ ਵਜ਼ਨ ਲਗਾਓ। ਇੱਕ ਸੁਰੱਖਿਅਤ ਵਿਧੀ ਦੀ ਵਰਤੋਂ ਕਰੋ – ਆਮ ਤੌਰ 'ਤੇ, ਵਜ਼ਨ ਵੈਲਡ ਕੀਤਾ ਜਾਂ ਬੋਲਟ ਕੀਤਾ ਰੋਟਰ 'ਤੇ। (ਸਾਡੇ ਫੈਕਟਰੀ ਦੇ ਮਾਮਲੇ ਵਿੱਚ, ਅਸੀਂ ਵਜ਼ਨ ਵੈਲਡ ਕੀਤੇ ਤਾਂ ਜੋ ਇਹ ਯਕੀਨੀ ਬਣਾਇਆ ਜਾ ਸਕੇ ਕਿ ਉਹ ਉੱਚ ਸਪੀਡ 'ਤੇ ਥਾਂ 'ਤੇ ਰਹਿਣ।) ਯਾਦ ਰੱਖੋ ਕਿ ਕੋਣ ਆਮ ਤੌਰ 'ਤੇ ਸੰਦਰਭ ਬਿੰਦੂ ਤੋਂ (ਜਿੱਥੇ ਤੁਸੀਂ ਸ਼ੁਰੂ ਵਿੱਚ ਟ੍ਰਾਇਲ ਵਜ਼ਨ ਰੱਖਿਆ) ਰੋਟੇਸ਼ਨ ਦੀ ਦਿਸ਼ਾ ਵਿੱਚ ਮਾਪਿਆ ਜਾਂਦਾ ਹੈ (ਇੰਸਟਰੂਮੈਂਟ ਨੂੰ ਸਪੱਸ਼ਟ ਕਰਨਾ ਚਾਹੀਦਾ ਹੈ ਕਿ ਇਹ 0° ਅਤੇ ਕੋਣ ਦੀ ਦਿਸ਼ਾ ਕਿਵੇਂ ਪਰਿਭਾਸ਼ਿਤ ਕਰਦਾ ਹੈ)।
- ਨਤੀਜਿਆਂ ਦੀ ਪੁਸ਼ਟੀ ਕਰੋ (ਅੰਤਿਮ ਰਨ): ਰੋਟਰ 'ਤੇ ਬਾਕੀ ਬਚੇ ਕਿਸੇ ਵੀ ਟ੍ਰਾਇਲ ਵਜ਼ਨ ਨੂੰ ਹਟਾਓ, ਦੋ-ਵਾਰ ਜਾਂਚ ਕਰੋ ਕਿ ਸਾਰੇ ਟੂਲ ਜਾਂ ਢਿੱਲੀਆਂ ਚੀਜ਼ਾਂ ਹਟਾ ਦਿੱਤੀਆਂ ਗਈਆਂ ਹਨ, ਅਤੇ ਸੈਂਟਰਿਫਿਊਜ ਨੂੰ ਬੈਲੇਂਸਿੰਗ ਸਪੀਡ 'ਤੇ ਇੱਕ ਹੋਰ ਵਾਰ ਚਲਾਓ। ਹੁਣ ਕੰਪਨ ਰੀਡਿੰਗਾਂ ਦੀ ਜਾਂਚ ਕਰੋ। ਇਹ ਸ਼ੁਰੂਆਤੀ ਬੇਸਲਾਈਨ ਨਾਲੋਂ ਬਹੁਤ ਘੱਟ ਹੋਣੀਆਂ ਚਾਹੀਦੀਆਂ ਹਨ। ਸਾਡੀ ਉਦਾਹਰਨ ਵਿੱਚ, ਗਣਨਾ ਕੀਤੇ ਸੁਧਾਰ ਵਜ਼ਨ ਜੋੜਨ ਤੋਂ ਬਾਅਦ, ਕੰਪਨ ਪਲੇਨ 1 'ਤੇ ਲਗਭਗ 0.399 mm/s ਅਤੇ ਪਲੇਨ 2 'ਤੇ 0.715 mm/s ਤੱਕ ਘੱਟ ਗਿਆ – ਸ਼ੁਰੂ ਤੋਂ ਦਸ ਗੁਣਾ ਤੋਂ ਵੱਧ ਕਮੀ। ਇਸ ਨੇ ਪੁਸ਼ਟੀ ਕੀਤੀ ਕਿ ਬੈਲੇਂਸਿੰਗ ਸਫਲ ਰਹੀ। ਜੇਕਰ ਤੁਹਾਡੇ ਕੰਪਨ ਪੱਧਰ ਹੁਣ ਸਵੀਕਾਰਯੋਗ ਸੀਮਾਵਾਂ ਦੇ ਅੰਦਰ ਹਨ (ਅਕਸਰ ਮਸ਼ੀਨ ਸਟੈਂਡਰਡ ਜਾਂ ਤੁਹਾਡੀ ਕੰਪਨੀ ਦੇ ਮਾਪਦੰਡਾਂ ਦੁਆਰਾ ਸੈੱਟ ਕੀਤੀਆਂ ਗਈਆਂ), ਤਾਂ ਤੁਸੀਂ ਪੂਰਾ ਕਰ ਲਿਆ! ਜੇ ਨਹੀਂ, ਤਾਂ ਪ੍ਰਕਿਰਿਆ ਨੂੰ ਦੁਹਰਾਉਣ ਜਾਂ ਵਧੀਆ-ਟਿਊਨ ਕਰਨ ਦੀ ਲੋੜ ਹੋ ਸਕਦੀ ਹੈ, ਪਰ ਆਮ ਤੌਰ 'ਤੇ ਸਹੀ ਢੰਗ ਨਾਲ ਕੀਤੇ ਜਾਣ 'ਤੇ ਇੱਕ ਦੁਹਰਾਓ ਕਾਫ਼ੀ ਹੁੰਦਾ ਹੈ।
ਇਸ ਬਿੰਦੂ 'ਤੇ, ਸੈਂਟਰਿਫਿਊਜ ਰੋਟਰ ਚੰਗੀ ਤਰ੍ਹਾਂ ਬੈਲੇਂਸ ਹੋਣਾ ਚਾਹੀਦਾ ਹੈ। ਤੁਸੀਂ ਤੁਰੰਤ ਫਰਕ ਦੇਖੋਗੇ: ਸੁਚਾਰੂ ਓਪਰੇਸ਼ਨ, ਘੱਟ ਸ਼ੋਰ, ਅਤੇ ਕੋਈ ਬਹੁਤ ਜ਼ਿਆਦਾ ਹਿਲਜੁਲ ਨਹੀਂ। ਹਮੇਸ਼ਾ ਅੰਤਿਮ ਕੰਪਨ ਪੱਧਰਾਂ ਅਤੇ ਜੋੜੇ ਗਏ ਕਿਸੇ ਵੀ ਵਜ਼ਨ ਦਾ ਦਸਤਾਵੇਜ਼ ਬਣਾਓ, ਕਿਉਂਕਿ ਇਹ ਜਾਣਕਾਰੀ ਮੇਨਟੇਨੈਂਸ ਰਿਕਾਰਡਾਂ ਅਤੇ ਭਵਿੱਖ ਦੀ ਨਿਗਰਾਨੀ ਲਈ ਲਾਭਦਾਇਕ ਹੈ।
ਉਦਯੋਗਿਕ ਸੈਂਟਰੀਫਿਊਜਾਂ ਨੂੰ ਬੈਲੈਂਸ ਕਰਨ ਦੀਆਂ 6 ਆਮ ਗਲਤੀਆਂ (ਅਤੇ ਉਹਨਾਂ ਤੋਂ ਕਿਵੇਂ ਬਚੀਏ)
ਬੈਲੇਂਸਿੰਗ ਪ੍ਰਕਿਰਿਆ ਦੀ ਠੋਸ ਸਮਝ ਹੋਣ 'ਤੇ ਵੀ, ਤਕਨੀਸ਼ੀਅਨ ਅਤੇ ਇੰਜੀਨੀਅਰ ਗਲਤੀਆਂ ਵਿੱਚ ਫਸ ਸਕਦੇ ਹਨ। ਉਦਯੋਗਿਕ ਸੈਂਟਰਿਫਿਊਜਾਂ ਨੂੰ ਬੈਲੇਂਸ ਕਰਨਾ ਵਿਲੱਖਣ ਚੁਣੌਤੀਆਂ ਪੇਸ਼ ਕਰਦਾ ਹੈ – ਇਹ ਮਸ਼ੀਨਾਂ ਅਕਸਰ ਬਹੁਤ ਉੱਚੀਆਂ ਸਪੀਡਾਂ 'ਤੇ ਚੱਲਦੀਆਂ ਹਨ ਅਤੇ ਭਾਰੀ ਪ੍ਰਕਿਰਿਆ ਸਮੱਗਰੀਆਂ ਨਾਲ ਨਜਿੱਠਦੀਆਂ ਹਨ, ਜਿਸਦਾ ਮਤਲਬ ਹੈ ਕਿ ਗਲਤੀਆਂ ਮਹਿੰਗੀਆਂ ਜਾਂ ਖਤਰਨਾਕ ਹੋ ਸਕਦੀਆਂ ਹਨ। ਇੱਥੇ ਛੇ ਆਮ ਗਲਤੀਆਂ ਹਨ ਜੋ ਲੋਕ ਸੈਂਟਰਿਫਿਊਜ ਰੋਟਰਾਂ ਨੂੰ ਬੈਲੇਂਸ ਕਰਦੇ ਸਮੇਂ ਕਰਦੇ ਹਨ, ਅਤੇ ਤੁਸੀਂ ਹਰੇਕ ਤੋਂ ਕਿਵੇਂ ਬਚ ਸਕਦੇ ਹੋ:
-
ਗੰਦੇ ਜਾਂ ਖਰਾਬ ਸੈਂਟਰੀਫਿਊਜ ਨੂੰ ਬੈਲੈਂਸ ਕਰਨ ਦੀ ਕੋਸ਼ਿਸ਼ ਕਰਨਾ। ਸੈਂਟਰਿਫਿਊਜਾਂ ਨਾਲ ਇਹ ਨੰਬਰ ਇੱਕ ਗਲਤੀ ਹੈ। ਇੱਕ ਸਧਾਰਨ ਪੱਖੇ ਜਾਂ ਮੋਟਰ ਰੋਟਰ ਦੇ ਉਲਟ, ਇੱਕ ਉਦਯੋਗਿਕ ਸੈਂਟਰਿਫਿਊਜ ਦਾ ਕੰਪਨ ਆਮ ਤੌਰ 'ਤੇ ਹਾਵੀ ਹੁੰਦਾ ਹੈ ਪ੍ਰਕਿਰਿਆ ਨਾਲ ਸਬੰਧਤ ਅਸੰਤੁਲਨ – ਭਾਵ ਮਸ਼ੀਨ ਦੇ ਅੰਦਰ ਪ੍ਰੋਡਕਟ (ਜਿਵੇਂ ਸਲਰੀ, ਸੌਲਿਡਸ, ਆਦਿ) ਦੀ ਅਸਮਾਨ ਵੰਡ। ਜੇਕਰ ਰੋਟਰ ਗੰਦਾ ਹੈ ਜਾਂ ਸਮੱਗਰੀ ਨਾਲ ਜੰਮਿਆ ਹੋਇਆ ਹੈ, ਤਾਂ ਉਹ ਜਮਾਵ ਸ਼ਾਇਦ ਜ਼ਿਆਦਾਤਰ ਕੰਪਨ ਪੈਦਾ ਕਰ ਰਿਹਾ ਹੈ। ਅਜਿਹੇ ਮਾਮਲੇ ਵਿੱਚ, ਵਜ਼ਨ ਜੋੜ ਕੇ ਰੋਟਰ ਨੂੰ "ਬੈਲੇਂਸ" ਕਰਨ ਦੀ ਕੋਸ਼ਿਸ਼ ਕਰਨਾ ਸਿਰਫ਼ ਲੱਛਣ ਨਾਲ ਲੜਨਾ ਹੈ, ਕਾਰਨ ਨਾਲ ਨਹੀਂ। ਇਸ ਤੋਂ ਇਲਾਵਾ, ਜੇਕਰ ਮਸ਼ੀਨ ਵਿੱਚ ਗੰਭੀਰ ਮਕੈਨਿਕਲ ਨੁਕਸ ਹੈ (ਖਰਾਬ ਬੇਅਰਿੰਗ, ਆਦਿ), ਤਾਂ ਬੈਲੇਂਸਿੰਗ ਮਦਦ ਨਹੀਂ ਕਰੇਗੀ।
ਸਲਾਹ: ਹਮੇਸ਼ਾ ਚੰਗੀ ਤਰ੍ਹਾਂ ਸੈਂਟਰੀਫਿਊਜ ਸਾਫ਼ ਕਰੋ ਕਿਸੇ ਵੀ ਬੈਲੇਂਸਿੰਗ ਦੀ ਕੋਸ਼ਿਸ਼ ਕਰਨ ਤੋਂ ਪਹਿਲਾਂ। ਰੋਟਰ ਬਾਊਲ ਜਾਂ ਬਾਸਕੇਟ ਤੋਂ ਸਾਰੇ ਪ੍ਰੋਡਕਟ ਬਚਿਆ, ਜਮਾਵ, ਅਤੇ ਗੰਦਗੀ ਹਟਾਓ। ਇੱਕ ਵਾਰ ਸਾਫ਼ ਹੋ ਜਾਣ 'ਤੇ (ਅਤੇ ਕੋਈ ਵੀ ਮਕੈਨਿਕਲ ਮੁਰੰਮਤ ਹੋ ਜਾਣ 'ਤੇ), ਨਵੀਆਂ ਕੰਪਨ ਰੀਡਿੰਗਾਂ ਲਓ – ਤੁਹਾਨੂੰ ਪਤਾ ਲੱਗ ਸਕਦਾ ਹੈ ਕਿ ਕੰਪਨ ਪਹਿਲਾਂ ਹੀ ਬਹੁਤ ਘੱਟ ਹੈ। ਸਿਰਫ਼ ਤਾਂ, ਜੇ ਅਜੇ ਵੀ ਮਹੱਤਵਪੂਰਨ ਕੰਪਨ ਹੈ, ਖਾਲੀ ਰੋਟਰ ਨੂੰ ਬੈਲੇਂਸ ਕਰਨ ਲਈ ਅੱਗੇ ਵਧੋ। ਨਾਲ ਹੀ, ਬੇਅਰਿੰਗਾਂ ਦੀ ਸਿਹਤ ਅਤੇ ਫਾਊਂਡੇਸ਼ਨ ਦੀ ਮਜ਼ਬੂਤੀ ਦੀ ਦੋ-ਵਾਰ ਜਾਂਚ ਕਰੋ। ਉੱਚ ਕੰਪਨ ਉਹਨਾਂ ਖੇਤਰਾਂ ਵਿੱਚ ਕਿਸੇ ਵੀ ਪਹਿਲਾਂ ਤੋਂ ਮੌਜੂਦ ਮੁੱਦਿਆਂ ਨੂੰ ਜਲਦੀ ਪ੍ਰਗਟ ਅਤੇ ਵਿਗੜ ਸਕਦਾ ਹੈ, ਇਸ ਲਈ ਬੈਲੇਂਸਿੰਗ ਤੋਂ ਪਹਿਲਾਂ ਮਸ਼ੀਨ ਨੂੰ ਚੰਗੀ ਹਾਲਤ ਵਿੱਚ ਰੱਖਣਾ ਸਭ ਤੋਂ ਵਧੀਆ ਹੈ।
-
ਇਹ ਮੰਨ ਲੈਣਾ ਕਿ ਬੈਲੈਂਸਿੰਗ ਸਾਰੀ ਵਾਈਬ੍ਰੇਸ਼ਨ ਨੂੰ ਸਥਾਈ ਤੌਰ 'ਤੇ ਖਤਮ ਕਰ ਦੇਵੇਗੀ। ਬਹੁਤ ਸਾਰੇ ਸ਼ੁਰੂਆਤੀ ਲੋਕ ਉਮੀਦ ਕਰਦੇ ਹਨ ਕਿ ਇੱਕ ਵਾਰ ਜਦੋਂ ਤੁਸੀਂ ਸੈਂਟਰਿਫਿਊਜ ਨੂੰ ਬੈਲੇਂਸ ਕਰ ਲੈਂਦੇ ਹੋ, ਤਾਂ ਇਹ ਹਮੇਸ਼ਾ ਲਈ ਕੰਪਨ-ਮੁਕਤ ਚੱਲੇਗਾ। ਅਸਲੀਅਤ ਇਹ ਹੈ ਕਿ ਇੱਥੇ ਹਨ ਅਸੰਤੁਲਨ ਦੀਆਂ ਦੋ ਕਿਸਮਾਂ ਇੱਕ ਸੈਂਟਰਿਫਿਊਜ ਵਿੱਚ: (1) ਰੋਟਰ ਦਾ ਖੁਦ ਦਾ ਅੰਦਰੂਨੀ ਮਕੈਨਿਕਲ (ਬਾਕੀ) ਅਸੰਤੁਲਨ, ਅਤੇ (2) ਪ੍ਰੋਡਕਟ ਦੁਆਰਾ ਹੋਣ ਵਾਲਾ ਲਗਾਤਾਰ ਪ੍ਰਕਿਰਿਆ ਅਸੰਤੁਲਨ। ਫੀਲਡ ਵਿੱਚ ਬੈਲੇਂਸਿੰਗ ਸਿਰਫ਼ ਖਾਲੀ ਰੋਟਰ ਦੇ ਮਕੈਨਿਕਲ ਅਸੰਤੁਲਨ ਨੂੰ ਠੀਕ ਕਰਦੀ ਹੈ। ਇਹ ਓਪਰੇਸ਼ਨ ਦੌਰਾਨ ਅਸਮਾਨ ਲੋਡਿੰਗ ਜਾਂ ਜਮਾਵ ਦੁਆਰਾ ਹੋਣ ਵਾਲੇ ਕੰਪਨ ਨੂੰ ਨਹੀਂ ਰੋਕਦੀ।
ਸਲਾਹ: ਵਿਚਲੇ ਫਰਕ ਨੂੰ ਸਮਝੋ ਮਕੈਨੀਕਲ ਬਨਾਮ ਪ੍ਰਕਿਰਿਆ ਅਸੰਤੁਲਨ. ਫੀਲਡ ਬੈਲੇਂਸਿੰਗ ਵਿੱਚ ਤੁਹਾਡਾ ਟੀਚਾ ਇਹ ਹੈ ਕਿ ਜਦੋਂ ਇਹ ਸਾਫ਼ ਅਤੇ ਖਾਲੀ ਹੋਵੇ ਤਾਂ ਰੋਟਰ ਨੂੰ ਜਿੰਨਾ ਸੰਭਵ ਹੋ ਸਕੇ ਮਕੈਨਿਕਲੀ ਤੌਰ 'ਤੇ ਬੈਲੇਂਸ ਬਣਾਓ। ਇਹ ਭਰੋਸੇਯੋਗਤਾ ਵਿੱਚ ਸੁਧਾਰ ਕਰੇਗਾ ਅਤੇ ਬੇਸਲਾਈਨ ਕੰਪਨ ਨੂੰ ਘਟਾਏਗਾ। ਹਾਲਾਂਕਿ, ਜਦੋਂ ਸੈਂਟਰਿਫਿਊਜ ਵਰਤੋਂ ਵਿੱਚ ਹੁੰਦਾ ਹੈ, ਸਮੱਗਰੀ ਲਾਜ਼ਮੀ ਤੌਰ 'ਤੇ ਥੋੜ੍ਹੀ ਅਸਮਾਨ ਹੋ ਜਾਵੇਗੀ (ਉਦਾਹਰਨ ਲਈ, ਬਾਊਲ ਨਾਲ ਚਿਪਕਿਆ ਹੋਇਆ ਕੇਕ), ਜੋ ਦੁਬਾਰਾ ਕੁਝ ਕੰਪਨ ਪੈਦਾ ਕਰਦਾ ਹੈ। ਨਿਯਮਤ ਸਫਾਈ ਸਮਾਂ-ਸਾਰਣੀਆਂ ਅਤੇ ਓਪਰੇਟਿੰਗ ਪ੍ਰਕਿਰਿਆਵਾਂ ਅਜੇ ਵੀ ਲੋੜੀਂਦੀਆਂ ਹਨ। ਸੰਖੇਪ ਵਿੱਚ, ਰੋਟਰ ਨੂੰ ਬੈਲੇਂਸ ਕਰਨ ਨਾਲ ਪ੍ਰਦਰਸ਼ਨ ਵਿੱਚ ਸੁਧਾਰ ਹੁੰਦਾ ਹੈ ਅਤੇ ਮਸ਼ੀਨ ਦੀ ਜ਼ਿੰਦਗੀ ਵਧਦੀ ਹੈ (ਕਿਉਂਕਿ ਇਹ ਪ੍ਰਕਿਰਿਆ-ਪ੍ਰੇਰਿਤ ਸ਼ਕਤੀਆਂ ਨੂੰ ਬਿਹਤਰ ਢੰਗ ਨਾਲ ਸੰਭਾਲ ਸਕਦਾ ਹੈ), ਪਰ ਇਹ ਸਦਾ ਲਈ ਸਾਰੇ ਕੰਪਨ ਦਾ ਇੱਕ-ਵਾਰ ਇਲਾਜ ਨਹੀਂ ਹੈ।
-
ਗਲਤ ਟ੍ਰਾਇਲ ਵਜ਼ਨ ਵਰਤਣਾ (ਬਹੁਤ ਭਾਰਾ ਜਾਂ ਬਹੁਤ ਹਲਕਾ)। ਸਹੀ ਟ੍ਰਾਇਲ ਵਜ਼ਨ ਚੁਣਨਾ ਬਹੁਤ ਜ਼ਰੂਰੀ ਹੈ। ਜੇਕਰ ਟੈਸਟ ਵਜ਼ਨ ਬਹੁਤ ਛੋਟਾ ਹੈ, ਤਾਂ ਇਹ ਕੰਪਨ ਵਿੱਚ ਮਾਪਣਯੋਗ ਬਦਲਾਅ ਪੈਦਾ ਨਹੀਂ ਕਰ ਸਕਦਾ, ਅਤੇ ਤੁਹਾਨੂੰ ਲਾਭਦਾਇਕ ਡੇਟਾ ਪ੍ਰਾਪਤ ਕਰਨ ਵਿੱਚ ਮੁਸ਼ਕਲ ਆਵੇਗੀ। ਜੇਕਰ ਇਹ ਬਹੁਤ ਵੱਡਾ ਹੈ, ਖਾਸ ਕਰਕੇ ਇੱਕ ਉੱਚ-ਸਪੀਡ ਸੈਂਟਰਿਫਿਊਜ 'ਤੇ, ਇਹ ਮਸ਼ੀਨ ਨੂੰ ਓਵਰਸਟ੍ਰੈਸ ਕਰ ਸਕਦਾ ਹੈ ਜਾਂ ਨੁਕਸਾਨ ਵੀ ਪਹੁੰਚਾ ਸਕਦਾ ਹੈ (ਕਲਪਨਾ ਕਰੋ ਕਿ ਹਜ਼ਾਰਾਂ RPM 'ਤੇ ਘੁੰਮ ਰਹੇ ਰੋਟਰ 'ਤੇ ਇੱਕ ਵੱਡਾ ਵਜ਼ਨ ਥੱਪੜ ਮਾਰਨਾ – ਸੈਂਟਰਿਫਿਊਗਲ ਫੋਰਸ ਬਹੁਤ ਵੱਡੀ ਹੁੰਦੀ ਹੈ)। ਇਹ ਇੱਕ ਵਜ਼ਨ ਪ੍ਰਾਪਤ ਕਰਨ ਲਈ ਇੱਕ ਨਾਜ਼ੁਕ ਸੰਤੁਲਨ ਹੈ ਜੋ ਪ੍ਰਭਾਵਸ਼ਾਲੀ ਪਰ ਸੁਰੱਖਿਅਤ ਹੋਵੇ।
ਸਲਾਹ: ਸਾਵਧਾਨੀ ਵਰਤੋ ਅਤੇ ਇਸ ਨਾਲ ਸ਼ੁਰੂ ਕਰੋ ਛੋਟਾ ਟ੍ਰਾਇਲ ਵਜ਼ਨ. ਤੁਸੀਂ ਹਮੇਸ਼ਾ ਕਈ ਟ੍ਰਾਇਲ ਰਨ ਕਰ ਸਕਦੇ ਹੋ, ਹੌਲੀ-ਹੌਲੀ ਵਜ਼ਨ ਵਧਾਉਂਦੇ ਹੋਏ ਜਦੋਂ ਤੱਕ ਤੁਸੀਂ ਕੰਪਨ ਵਿੱਚ ਸਪੱਸ਼ਟ 20–30% ਬਦਲਾਅ ਨਹੀਂ ਦੇਖਦੇ। ਇਹ ਵਾਧਾਯੋਗ ਪਹੁੰਚ ਸ਼ੁਰੂ ਤੋਂ ਹੀ ਵੱਡੇ ਵਜ਼ਨ ਦਾ ਖਤਰਾ ਲੈਣ ਨਾਲੋਂ ਬਹੁਤ ਸੁਰੱਖਿਅਤ ਹੈ। ਆਪਣੀ ਚੋਣ ਨੂੰ ਗਾਈਡ ਕਰਨ ਲਈ ਉਪਲਬਧ ਸਰੋਤਾਂ ਦੀ ਵਰਤੋਂ ਕਰੋ: ਉਦਾਹਰਨ ਲਈ, ਤੁਸੀਂ ਇੱਕ ਔਨਲਾਈਨ ਟ੍ਰਾਇਲ ਵੇਟ ਕੈਲਕੁਲੇਟਰ ਰੋਟਰ ਮਾਸ ਅਤੇ ਸਪੀਡ ਦੇ ਅਧਾਰ 'ਤੇ ਢੁਕਵੇਂ ਵਜ਼ਨ ਦਾ ਮੋਟਾ ਅਨੁਮਾਨ ਪ੍ਰਾਪਤ ਕਰਨ ਲਈ। ਯਾਦ ਰੱਖੋ ਕਿ ਸੈਂਟਰਿਫਿਊਗਲ ਫੋਰਸਾਂ ਕਿੰਨੀਆਂ ਉੱਚੀਆਂ ਹਨ – ਇੱਕ ਵੱਡਾ ਵਜ਼ਨ ਸੁੱਟ ਕੇ ਤਬਾਹੀ ਦਾ ਕਾਰਨ ਬਣਨ ਨਾਲੋਂ ਕੁਝ ਵਾਧੂ ਰਨ ਕਰਨਾ ਬਿਹਤਰ ਹੈ।
-
ਬਦਲਦੀਆਂ ਜਾਂ ਗਲਤ ਸਥਿਤੀਆਂ ਹੇਠ ਬੈਲੈਂਸਿੰਗ ਕਰਨਾ। ਇੱਕ ਆਮ ਗਲਤੀ ਹੈ ਅਸਥਿਰ ਸਥਿਤੀਆਂ ਵਿੱਚ ਸੈਂਟਰਿਫਿਊਜ ਨੂੰ ਬੈਲੇਂਸ ਕਰਨ ਦੀ ਕੋਸ਼ਿਸ਼ ਕਰਨਾ – ਉਦਾਹਰਨ ਲਈ, ਜਦੋਂ ਇਹ ਸਮੱਗਰੀ ਪ੍ਰੋਸੈਸ ਕਰ ਰਿਹਾ ਹੋਵੇ, ਜਾਂ ਬਦਲਦੀਆਂ ਸਪੀਡਾਂ 'ਤੇ। ਜੇਕਰ ਪ੍ਰੋਡਕਟ ਹਿੱਲ ਰਿਹਾ ਹੈ ਜਾਂ ਅੰਦਰ-ਬਾਹਰ ਖੁਆਇਆ ਜਾ ਰਿਹਾ ਹੈ, ਕੰਪਨ ਲਗਾਤਾਰ ਬਦਲਦਾ ਰਹੇਗਾ ਅਤੇ ਤੁਹਾਡੇ ਬੈਲੇਂਸਿੰਗ ਡੇਟਾ ਨੂੰ ਅਵੈਧ ਬਣਾ ਦੇਵੇਗਾ। ਇੱਕ ਹੋਰ ਪੱਖ ਹੈ ਤਾਪਮਾਨ ਅਤੇ ਓਪਰੇਟਿੰਗ ਸਥਿਤੀਆਂ: ਜੇਕਰ ਮਸ਼ੀਨ ਦਾ ਵਿਵਹਾਰ ਗਰਮ ਬਨਾਮ ਠੰਡੇ ਹੋਣ 'ਤੇ ਬਦਲਦਾ ਹੈ, ਤਾਂ ਇਹ ਬੈਲੇਂਸਿੰਗ ਨੂੰ ਵੀ ਪ੍ਰਭਾਵਿਤ ਕਰ ਸਕਦਾ ਹੈ।
ਸਲਾਹ: ਹਮੇਸ਼ਾ ਬੈਲੈਂਸਿੰਗ ਇੱਕ ਨਿਯੰਤਰਿਤ, ਇਕਸਾਰ ਸਥਿਤੀ. ਸੈਂਟਰਿਫਿਊਜ ਖਾਲੀ ਹੋਣਾ ਚਾਹੀਦਾ ਹੈ (ਜਿਵੇਂ ਪਹਿਲਾਂ ਦੱਸਿਆ ਗਿਆ) ਅਤੇ ਸਾਰੇ ਮਾਪਾਂ ਲਈ ਸਥਿਰ ਸਪੀਡ 'ਤੇ ਚੱਲਣਾ ਚਾਹੀਦਾ ਹੈ – ਆਮ ਤੌਰ 'ਤੇ ਇਸਦਾ ਸਧਾਰਨ ਓਪਰੇਟਿੰਗ RPM ਜਾਂ ਇੱਕ ਨਿਰਧਾਰਤ ਬੈਲੇਂਸ ਸਪੀਡ ਜੋ ਕਿਸੇ ਵੀ ਕ੍ਰਿਟੀਕਲ ਰੈਜ਼ੋਨੈਂਸ ਤੋਂ ਬਚਦੀ ਹੈ। ਪ੍ਰੋਡਕਸ਼ਨ ਸਾਈਕਲਾਂ ਦੌਰਾਨ ਬੈਲੇਂਸਿੰਗ ਦੀ ਕੋਸ਼ਿਸ਼ ਨਾ ਕਰੋ; ਪ੍ਰਕਿਰਿਆ ਨੂੰ ਰੋਕੋ ਜਾਂ ਮਸ਼ੀਨ ਨੂੰ ਅਲੱਗ ਕਰੋ। ਜੇਕਰ ਸੈਂਟਰਿਫਿਊਜ ਦੀਆਂ ਵਿਸ਼ੇਸ਼ਤਾਵਾਂ ਤਾਪਮਾਨ ਨਾਲ ਬਦਲਦੀਆਂ ਹਨ (ਉਦਾਹਰਨ ਲਈ, ਠੰਡੇ ਹੋਣ 'ਤੇ ਕਲੀਅਰੈਂਸ ਸਖ਼ਤ ਹੋ ਸਕਦੀ ਹੈ), ਤਾਂ ਤੁਸੀਂ ਮਾਪ ਲੈਣ ਤੋਂ ਪਹਿਲਾਂ ਇਸਨੂੰ ਓਪਰੇਟਿੰਗ ਤਾਪਮਾਨ ਤੱਕ ਗਰਮ ਕਰਨਾ ਚਾਹ ਸਕਦੇ ਹੋ, ਤਾਂ ਜੋ ਤੁਸੀਂ ਇਸਨੂੰ ਅਸਲ ਓਪਰੇਟਿੰਗ ਸਥਿਤੀ ਵਿੱਚ ਬੈਲੇਂਸ ਕਰ ਰਹੇ ਹੋਵੋ। ਸਹੀ ਬੈਲੇਂਸਿੰਗ ਨਤੀਜਿਆਂ ਲਈ ਇਕਸਾਰਤਾ ਮਹੱਤਵਪੂਰਨ ਹੈ।
-
ਸੁਧਾਰ ਵਜ਼ਨਾਂ ਨੂੰ ਸਹੀ ਢੰਗ ਨਾਲ ਨਾ ਬੰਨ੍ਹਣਾ। ਪੂਰੀ ਬੈਲੇਂਸਿੰਗ ਪ੍ਰਕਿਰਿਆ ਵਿੱਚੋਂ ਲੰਘਣ ਦੀ ਕਲਪਨਾ ਕਰੋ, ਸਿਰਫ਼ ਇਹ ਦੇਖਣ ਲਈ ਕਿ ਜਦੋਂ ਸੈਂਟਰਿਫਿਊਜ ਵਾਪਸ ਓਪਰੇਸ਼ਨ ਵਿੱਚ ਹੁੰਦਾ ਹੈ ਤਾਂ ਇੱਕ ਸੁਧਾਰ ਵਜ਼ਨ ਉੱਡ ਜਾਂਦਾ ਹੈ। ਇੱਕ ਆਮ ਪੱਖੇ 'ਤੇ, ਸੁੱਟਿਆ ਗਿਆ ਵਜ਼ਨ ਸ਼ਾਇਦ ਕੇਸਿੰਗ ਦੇ ਅੰਦਰ ਡਿੱਗ ਜਾਵੇ; ਪਰ ਇੱਕ ਉਦਯੋਗਿਕ ਸੈਂਟਰਿਫਿਊਜ 'ਤੇ, ਇੱਕ ਢਿੱਲਾ ਵਜ਼ਨ ਇੱਕ ਉੱਚ-ਸਪੀਡ ਪ੍ਰੋਜੈਕਟਾਈਲ ਬਣ ਜਾਂਦਾ ਹੈ। ਇਹ ਮਸ਼ੀਨ ਦੀ ਕੇਸਿੰਗ ਨੂੰ ਗੰਭੀਰਤਾ ਨਾਲ ਨੁਕਸਾਨ ਪਹੁੰਚਾ ਸਕਦਾ ਹੈ ਜਾਂ, ਬੁਰੀ ਗੱਲ, ਨੇੜੇ ਕਿਸੇ ਨੂੰ ਸੱਟ ਮਾਰ ਸਕਦਾ ਹੈ। ਵਜ਼ਨ ਜੋੜਨ ਲਈ ਕਮਜ਼ੋਰ ਤਰੀਕਿਆਂ ਦੀ ਵਰਤੋਂ ਕਰਨਾ (ਜਿਵੇਂ ਟੇਪ, ਗੂੰਦ, ਜਾਂ ਨਾਕਾਫ਼ੀ ਕਲੈਂਪ) ਜਾਂ ਸਹੀ ਮਾਊਂਟਿੰਗ ਪ੍ਰਕਿਰਿਆ ਦੀ ਪਾਲਣਾ ਨਾ ਕਰਨਾ ਬਹੁਤ ਖਤਰਨਾਕ ਹੈ।
ਸਲਾਹ: ਸੁਰੱਖਿਆ ਪਹਿਲਾਂ! ਵਜ਼ਨ ਲਗਾਉਣ ਲਈ ਸਿਰਫ਼ ਮਨਜ਼ੂਰਸ਼ੁਦਾ ਤਰੀਕਿਆਂ ਦੀ ਵਰਤੋਂ ਕਰੋ, ਅਤੇ ਯਕੀਨੀ ਬਣਾਓ ਕਿ ਉਹ ਬਹੁਤ ਸੁਰੱਖਿਅਤ. ਸਭ ਤੋਂ ਵਧੀਆ ਅਭਿਆਸ ਇਹ ਹੈ ਕਿ ਵਜ਼ਨ ਨੂੰ ਰੋਟਰ 'ਤੇ ਨਿਰਧਾਰਤ ਬੈਲੇਂਸ ਸੁਧਾਰ ਸਥਾਨਾਂ 'ਤੇ ਵੈਲਡ ਜਾਂ ਬੋਲਟ ਕੀਤਾ ਜਾਵੇ (ਬਹੁਤ ਸਾਰੇ ਉਦਯੋਗਿਕ ਸੈਂਟਰਿਫਿਊਜਾਂ ਵਿੱਚ ਰੋਟਰ 'ਤੇ ਖਾਸ ਖੇਤਰ ਹੁੰਦੇ ਹਨ ਜਿੱਥੇ ਤੁਸੀਂ ਵਜ਼ਨ ਜੋੜ ਸਕਦੇ ਹੋ)। ਪੂਰੀ ਓਪਰੇਟਿੰਗ ਸਪੀਡ 'ਤੇ ਟੈਸਟ ਵਜ਼ਨ ਲਈ ਕਦੇ ਵੀ ਮੋਮ, ਮਿੱਟੀ, ਜਾਂ ਟੇਪ ਵਰਗੇ ਅਸਥਾਈ ਅਟੈਚਮੈਂਟ ਦੀ ਵਰਤੋਂ ਨਾ ਕਰੋ – ਜੇਕਰ ਤੁਹਾਨੂੰ ਘੱਟ-ਸਪੀਡ ਟ੍ਰਾਇਲ ਲਈ ਉਹਨਾਂ ਦੀ ਵਰਤੋਂ ਕਰਨ ਦੀ ਲੋੜ ਹੈ, ਤਾਂ ਇਹ ਵੱਖਰੀ ਗੱਲ ਹੈ, ਪਰ ਸਪਿਨ ਕਰਨ ਤੋਂ ਪਹਿਲਾਂ ਉਹਨਾਂ ਨੂੰ ਹਟਾ ਦਿਓ। ਹਮੇਸ਼ਾ ਦੋ-ਵਾਰ ਜਾਂਚ ਕਰੋ ਕਿ ਸਾਰੇ ਵਜ਼ਨ (ਅਤੇ ਫਾਸਟਨਰ) ਕੱਸੇ ਹੋਏ ਹਨ ਅਤੇ ਢਿੱਲੇ ਨਹੀਂ ਹੋਣਗੇ। ਟੈਸਟਾਂ ਦੌਰਾਨ ਮਸ਼ੀਨ ਨੂੰ ਸਪੀਡ 'ਤੇ ਚਲਾਉਂਦੇ ਸਮੇਂ "ਰੋਟੇਸ਼ਨ ਦੇ ਪਲੇਨ" (ਰੋਟਰ ਦੇ ਭੂਮੱਧ ਪਲੇਨ) ਤੋਂ ਦੂਰ ਖੜ੍ਹੇ ਰਹਿਣਾ ਵੀ ਸਮਝਦਾਰੀ ਹੈ, ਇੱਕ ਵਾਧੂ ਸਾਵਧਾਨੀ ਵਜੋਂ।
-
ਮੁੱਢਲੀ ਬੈਲੈਂਸਿੰਗ ਤੋਂ ਪਰੇ ਡਾਇਗਨੌਸਟਿਕ ਟੂਲਾਂ ਨੂੰ ਨਜ਼ਰਅੰਦਾਜ਼ ਕਰਨਾ। ਆਧੁਨਿਕ ਬੈਲੇਂਸਿੰਗ ਉਪਕਰਣ ਤੁਹਾਨੂੰ ਸਿਰਫ਼ ਇਹ ਦੱਸਣ ਤੋਂ ਵੱਧ ਕੁਝ ਕਰ ਸਕਦੇ ਹਨ ਕਿ ਵਜ਼ਨ ਕਿੱਥੇ ਲਗਾਉਣੇ ਹਨ। ਜੇਕਰ ਤੁਸੀਂ ਸਪੈਕਟ੍ਰਲ ਵਿਸ਼ਲੇਸ਼ਣ ਜਾਂ ਕੋਸਟ-ਡਾਊਨ ਟੈਸਟਿੰਗ ਵਰਗੀਆਂ ਵਿਸ਼ੇਸ਼ਤਾਵਾਂ ਦਾ ਫਾਇਦਾ ਨਹੀਂ ਲੈਂਦੇ, ਤਾਂ ਤੁਸੀਂ ਮਹੱਤਵਪੂਰਨ ਸੁਰਾਗ ਖੁੰਝਾ ਸਕਦੇ ਹੋ। ਉਦਾਹਰਨ ਲਈ, ਇੱਕ ਉੱਚ 1× ਕੰਪਨ ਅਸੰਤੁਲਨ ਦਾ ਸੁਝਾਅ ਦਿੰਦਾ ਹੈ, ਪਰ ਜੇਕਰ ਹੋਰ ਬਾਰੰਬਾਰਤਾਵਾਂ (ਜਿਵੇਂ 2×, 3×, ਜਾਂ ਨਾਨ-ਸਿੰਕ੍ਰੋਨਸ ਬਾਰੰਬਾਰਤਾਵਾਂ) 'ਤੇ ਵੀ ਪੀਕ ਹਨ, ਤਾਂ ਉਹ ਮਿਸਅਲਾਈਨਮੈਂਟ, ਢਿੱਲਾਪਣ, ਜਾਂ ਰੈਜ਼ੋਨੈਂਸ ਮੁੱਦਿਆਂ ਨੂੰ ਦਰਸਾ ਸਕਦੇ ਹਨ। ਜੇਕਰ ਤੁਸੀਂ ਇਹਨਾਂ ਦਾ ਨਿਦਾਨ ਕੀਤੇ ਬਿਨਾਂ ਸਿਰਫ਼ ਬੈਲੇਂਸਿੰਗ 'ਤੇ ਧਿਆਨ ਦਿੰਦੇ ਹੋ, ਤਾਂ ਤੁਸੀਂ ਇੱਕ ਡੂੰਘੀ ਸਮੱਸਿਆ ਨੂੰ ਅਣਸੁਲਝਿਆ ਛੱਡ ਸਕਦੇ ਹੋ।
ਸਲਾਹ: ਆਪਣੇ ਯੰਤਰ ਦੀ ਪੂਰੀ ਸਮਰੱਥਾ ਦਾ ਲਾਭ ਉਠਾਓ ਵਾਈਬ੍ਰੇਸ਼ਨ ਵਿਸ਼ਲੇਸ਼ਣ ਟੂਲ. ਬੈਲੇਂਸਿੰਗ ਤੋਂ ਬਾਅਦ, ਜਾਂ ਡਾਇਗਨੌਸਟਿਕ ਪੜਾਅ ਦੌਰਾਨ ਵੀ, ਕੰਪਨ ਸਪੈਕਟ੍ਰਮ ਦੀ ਜਾਂਚ ਕਰੋ। ਇੱਕ ਸਹੀ ਢੰਗ ਨਾਲ ਬੈਲੇਂਸ ਕੀਤੇ ਰੋਟਰ ਵਿੱਚ ਪ੍ਰਮੁੱਖ ਕੰਪਨ 1× (ਚੱਲਣ ਦੀ ਸਪੀਡ) 'ਤੇ ਹੋਵੇਗਾ ਅਤੇ ਹੋਰ ਬਾਰੰਬਾਰਤਾਵਾਂ 'ਤੇ ਬਹੁਤ ਘੱਟ ਪੱਧਰ ਹੋਣਗੇ। ਜੇਕਰ ਤੁਸੀਂ ਕਿਤੇ ਹੋਰ ਮਹੱਤਵਪੂਰਨ ਪੀਕ ਦੇਖਦੇ ਹੋ, ਉਹਨਾਂ ਦੀ ਜਾਂਚ ਕਰੋ – ਤੁਹਾਡੇ ਕੋਲ ਬੇਅਰਿੰਗ ਨੁਕਸ (ਅਕਸਰ ਉੱਚ-ਬਾਰੰਬਾਰਤਾ ਕੰਪਨ), ਢਾਂਚਾਗਤ ਰੈਜ਼ੋਨੈਂਸ (ਖਾਸ ਸਪੀਡਾਂ 'ਤੇ ਕੰਪਨ ਸਪਾਈਕ), ਜਾਂ ਹੋਰ ਮਕੈਨਿਕਲ ਮੁੱਦੇ ਹੋ ਸਕਦੇ ਹਨ। ਇੱਕ ਕੋਸਟ-ਡਾਊਨ (ਰਨ-ਡਾਊਨ) ਟੈਸਟ ਜੇਕਰ ਤੁਹਾਡਾ ਡਿਵਾਈਸ ਇਜਾਜ਼ਤ ਦਿੰਦਾ ਹੈ: ਜਿਵੇਂ ਸੈਂਟਰਿਫਿਊਜ ਹੌਲੀ ਹੁੰਦਾ ਹੈ, ਖਾਸ ਸਪੀਡਾਂ 'ਤੇ ਕੰਪਨ ਵਿੱਚ ਕਿਸੇ ਵੀ ਸਪਾਈਕ ਲਈ ਦੇਖੋ – ਇਹ ਸਿਸਟਮ ਦੀਆਂ ਕ੍ਰਿਟੀਕਲ ਸਪੀਡਾਂ ਜਾਂ ਰੈਜ਼ੋਨੈਂਟ ਬਾਰੰਬਾਰਤਾਵਾਂ ਨੂੰ ਦਰਸਾਉਂਦੇ ਹਨ। ਇਹ ਜਾਣਨਾ ਤੁਹਾਨੂੰ ਬਿਲਕੁਲ ਉਹਨਾਂ ਸਪੀਡਾਂ 'ਤੇ ਮਾਪ ਲੈਣ ਤੋਂ ਬਚਣ ਵਿੱਚ ਮਦਦ ਕਰ ਸਕਦਾ ਹੈ (ਜਿੱਥੇ ਡੇਟਾ ਸਕਿਊਡ ਹੋਵੇਗਾ) ਅਤੇ ਤੁਹਾਨੂੰ ਬਚਣ ਜਾਂ ਮਜ਼ਬੂਤ ਕਰਨ ਵਾਲੀਆਂ ਓਪਰੇਟਿੰਗ ਸਪੀਡਾਂ ਬਾਰੇ ਵੀ ਦੱਸਦਾ ਹੈ। ਸੰਖੇਪ ਵਿੱਚ, ਇਹ ਯਕੀਨੀ ਬਣਾਉਣ ਲਈ ਕਿ ਤੁਸੀਂ ਅਸਲ ਵਿੱਚ ਇੱਕ ਸਧਾਰਨ ਅਸੰਤੁਲਨ ਨਾਲ ਨਜਿੱਠ ਰਹੇ ਹੋ ਅਤੇ ਇਹ ਪੁਸ਼ਟੀ ਕਰਨ ਲਈ ਕਿ ਤੁਹਾਡੇ ਬੈਲੇਂਸਿੰਗ ਕੰਮ ਨੇ ਮੁੱਦਾ ਹੱਲ ਕਰ ਦਿੱਤਾ ਹੈ, ਸਪੈਕਟ੍ਰਲ ਅਤੇ ਰਨ-ਡਾਊਨ ਵਿਸ਼ਲੇਸ਼ਣ ਦੀ ਵਰਤੋਂ ਕਰੋ।
ਸਿੱਟੇ ਵਜੋਂ: ਇੱਕ ਉਦਯੋਗਿਕ ਸੈਂਟਰੀਫਿਊਜ ਨੂੰ ਸਫਲਤਾਪੂਰਵਕ ਬੈਲੈਂਸ ਕਰਨ ਲਈ ਇੱਕ ਵਿਧੀਪੂਰਵਕ ਪਹੁੰਚ ਅਤੇ ਬਾਰੀਕੀ ਵੱਲ ਧਿਆਨ ਦੀ ਲੋੜ ਹੁੰਦੀ ਹੈ। ਹਮੇਸ਼ਾ ਇੱਕ ਸਾਫ਼, ਮਕੈਨੀਕਲ ਤੌਰ ’ਤੇ ਠੀਕ ਮਸ਼ੀਨ ਨਾਲ ਸ਼ੁਰੂਆਤ ਕਰੋ; ਫਿਰ ਇਹ ਪੁਸ਼ਟੀ ਕਰਨ ਲਈ ਡਾਇਗਨੋਜ਼ ਕਰੋ ਕਿ ਸਮੱਸਿਆ ਅਸੰਤੁਲਨ (imbalance) ਦੀ ਹੈ; ਅਤੇ ਉਸ ਤੋਂ ਬਾਅਦ ਹੀ, ਸਾਰੇ ਸੁਰੱਖਿਆ ਉਪਾਵਾਂ ਦੇ ਨਾਲ, ਧਿਆਨ ਨਾਲ ਬੈਲੈਂਸਿੰਗ ਪ੍ਰਕਿਰਿਆ ਕਰੋ। ਇਸਦਾ ਫਾਇਦਾ ਇਸਦੇ ਯੋਗ ਹੈ – ਤੁਹਾਡਾ ਸੈਂਟਰੀਫਿਊਜ ਘੱਟੋ-ਘੱਟ ਵਾਈਬ੍ਰੇਸ਼ਨ ਨਾਲ ਚੱਲੇਗਾ, ਜਿਸਦਾ ਮਤਲਬ ਹੈ ਘੱਟ ਡਾਊਨਟਾਈਮ, ਘੱਟ ਮੁਰੰਮਤ, ਅਤੇ ਇੱਕ ਸੁਰੱਖਿਅਤ ਮਾਹੌਲ। ਉੱਪਰ ਦੱਸੀਆਂ ਆਮ ਗਲਤੀਆਂ ਤੋਂ ਬਚ ਕੇ, ਤੁਸੀਂ ਸਮਾਂ ਅਤੇ ਪੈਸਾ ਬਚਾਓਗੇ ਅਤੇ ਆਪਣੇ ਉਪਕਰਨ ਦੀ ਉਮਰ ਵਧਾਓਗੇ।
ਵਾਈਬ੍ਰੇਸ਼ਨ ਦੀ ਸਮੱਸਿਆ ਦੇ ਸੰਕਟ ਬਣਨ ਤੱਕ ਉਡੀਕ ਨਾ ਕਰੋ। ਆਪਣੇ ਨਿਯਮਤ ਰੱਖ-ਰਖਾਅ ਦੌਰਾਨ ਇਹਨਾਂ ਅਭਿਆਸਾਂ ਨੂੰ ਲਾਗੂ ਕਰੋ, ਅਤੇ ਆਪਣੇ ਸੈਂਟਰੀਫਿਊਜ ਦੀ ਹਾਲਤ ਦੀ ਸਰਗਰਮੀ ਨਾਲ ਨਿਗਰਾਨੀ ਕਰੋ। ਸਹੀ ਬੈਲੈਂਸਿੰਗ ਅਤੇ ਰੱਖ-ਰਖਾਅ ਨਾਲ, ਤੁਹਾਡਾ ਸੈਂਟਰੀਫਿਊਜ ਸੁਚਾਰੂ ਢੰਗ ਨਾਲ ਘੁੰਮਦਾ ਰਹੇਗਾ, ਆਉਣ ਵਾਲੇ ਸਾਲਾਂ ਲਈ ਭਰੋਸੇਯੋਗ ਪ੍ਰਦਰਸ਼ਨ ਦਿੰਦਾ ਰਹੇਗਾ। ਜੇਕਰ ਤੁਹਾਨੂੰ ਕਦੇ ਯਕੀਨ ਨਹੀਂ ਹੈ, ਤਾਂ ਵਾਈਬ੍ਰੇਸ਼ਨ ਵਿਸ਼ਲੇਸ਼ਣ ਮਾਹਿਰਾਂ ਨਾਲ ਸਲਾਹ ਕਰੋ ਜਾਂ ਉਪਕਰਨ ਨਿਰਮਾਤਾ ਨਾਲ ਸੰਪਰਕ ਕਰੋ – ਜਦੋਂ ਹਾਈ-ਸਪੀਡ ਮਸ਼ੀਨਰੀ ਦੀ ਗੱਲ ਆਉਂਦੀ ਹੈ ਤਾਂ ਅੰਦਾਜ਼ਾ ਲਗਾਉਣ ਨਾਲੋਂ ਪੇਸ਼ੇਵਰ ਮਾਰਗਦਰਸ਼ਨ ਲੈਣਾ ਹਮੇਸ਼ਾ ਬਿਹਤਰ ਹੁੰਦਾ ਹੈ। ਸ਼ੁਭ ਬੈਲੈਂਸਿੰਗ!
ਅਕਸਰ ਪੁੱਛੇ ਜਾਣ ਵਾਲੇ ਸਵਾਲ
ਬੈਲੈਂਸਿੰਗ ਤੋਂ ਪਹਿਲਾਂ ਸੈਂਟਰੀਫਿਊਜ ਨੂੰ ਚੰਗੀ ਤਰ੍ਹਾਂ ਸਾਫ਼ ਕਿਉਂ ਕੀਤਾ ਜਾਣਾ ਚਾਹੀਦਾ ਹੈ?
ਗੰਦੇ ਸੈਂਟਰੀਫਿਊਜ ਵਿੱਚ ਅਕਸਰ ਰੋਟਰ ’ਤੇ ਉਤਪਾਦ ਦੀ ਰਹਿੰਦ-ਖੂੰਹਦ ਚਿਪਕੀ ਰਹਿੰਦੀ ਹੈ, ਜੋ ਜ਼ਿਆਦਾਤਰ ਵਾਈਬ੍ਰੇਸ਼ਨ ਦਾ ਕਾਰਨ ਬਣਦੀ ਹੈ। ਜੇਕਰ ਤੁਸੀਂ ਸਾਫ਼ ਕੀਤੇ ਬਿਨਾਂ ਰੋਟਰ ਨੂੰ ਬੈਲੈਂਸ ਕਰਨ ਦੀ ਕੋਸ਼ਿਸ਼ ਕਰਦੇ ਹੋ, ਤਾਂ ਤੁਸੀਂ ਸਿਰਫ਼ ਉਸ ਅਸਥਾਈ ਜਮ੍ਹਾਂ ਹੋਣ ਦੀ ਭਰਪਾਈ ਕਰ ਰਹੇ ਹੋ। ਜਿਵੇਂ ਹੀ ਪ੍ਰਕਿਰਿਆ ਬਦਲਦੀ ਹੈ ਜਾਂ ਤੁਸੀਂ ਬਾਅਦ ਵਿੱਚ ਮਸ਼ੀਨ ਸਾਫ਼ ਕਰਦੇ ਹੋ, ਬੈਲੈਂਸ ਫਿਰ ਵਿਗੜ ਜਾਵੇਗਾ। ਇਸ ਲਈ, ਤੁਹਾਨੂੰ ਹਮੇਸ਼ਾ ਬੈਲੈਂਸਿੰਗ ਤੋਂ ਪਹਿਲਾਂ ਰੋਟਰ ਨੂੰ ਪੂਰੀ ਤਰ੍ਹਾਂ ਸਾਫ਼ ਕਰਨਾ ਚਾਹੀਦਾ ਹੈ ਅਤੇ ਕਿਸੇ ਵੀ ਮਕੈਨੀਕਲ ਸਮੱਸਿਆ ਨੂੰ ਠੀਕ ਕਰਨਾ ਚਾਹੀਦਾ ਹੈ ਤਾਂ ਜੋ ਤੁਸੀਂ ਰੋਟਰ ਦੇ ਅਸਲ ਅੰਤਰੀਵ ਅਸੰਤੁਲਨ ਨੂੰ ਹੱਲ ਕਰ ਸਕੋ।
ਕੀ ਇੱਕ ਉਦਯੋਗਿਕ ਸੈਂਟਰੀਫਿਊਜ ਨੂੰ ਬੈਲੈਂਸ ਕਰਨ ਨਾਲ ਸਾਰੀ ਵਾਈਬ੍ਰੇਸ਼ਨ ਖਤਮ ਹੋ ਜਾਂਦੀ ਹੈ?
ਬੈਲੈਂਸਿੰਗ ਰੋਟਰ ਦੇ ਅੰਤਰੀਵ ਅਸੰਤੁਲਨ ਕਾਰਨ ਹੋਣ ਵਾਲੀ ਵਾਈਬ੍ਰੇਸ਼ਨ ਨੂੰ ਬਹੁਤ ਘਟਾ ਦਿੰਦੀ ਹੈ, ਇਸ ਲਈ ਸੈਂਟਰੀਫਿਊਜ ਖਾਲੀ ਹੋਣ ’ਤੇ ਬਹੁਤ ਸੁਚਾਰੂ ਢੰਗ ਨਾਲ ਚੱਲੇਗਾ। ਹਾਲਾਂਕਿ, ਇਹ ਪ੍ਰਕਿਰਿਆ ਤੋਂ ਆਉਣ ਵਾਲੀ ਵਾਈਬ੍ਰੇਸ਼ਨ ਨੂੰ ਨਹੀਂ ਰੋਕਦੀ (ਉਦਾਹਰਨ ਲਈ, ਜੇਕਰ ਸਮੱਗਰੀ ਬਾਊਲ ਨਾਲ ਚਿਪਕ ਜਾਂਦੀ ਹੈ ਜਾਂ ਬਰਾਬਰ ਵੰਡੀ ਨਹੀਂ ਜਾਂਦੀ)। ਮਸ਼ੀਨ ਦੇ ਕੰਮ ਕਰਨ ਅਤੇ ਗੰਦੀ ਹੋਣ ਦੇ ਨਾਲ ਸਮੇਂ ਦੇ ਨਾਲ ਤੁਸੀਂ ਸ਼ਾਇਦ ਕੁਝ ਵਾਈਬ੍ਰੇਸ਼ਨ ਵੇਖੋਗੇ – ਇਸੇ ਲਈ ਨਿਯਮਤ ਸਫਾਈ ਮਹੱਤਵਪੂਰਨ ਹੈ। ਸੰਖੇਪ ਵਿੱਚ, ਬੈਲੈਂਸਿੰਗ ਰੋਟਰ ਦੇ ਅਸੰਤੁਲਨ ਨੂੰ ਠੀਕ ਕਰਦੀ ਹੈ ਪਰ ਸੰਚਾਲਨ ਦੀਆਂ ਸਥਿਤੀਆਂ ਵਿੱਚ ਸਾਰੀ ਵਾਈਬ੍ਰੇਸ਼ਨ ਨੂੰ ਰੋਕ ਨਹੀਂ ਸਕਦੀ, ਖਾਸ ਕਰਕੇ ਜੇਕਰ ਪ੍ਰਕਿਰਿਆ ਨਵਾਂ ਅਸੰਤੁਲਨ ਲਿਆਉਂਦੀ ਹੈ।
ਉਦਯੋਗਿਕ ਸੈਂਟਰੀਫਿਊਜ ਦੀ ਬੈਲੈਂਸਿੰਗ ਲਈ ਢੁਕਵਾਂ ਟ੍ਰਾਇਲ ਵੇਟ ਕਿਵੇਂ ਚੁਣਾਂ?
ਤੁਹਾਨੂੰ ਇੱਕ ਛੋਟੇ ਟ੍ਰਾਇਲ ਵੇਟ ਨਾਲ ਸ਼ੁਰੂਆਤ ਕਰਨੀ ਚਾਹੀਦੀ ਹੈ ਅਤੇ ਦੇਖਣਾ ਚਾਹੀਦਾ ਹੈ ਕਿ ਇਹ ਵਾਈਬ੍ਰੇਸ਼ਨ ਨੂੰ ਕਿਵੇਂ ਪ੍ਰਭਾਵਿਤ ਕਰਦਾ ਹੈ। ਆਮ ਨਿਯਮ ਇਹ ਹੈ ਕਿ ਟੈਸਟ ਵੇਟ ਜੋੜਨ ’ਤੇ ਵਾਈਬ੍ਰੇਸ਼ਨ ਐਂਪਲੀਟਿਊਡ ਵਿੱਚ ਲਗਭਗ 20% ਬਦਲਾਅ ਦਾ ਟੀਚਾ ਰੱਖੋ। ਜੇਕਰ ਤੁਸੀਂ ਇੱਕ ਬਹੁਤ ਛੋਟਾ ਵੇਟ ਜੋੜਦੇ ਹੋ ਅਤੇ ਕੁਝ ਨਹੀਂ ਬਦਲਦਾ, ਤਾਂ ਤੁਸੀਂ ਥੋੜ੍ਹਾ ਵੱਡਾ ਵੇਟ ਅਜ਼ਮਾ ਸਕਦੇ ਹੋ। ਮੁੱਖ ਗੱਲ ਹੈ ਹੌਲੀ-ਹੌਲੀ ਵਧਾਉਣਾ – ਇੱਕਦਮ ਬਹੁਤ ਭਾਰੀ ਵੇਟ ’ਤੇ ਨਾ ਜਾਓ। ਕਿਉਂਕਿ ਸੈਂਟਰੀਫਿਊਜ ਬਹੁਤ ਤੇਜ਼ੀ ਨਾਲ ਘੁੰਮਦੇ ਹਨ, ਇੱਥੋਂ ਤੱਕ ਕਿ ਇੱਕ ਛੋਟਾ ਵੇਟ ਵੀ ਇੱਕ ਵੱਡਾ ਬਲ ਪੈਦਾ ਕਰਦਾ ਹੈ। ਬਹੁਤ ਭਾਰੀ ਵੇਟ ਨਾਲ ਓਵਰਸ਼ੂਟ ਕਰਨਾ ਖਤਰਨਾਕ ਹੋ ਸਕਦਾ ਹੈ। ਇੱਕ ਗਣਨਾ ਜਾਂ ਟੂਲ ਦੀ ਵਰਤੋਂ ਕਰਕੇ ਇੱਕ ਵਾਜਬ ਵੇਟ ਦਾ ਅਨੁਮਾਨ ਲਗਾਉਣਾ (ਰੋਟਰ ਦੇ ਆਕਾਰ ਅਤੇ ਸਪੀਡ ਦੇ ਆਧਾਰ ’ਤੇ) ਮਦਦਗਾਰ ਹੋ ਸਕਦਾ ਹੈ, ਪਰ ਹਮੇਸ਼ਾ ਸਾਵਧਾਨੀ ਦੇ ਪਾਸੇ ਰਹੋ।
ਕੀ ਸੈਂਟਰੀਫਿਊਜ ਨੂੰ ਉਦੋਂ ਬੈਲੈਂਸ ਕੀਤਾ ਜਾ ਸਕਦਾ ਹੈ ਜਦੋਂ ਇਸ ਵਿੱਚ ਉਤਪਾਦ ਹੋਵੇ?
ਨਹੀਂ – ਤੁਹਾਨੂੰ ਸੈਂਟਰੀਫਿਊਜ ਨੂੰ ਸਿਰਫ਼ ਉਦੋਂ ਬੈਲੈਂਸ ਕਰਨਾ ਚਾਹੀਦਾ ਹੈ ਜਦੋਂ ਇਹ ਖਾਲੀ ਹੋਵੇ (ਅਤੇ ਤਰਜੀਹੀ ਤੌਰ ’ਤੇ ਸਾਫ਼ ਹੋਵੇ)। ਜੇਕਰ ਅੰਦਰ ਉਤਪਾਦ ਹੈ (ਜਿਵੇਂ ਕਿ ਤਰਲ ਜਾਂ ਸਲੱਜ), ਤਾਂ ਇਹ ਸੰਭਾਵਤ ਤੌਰ ’ਤੇ ਬਰਾਬਰ ਵੰਡਿਆ ਨਹੀਂ ਜਾਵੇਗਾ ਅਤੇ ਹਿੱਲੇਗਾ ਜਾਂ ਖਿਸਕੇਗਾ, ਜਿਸਦਾ ਮਤਲਬ ਹੈ ਕਿ ਤੁਹਾਡੀਆਂ ਵਾਈਬ੍ਰੇਸ਼ਨ ਰੀਡਿੰਗਾਂ ਬਦਲਦੀਆਂ ਰਹਿਣਗੀਆਂ। ਇਹਨਾਂ ਹਾਲਤਾਂ ਵਿੱਚ ਤੁਹਾਡੇ ਵੱਲੋਂ ਕੀਤਾ ਗਿਆ ਕੋਈ ਵੀ ਬੈਲੈਂਸ ਸੁਧਾਰ ਭਰੋਸੇਯੋਗ ਨਹੀਂ ਹੋਵੇਗਾ। ਹਮੇਸ਼ਾ ਸਥਿਰ ਹਾਲਤਾਂ ਵਿੱਚ ਬੈਲੈਂਸ ਕਰੋ: ਖਾਲੀ ਰੋਟਰ, ਸਥਿਰ ਸਪੀਡ, ਅਤੇ ਕੋਈ ਸਰਗਰਮ ਪ੍ਰਕਿਰਿਆ ਨਹੀਂ ਚੱਲ ਰਹੀ।
ਸੈਂਟਰੀਫਿਊਜ ਰੋਟਰ ’ਤੇ ਸੁਧਾਰਾਤਮਕ ਵੇਟ ਸੁਰੱਖਿਅਤ ਢੰਗ ਨਾਲ ਕਿਵੇਂ ਲਗਾਏ ਜਾਣੇ ਚਾਹੀਦੇ ਹਨ?
ਸੈਂਟਰੀਫਿਊਜ ਨਿਰਮਾਤਾ ਵੱਲੋਂ ਸਿਫਾਰਸ਼ ਕੀਤੇ ਤਰੀਕਿਆਂ ਜਿਵੇਂ ਵੈਲਡਿੰਗ ਜਾਂ ਬੋਲਟਿੰਗ ਦੀ ਵਰਤੋਂ ਕਰਕੇ, ਹਮੇਸ਼ਾ ਸੁਧਾਰ ਵੇਟ ਨੂੰ ਬਹੁਤ ਮਜ਼ਬੂਤੀ ਨਾਲ ਲਗਾਓ। ਜੇਕਰ ਰੋਟਰ ਵਿੱਚ ਨਿਰਧਾਰਿਤ ਬੈਲੈਂਸ ਸੁਧਾਰ ਖੇਤਰ ਹਨ, ਤਾਂ ਵੇਟ ਉਹਨਾਂ ਖੇਤਰਾਂ ਵਿੱਚ ਜਾਣੇ ਚਾਹੀਦੇ ਹਨ। ਅਸਥਾਈ ਤਰੀਕੇ (ਗੂੰਦ, ਟੇਪ, ਪੁਟੀ) ਪੂਰੀ ਸਪੀਡ ਸੰਚਾਲਨ ਲਈ ਸੁਰੱਖਿਅਤ ਨਹੀਂ ਹਨ – ਇਹ ਨਿਕਲ ਸਕਦੇ ਹਨ ਅਤੇ ਗੰਭੀਰ ਨੁਕਸਾਨ ਜਾਂ ਸੱਟ ਦਾ ਕਾਰਨ ਬਣ ਸਕਦੇ ਹਨ। ਵੇਟ ਲਗਾਉਣ ਤੋਂ ਬਾਅਦ, ਜੇ ਸੰਭਵ ਹੋਵੇ ਤਾਂ ਇਹ ਯਕੀਨੀ ਬਣਾਉਣ ਲਈ ਹੌਲੀ ਟੈਸਟ ਸਪਿਨ ਕਰੋ ਕਿ ਸਭ ਕੁਝ ਟਿਕਿਆ ਰਹਿੰਦਾ ਹੈ, ਅਤੇ ਸਾਵਧਾਨੀ ਵਜੋਂ ਜਦੋਂ ਇਹ ਘੁੰਮ ਰਿਹਾ ਹੋਵੇ ਤਾਂ ਕਦੇ ਵੀ ਰੋਟਰ ਦੇ ਪਲੇਨ ਦੀ ਸੇਧ ਵਿੱਚ ਨਾ ਖੜ੍ਹੇ ਹੋਵੋ।
ਸਪੈਕਟ੍ਰਲ ਵਿਸ਼ਲੇਸ਼ਣ ਅਤੇ ਕੋਸਟ-ਡਾਊਨ ਟੈਸਟ ਸੈਂਟਰੀਫਿਊਜ ਬੈਲੈਂਸਿੰਗ ਵਿੱਚ ਕਿਵੇਂ ਮਦਦ ਕਰ ਸਕਦੇ ਹਨ?
ਸਪੈਕਟ੍ਰਲ ਵਿਸ਼ਲੇਸ਼ਣ (ਵਾਈਬ੍ਰੇਸ਼ਨ ਫ੍ਰੀਕੁਐਂਸੀ ਸਪੈਕਟ੍ਰਮ ਨੂੰ ਵੇਖਣਾ) ਇਹ ਪੁਸ਼ਟੀ ਕਰਨ ਵਿੱਚ ਮਦਦ ਕਰਦਾ ਹੈ ਕਿ ਮੁੱਖ ਸਮੱਸਿਆ ਚੱਲਣ ਦੀ ਸਪੀਡ (1×) ’ਤੇ ਹੈ। ਜੇਕਰ ਸਪੈਕਟ੍ਰਮ 1× RPM ’ਤੇ ਇੱਕ ਵੱਡੀ ਪੀਕ ਦਿਖਾਉਂਦਾ ਹੈ ਅਤੇ ਹੋਰ ਬਹੁਤਾ ਕੁਝ ਨਹੀਂ, ਤਾਂ ਇਹ ਇੱਕ ਚੰਗਾ ਸੰਕੇਤ ਹੈ ਕਿ ਤੁਸੀਂ ਮੁੱਖ ਤੌਰ ’ਤੇ ਅਸੰਤੁਲਨ ਨਾਲ ਨਜਿੱਠ ਰਹੇ ਹੋ। ਜੇਕਰ ਹੋਰ ਪੀਕਾਂ ਹਨ (ਜਿਵੇਂ 2× ’ਤੇ ਜਾਂ ਬੇਤਰਤੀਬ ਫ੍ਰੀਕੁਐਂਸੀਆਂ ’ਤੇ), ਤਾਂ ਇਹ ਤੁਹਾਨੂੰ ਹੋਰ ਸੰਭਾਵਿਤ ਸਮੱਸਿਆਵਾਂ (ਜਿਵੇਂ ਮਿਸਅਲਾਈਨਮੈਂਟ, ਢਿੱਲਾਪਣ, ਜਾਂ ਬੇਅਰਿੰਗ ਸਮੱਸਿਆਵਾਂ) ਬਾਰੇ ਸੁਚੇਤ ਕਰਦਾ ਹੈ ਜਿਨ੍ਹਾਂ ਨੂੰ ਸਿਰਫ਼ ਬੈਲੈਂਸਿੰਗ ਠੀਕ ਨਹੀਂ ਕਰੇਗੀ। ਕੋਸਟ-ਡਾਊਨ ਟੈਸਟ (ਮਸ਼ੀਨ ਦੇ ਹੌਲੀ ਹੋਣ ਦੌਰਾਨ ਵਾਈਬ੍ਰੇਸ਼ਨ ਰਿਕਾਰਡ ਕਰਨਾ) ਗੂੰਜਦਾਰ ਫ੍ਰੀਕੁਐਂਸੀਆਂ (resonant frequencies) ਦਾ ਖੁਲਾਸਾ ਕਰ ਸਕਦੇ ਹਨ – ਜੇਕਰ ਸੈਂਟਰੀਫਿਊਜ ਇੱਕ ਅਜਿਹੀ ਸਪੀਡ ਵਿੱਚੋਂ ਲੰਘਦਾ ਹੈ ਜਿੱਥੇ ਇਹ ਬਹੁਤ ਹਿੱਲਦਾ ਹੈ ਅਤੇ ਫਿਰ ਸੰਚਾਲਨ ਸਪੀਡ ’ਤੇ ਸ਼ਾਂਤ ਹੋ ਜਾਂਦਾ ਹੈ, ਤਾਂ ਉਹ ਸਪਾਈਕ ਇੱਕ ਗੂੰਜ (resonance) ਹੈ। ਇਹ ਜਾਣ ਕੇ, ਤੁਸੀਂ ਉਸ ਮੁਸ਼ਕਲ ਸਪੀਡ ’ਤੇ ਸਹੀ ਮਾਪ ਕਰਨ ਤੋਂ ਬਚ ਸਕਦੇ ਹੋ, ਜਾਂ ਤੁਹਾਨੂੰ ਇਹ ਪਤਾ ਹੋਵੇਗਾ ਕਿ ਮਸ਼ੀਨ ਉਸ ਰੇਂਜ ਵਿੱਚੋਂ ਲੰਘਦੇ ਸਮੇਂ ਹਮੇਸ਼ਾ ਵਾਈਬ੍ਰੇਟ ਕਰ ਸਕਦੀ ਹੈ। ਦੋਵੇਂ ਟੂਲ ਅਸਲ ਵਿੱਚ ਤੁਹਾਨੂੰ ਮਸ਼ੀਨ ਦੇ ਵਿਵਹਾਰ ਦੀ ਡੂੰਘੀ ਸਮਝ ਦਿੰਦੇ ਹਨ, ਤਾਂ ਜੋ ਤੁਸੀਂ ਇਹ ਯਕੀਨੀ ਬਣਾ ਸਕੋ ਕਿ ਤੁਸੀਂ ਸਹੀ ਹੱਲ ਲਾਗੂ ਕਰ ਰਹੇ ਹੋ (ਅਤੇ ਸਿਰਫ਼ ਉਸੇ ਚੀਜ਼ ਨੂੰ ਬੈਲੈਂਸ ਕਰ ਰਹੇ ਹੋ ਜਿਸਨੂੰ ਸੱਚਮੁੱਚ ਬੈਲੈਂਸਿੰਗ ਦੀ ਲੋੜ ਹੈ)।

Nikolai Shelkovenko
Nikolai Shelkovenko ਇੱਕ ਵਾਈਬ੍ਰੇਸ਼ਨ ਵਿਸ਼ਲੇਸ਼ਣ ਇੰਜੀਨੀਅਰ ਅਤੇ Vibromera ਦੇ ਸੰਸਥਾਪਕ ਅਤੇ CEO ਹਨ। 15 ਸਾਲਾਂ ਤੋਂ ਵੱਧ ਸਮੇਂ ਤੋਂ ਉਹ ਟੈਸਟ ਬੈਂਚ ਦੀ ਬਜਾਏ ਸਿੱਧੇ ਫੀਲਡ ਵਿੱਚ ਘੁੰਮਣ ਵਾਲੇ ਉਪਕਰਣਾਂ ਨੂੰ ਬੈਲੇਂਸ ਕਰਦੇ ਆ ਰਹੇ ਹਨ: ਮਲਚਰ, ਉਦਯੋਗਿਕ ਪੱਖੇ, ਕ੍ਰਸ਼ਰ, ਸੈਂਟ੍ਰੀਫਿਊਜ, ਸ਼ਾਫ਼ਟ ਅਤੇ ਸਪਿੰਡਲ। ਇਸੇ ਕੰਮ ਵਿੱਚੋਂ Balanset ਯੰਤਰਾਂ ਦਾ ਜਨਮ ਹੋਇਆ — ਇਹਨਾਂ ਨੂੰ ਇੱਕ ਅਜਿਹੇ ਸੰਦ ਵਜੋਂ ਡਿਜ਼ਾਈਨ ਕੀਤਾ ਗਿਆ ਜਿਸਨੂੰ ਇੱਕ ਮਾਹਰ ਖੁਦ ਮਸ਼ੀਨ ਤੱਕ ਲੈ ਜਾ ਸਕੇ ਅਤੇ ਥਾਂ 'ਤੇ ਹੀ ਇਕੱਲਿਆਂ ਵਰਤ ਸਕੇ, ਨਾ ਕਿ ਪ੍ਰਯੋਗਸ਼ਾਲਾ ਉਪਕਰਣ ਵਜੋਂ। Vibromera ਦੀ ਸਥਾਪਨਾ 2017 ਵਿੱਚ ਹੋਈ ਅਤੇ 2023 ਤੋਂ ਇਹ ਪੋਰਟੋ, ਪੁਰਤਗਾਲ ਵਿੱਚ ਸਥਿਤ ਹੈ। Balanset ਲੜੀ ਦਾ ਵਿਕਾਸ, ਅਸੈਂਬਲੀ ਅਤੇ ਸਹਾਇਤਾ ਸਭ ਇੱਥੇ ਹੀ ਹੁੰਦੇ ਹਨ। ਪ੍ਰਮੁੱਖ ਯੰਤਰ Balanset-1A ਹੈ, ਜੋ ਇੱਕ- ਅਤੇ ਦੋ-ਪਲੇਨ ਬੈਲੇਂਸਿੰਗ ਅਤੇ ਵਾਈਬ੍ਰੇਸ਼ਨ ਡਾਇਗਨੌਸਟਿਕਸ ਲਈ ਪੋਰਟੇਬਲ ਐਨਾਲਾਈਜ਼ਰ ਹੈ। Nikolai ਖੁਦ ਕਸਟਮਰ ਸਹਾਇਤਾ ਵਿੱਚ, ਮੁਸ਼ਕਲ ਬੈਲੇਂਸਿੰਗ ਮਾਮਲਿਆਂ ਨੂੰ ਹੱਲ ਕਰਨ ਵਿੱਚ ਅਤੇ ਸੌਫ਼ਟਵੇਅਰ ਦੇ ਵਿਕਾਸ ਵਿੱਚ ਸ਼ਾਮਲ ਰਹਿੰਦੇ ਹਨ। ਉਹ ਦੁਨੀਆ ਭਰ ਦੇ ਗਾਹਕਾਂ ਨਾਲ, ਕਿਸੇ ਵੀ ਭਾਸ਼ਾ ਵਿੱਚ ਕੰਮ ਕਰਦੇ ਹਨ।

