Understanding Sensor Mounting
Definition: What is Sensor Mounting?
Sensor mounting refers to the method and hardware used to attach vibration sensors (accelerometers, velocity sensors) to the measurement surface on machinery. The mounting method critically affects measurement quality, frequency response, and reliability. Proper mounting creates a rigid mechanical coupling that faithfully transmits vibration from the machine to the sensor without introducing resonances or losses, while poor mounting can limit frequency response, introduce measurement errors, or cause sensor detachment.
The mounting method must be matched to the application requirements—permanent monitoring requires permanent mounting (studs), routine surveys use magnetic mounts for speed, while handheld contact is acceptable only for quick screening. Understanding mounting effects on sensor performance is essential for obtaining accurate, repeatable vibration measurements.
Mounting Methods Comparison
1. Stud Mounting (Best Performance)
Method
- Sensor bolted to tapped hole using integral stud
- Thin layer of coupling agent (grease, oil) between surfaces
- Torqued to specification (typically 20-40 in-lb)
Performance
- Frequency Range: Full sensor capability (DC to 20+ kHz)
- Mounting Resonance: > 30 kHz typically (well above measurement range)
- Repeatability: Excellent
- Stability: Permanent, secure
Applications
- Permanent monitoring installations
- Bearing defect detection requiring high frequencies
- Critical measurements
- Reference measurements
2. Adhesive Mounting (Excellent Performance)
Method
- Sensor bonded with cyanoacrylate (super glue), epoxy, or specialized adhesive
- Thin uniform adhesive layer
- Semi-permanent installation
Performance
- Frequency Range: To 7-10 kHz (very good)
- Mounting Resonance: 15-20 kHz
- Repeatability: Good (if adhesive application consistent)
- Stability: Permanent until removal
Applications
- Temporary monitoring installations (weeks to months)
- When drilling holes not allowed
- Lightweight machinery
- Most vibration analysis work
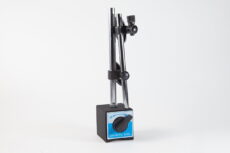
3. Magnetic Mounting (Good for Routine Work)
Method
- Permanent magnet base attaches to ferrous surfaces
- Quick attachment/removal
- No surface preparation required
Performance
- Frequency Range: To 2-3 kHz (adequate for most machinery)
- Mounting Resonance: 4-7 kHz (limits high-frequency measurements)
- Repeatability: Fair (depends on surface contact)
- Stability: Can detach if vibration severe or surface oily
Applications
- Route-based condition monitoring surveys
- General machinery vibration
- Quick checks and screening
- When convenience more important than maximum performance
4. Handheld/Probe (Qualitative Only)
Method
- Sensor on probe tip held against surface by hand
- Contact force varies
- No rigid coupling
Performance
- Frequency Range: To 500-1000 Hz maximum
- Repeatability: Poor
- Accuracy: ±20-50% variation possible
- Stability: Hand tremor, variable contact force
Applications
- Quick screening only
- Gross problem identification
- Inaccessible locations
- Not suitable for quantitative analysis or trending
Surface Preparation
For Best Performance
- Clean Surface: Remove paint, rust, oil, dirt
- Flat Surface: File or grind if necessary to ensure full contact
- Smooth Surface: Remove high spots, roughness
- Coupling Agent: Thin layer of grease, oil, or specialized couplant
Surface Flatness
- Critical for rigid coupling
- Gaps allow sensor to rock, reducing frequency response
- Air gaps act as springs, lowering mounting resonance
- Flatness within 0.02 mm (0.001 in) ideal
Mounting Location Selection
Ideal Locations
- Bearing housings (close to vibration source)
- Structural paths with good coupling to bearings
- Avoid flexible covers, sheet metal
- Avoid nodes or low-response areas
Accessibility
- Safe access for technicians
- Clear line-of-sight or reach
- Protected from damage (not in walkways)
- Cable routing practical
Direction
- Radial measurements perpendicular to shaft
- Axial measurements parallel to shaft
- Typically measure horizontal, vertical, and sometimes axial
Mounting Effects on Frequency Response
Frequency Response Limits by Mount Type
| Mounting Method | Usable Frequency (kHz) | Mounting Resonance (kHz) |
|---|---|---|
| Stud (ideal) | To 20+ | >30 |
| Adhesive | To 7-10 | 15-20 |
| Magnetic | To 2-3 | 4-7 |
| Handheld | To 0.5-1 | 2-3 |
Rule of Thumb
- Use frequencies up to 1/3 of mounting resonance
- Ensures flat response in measurement range
- Above this, amplitude errors increase
Best Practices
Match Method to Application
- Bearing analysis (high frequency): stud or adhesive only
- General machinery (< 1 kHz): magnetic acceptable
- Screening: handheld for speed, confirm with better mounting
Permanent Installations
- Drill and tap holes for stud mounting
- Use thread-locking compound
- Protect threaded holes when sensor removed
- Document measurement locations
Temporary Installations
- Adhesive for multi-day/week installations
- Magnetic for route-based surveys
- Verify secure attachment before measurement
- Clean magnetic base and surface for good contact
Sensor mounting method fundamentally affects vibration measurement quality and frequency response. Proper selection and application of mounting methods—matching technique to measurement requirements, ensuring rigid coupling through surface preparation, and understanding frequency limitations—is essential for obtaining accurate, reliable vibration data that supports effective machinery diagnostics and condition monitoring.
