Understanding Cable Compensation
Definition: What is Cable Compensation?
Cable compensation is an electronic adjustment in eddy current proximity probe systems that corrects for the effects of extension cable length on system calibration. Eddy current probes are calibrated as a system (probe + cable + proximitor electronics), and the cable capacitance and inductance affect the RF oscillator frequency and impedance, changing the voltage-to-gap relationship. Cable compensation adjusts the proximitor electronics to maintain accurate measurements when using cable lengths different from the standard calibration length (typically 5m or 9m).
Proper cable compensation ensures that displacement measurements remain accurate regardless of cable length variations in field installations, allowing flexibility in sensor placement while maintaining measurement integrity critical for shaft vibration monitoring, clearance assessment, and rotor dynamics analysis.
Why Cable Compensation is Needed
Cable Effects on Eddy Current Systems
- Extension cable has capacitance and inductance
- Cable becomes part of RF oscillator circuit
- Different cable length = different total capacitance/inductance
- Changes oscillator frequency and impedance
- Alters voltage output vs. gap relationship
- Result: Measurement error if not compensated
Magnitude of Effect
- Error can be 5-20% for large cable length changes
- Both sensitivity and offset affected
- Linear range changes
- Uncompensated measurements unreliable
Compensation Methods
Electronic Compensation (Modern Systems)
- Adjustable components in proximitor
- Typically potentiometers or DIP switches
- Set for specific cable length
- Restores calibration accuracy
- Some systems auto-detect cable length
Factory Calibration for Specific Length
- System calibrated with actual cable to be used
- No field compensation needed
- Most accurate method
- Inflexible (changing cable requires recalibration)
Multiple Calibration Points
- System calibrated at several cable lengths
- Calibration data provided for each length
- User selects appropriate calibration
Standard Cable Lengths
Common Lengths
- 5 meters (16 ft): Common standard in US
- 9 meters (30 ft): Common standard internationally
- 1 meter: Short system for special applications
- Custom: Any length possible with compensation
Extension Cable
- Special low-noise coaxial cable
- Specified capacitance per unit length
- Typically RG-174 or similar
- Must use correct cable type for system
Compensation Procedure
Setup Steps
- Measure Total Cable Length: Probe cable + extension cable
- Consult Manual: Determine compensation setting for length
- Adjust Proximitor: Set compensation controls per manual
- Verify: Check output at known gap or with calibrator
- Document: Record cable length and compensation setting
Verification
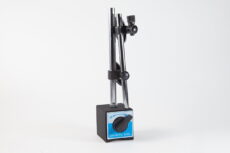
- Use gap calibrator or micrometer stand
- Check output at known gaps
- Verify sensitivity (V/mil or V/mm)
- Verify offset (voltage at nominal gap)
- Ensure linear range centered properly
Common Issues
Incorrect Compensation
- Symptoms: Readings don’t match expected, non-linear response
- Causes: Wrong cable length entered, compensation not adjusted, damaged cable
- Detection: Calibration check reveals errors
- Fix: Measure actual cable length, set compensation correctly
Cable Length Unknown
- Existing installation, length not documented
- Physically measure or estimate from installation
- Adjust compensation while monitoring known gap
- Iterate to achieve correct output
Mixed Cable Types
- Different cable types have different capacitance
- Compensation based on standard cable type
- Non-standard cable can cause errors even with compensation
- Always use manufacturer-specified cable
Importance for Accuracy
Vibration Measurements
- Incorrect compensation causes amplitude errors
- Affects trending reliability
- Can misrepresent vibration severity
- May trigger false alarms or miss real problems
Position Measurements
- Absolute position accuracy depends on proper compensation
- Affects clearance monitoring
- Trip setpoints must be based on accurate measurements
- Incorrect compensation can cause spurious trips or fail to protect
Documentation Requirements
Installation Records
- Total cable length for each channel
- Compensation settings applied
- Calibration verification data
- Stored with system documentation
Change Control
- If cable length changed, update compensation
- Recalibrate or verify after changes
- Document modifications
Cable compensation is a critical but often overlooked aspect of eddy current proximity probe systems. Proper compensation for actual cable length, verification through calibration checks, and documentation of settings ensure that these permanently-installed displacement measurement systems provide accurate, reliable data for shaft vibration monitoring, rotor position tracking, and machinery protection in critical turbomachinery applications.
