Razumijevanje montaže senzora

Montaža senzora je metoda i hardver koji se koristi za prikačavanje vibration sensors — akcelerometri i senzore brzine — na površinu mjerenja na stroju. To je mnogo više od mehaničkog detalja: metoda montaže kritično određuje kvalitetu mjerenja, iskoristivu frequency odgovor i pouzdanost. Dobar nosač kreira krut mehanički spoj koji vjerno prenosi vibracije sa stroja u senzor bez dodavanja rezonanci ili gubitaka; loš ograničava frekventni odgovor, uvodi greške amplitude ili dozvoljava da senzor padne.
Metoda mora biti prilagođena poslu. Trajno nadziranje zahtijeva trajnu montažu (vijke); rutinska mjerenja koriste magnetne nosače za brzinu; ručni kontakt je prihvatljiv samo za brzo skrining. Razumijevanje kako svaki nosač utječe na performanse senzora je esencijalno za dobivanje točnih, ponovljivih podataka — i ovo je formalizirano u ISO 5348, standard za mehaničku montažu akcelerometara.
1. Upoređeni Metodi Montaže
Montaža na Vistu — Najbolja Performansa
Method: senzor se pričvršćuje na navoj sa integralnim vistom, sa tankim slojem veznog sredstva (mast ili ulje) između dodirnih površina, zategnut prema specifikaciji (obično 20–40 in-lb).
- Frekventni raspon: punih mogućnosti senzora, od DC do 20+ kHz.
- Rezonancija montaže: obično iznad 30 kHz, dobro izvan dijapazona merenja.
- Repeatability: excellent.
- Stability: trajno i sigurno.
Applications: instalacije za trajni monitoring, bearing-defect detekcija koja zahteva visoke frekvencije, kritična merenja i referentna merenja.
Montaža Adhezivom — Odličnih Performansi
Method: senzor se lepí sa cijanokrilatomom (super lepak), epoksidom ili specijalizovanim adhezivom u tankom, ravnomernom sloju, omogućavajući semi-trajnu instalaciju.
- Frekventni raspon: do 7–10 kHz (vrlo dobro).
- Rezonancija montaže: 15–20 kHz.
- Repeatability: dobra, pod uslovom da je sloj adheziva primenjen dosljedno.
- Stability: trajna dok se namerno ne ukloni.
Applications: privremene instalacije koje traju nedelje do mesece, situacije gde nije dozvoljeno bušenje rupa, laka mehanizacija, i većina opšte vibracionalne analize.
Magnetna Montaža — Dobra za Rutinsku Analizu
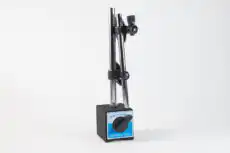
Method: baza sa permanentnim magnetom se pričvršćuje na ferozne površine, omogućavajući brzo pričvršćivanje i uklanjanje bez pripreme površine.
- Frekventni raspon: do 2–3 kHz (zadovoljavajuće za većinu mehanizacije).
- Rezonancija montaže: 4–7 kHz, što ograničava merenja visokih frekvencija.
- Repeatability: zadovoljavajuća, u zavisnosti od kontakta površine.
- Stability: može se odvojiti ako je vibration ozbiljna ili je površina masna.
Applications: route-based nadzor stanja, opšta vibration mašineria, brze provjere i pregledi, te svuda gdje je pogodnost važnija od maksimalnih performansi.
Ručni / Sonda — Samo kvalitativno
Method: senzor sjednje na vrh sonde koji se drži na površini rukom. Kontaktna sila varira i nema čvrste veze.
- Frekventni raspon: do 500–1000 Hz maksimalno.
- Repeatability: poor.
- Accuracy: moguća je varijacija od ±20–50%.
- Stability: drhtanje ruke i promjenjiva kontaktna sila pokvaruju mjerenje.
Applications: samo za brze preglede, identifikacija većih problema te nedostupne lokacije — nije prikladno za kvantiativnu analizu niti za praćenje trenda.
2. Priprema površine
Za najbolje performanse
- Clean surface: ukloniti краљ, hrđavu, ulje i nečistoće.
- Flat surface: piliti ili brušiti ako je potrebno da se osigura potpuni kontakt.
- Glatka površina: ukloniti dobre točke i hrapavost.
- Sredstvo za vezanje: nanijeti tanki sloj masti, ulja ili specijaliziranog kuplanda.
Zašto je ravnost važna
- Ravnost je ključna za čvrstu vezu.
- Razmaci omogućavaju senzoru da se njiše, smanjujući frekvencijski odziv.
- Zračni razmaci funkcioniraju kao opruge, što smanjuje rezonancija montaže.
- Ravnost od 0,02 mm (0,001 in) je idealna.
3. Odabir mjesta montaže
Idealna mjesta
- Ležajne kuće, što bliže izvoru vibracija.
- Putanje strukture sa krutom, direktnom vezom na ležajeve.
- Izbjegavati fleksibilne poklopce i limenu ploču.
- Izbjegavati čvorove ili druga područja niske odgovora.
Accessibility
- Siguran pristup za tehničare.
- Jasan vidokrug ili doseg.
- Zaštićeno od oštećenja i ne nalazi se u hodnicima.
- Praktičan rad kabela.
Direction
- Radijalna mjerenja okomita na vratilo.
- Aksijalna mjerenja paralelna sa vratilom.
- Obično mjeriti horizontalno, vertikalno i ponekad aksijalno na svakoj točki.
4. Kako montaža ograničava odziv frekvencije
Every mount behaves like a tiny mass-spring system whose stiffness sets a resonant frequency. Well below that resonance the response is flat and trustworthy; approaching and above it the reading is distorted. The table summarises the practical limits:
| Metoda montaže | Upotrebljiva frekvencija (kHz) | Rezonancija montaže (kHz) |
|---|---|---|
| Stud (ideal) | To 20+ | >30 |
| Adhesive | To 7–10 | 15–20 |
| Magnetic | To 2–3 | 4–7 |
| Handheld | To 0.5–1 | 2–3 |
Rule of Thumb
- Keep measurement frequencies well below the mounting resonance. For undamped accelerometers, ISO 5348 advises staying at or below about 20% (one-fifth) of the mounted resonance, which limits amplitude errors to a few percent.
- A one-third limit is only a rough screening rule: at one-third of the resonance the amplitude reading is already about 10–12% high.
- Above these limits, amplitude errors climb quickly.
Možete staviti brojeve na ovo za danu masu senzora i krutost kontakta sa kalkulatorom rezonancije montaže akcelerometra, što je najbrži način da potvrдite da odabrana montaža neće utjecati na mjerenje ležaja.
5. Najbolje Prakse
Prilagodite metodu primjeni
- Analiza ležaja na visokoj frekvenciji: samo stud ili ljepilo.
- Općenita mašinerija ispod 1 kHz: magnetno je prihvatljivo.
- Pregled: ručno za brzinu, zatim potvrдite boljom montažom.
Trajne instalacije
- Izbušite i navrtajte rupe za stuд montažu.
- Koristite spoj za zaključavanje navrtke.
- Zaštitite navrtane rupe kada se senzor uklanja.
- Dokumentujte svaku lokaciju mjerenja za ponovljivo praćenje.
Privremene instalacije
- Ljepilo za instalacije od više dana ili više sedmica.
- Magnetno za premjeravanje na rutama.
- Provjerite sigurnu pričvršćenost prije mjerenja.
- Očistite i magnetnu bazu i površinu za dobar kontakt.
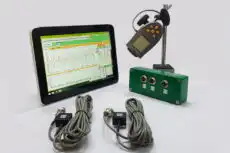
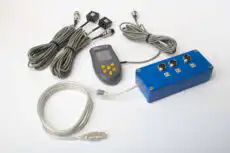
Ista disciplina se primjenjuje na senzore prenosivog balansera. Kada izvršavate balansiranje na licu mjesta pomoću instrumenta kao što je Balanset-1A, ponovljivi amplituda i faza zavise od montaže svakog akselerometra na isti način u istoj točki pri svakom mjerenju — čavao ili čista magnetska baza na pripremljenom kućištu ležaja — tako da se odgovori probne mase mogu smisleno uspoređivati. Bez obzira na tip senzora, od piezoelektričnog akcelerometra to a velometer, montaža temeljno određuje kvalitetu podataka. Prilagođavanjem tehnike zahtjevima, osiguravanjem krutog spajanja kroz pripremu površine i poštovanjem granica frekvencije zajedno se postižu točna, pouzdana mjerenja koja su neophodna za učinkovitu dijagnostiku i praćenje stanja stroja depend on.
