Broken Rotor Bars समजून घेणे

तुटलेले रोटर बार इंडक्शन मोटरच्या squirrel-cage रोटरमधील कंडक्टर बारचे पूर्ण फ्रॅक्चर आहेत. ही स्थिती मूलत: हीच आहे रोटर बार दोष, परंतु हा शब्द क्रॅक किंवा उच्च-प्रतिरोध जोडीऐवजी पूर्ण ब्रेक जोर देतो. जेव्हा एक किंवा अधिक बार तुटतात, तेव्हा विद्युत प्रवाह यापुढे त्यांच्यामधून वाहू शकत नाही, आणि परिणामी विद्युतचुंबकीय असममिती विशिष्ट निर्माण करते vibration आणि सद्यमान सिग्नेचर्स — sidebands spaced at the ध्रुव-पास वारंवारता (the number of poles × the स्लिप वारंवारता) around the running speed.
तुटलेल्या पट्ट्या विशेषतः धोकादायक आहेत कारण ते मुसळचे अपयश होतात. एक तुटलेल्या पट्टीचे कारण त्याच्या शेजारी असलेल्या पट्ट्यांमध्ये अतिरिक्त प्रवाह आणि ताण येतो, जे नंतर पुढे अपयश होऊ लागतात. लवकर पकडले गेल्यास — एक तुटलेल्या पट्टीच्या अवस्थेत — मोटर निरीक्षणाखाली महिन्यांसाठी चालू शकते; चुकवल्यास, दोष अनेक तुटलेल्या पट्ट्या आणि विनाशकारी रोटर अपयश पर्यंत वेग घेऊ शकतो जो बदलणे आवश्यक आहे.
१. रोटर पट्ट्या कसे तुटतात
थर्मल थकवा (सर्वाधिक सामान्य)
पुनरावृत्ती होणारे गरम आणि थंड होण्याचे चक्र हे मुख्य कारण आहे, आणि यंत्रणा चरण दर चरण अनुसरण करायोग्य आहे:
- स्टार्टअप प्रवाह: प्रारंभादरम्यान, रोटर लॉक-रोटर स्थितीमध्ये सामान्य प्रवाहापेक्षा ५–७× प्रवाह वहन करतो.
- थर्मल विस्तार: ॲल्युमिनियम बार मोठ्या प्रमाणात प्रसरण पावतात, ज्यांचा गुणांक सुमारे 23 µm/m/°C असतो.
- बंधने: लोखंडी गाभा खूपच कमी प्रसरण पावतो (सुमारे 12 µm/m/°C), जो बारना रोखून ठेवतो.
- ताण: हा विभेदक विस्तार पट्ट्यांमध्ये उच्च थर्मल ताण निर्माण करतो.
- थकवा: पुनरावृत्ती होणारे स्टार्ट चक्र कमी-चक्र चालविते थकवा.
- दरार उद्भव: दरारें सामान्यतः पट्टी-ते-एंड-रिंग जंक्शनवर सुरू होतात, सर्वोच्च-ताण बिंदू.
यांत्रिक ताण
- केंद्रापसारक बल at high speed.
- चालविण्यादरम्यान आणि प्रारंभाच्या वेळी विद्युत चुंबकीय बल.
- बाह्य स्रोतांकडून प्रसारित कंपन.
- प्रारंभाच्या वेळी किंवा अचानक भार बदलांमध्ये शॉक लोडिंग.
उत्पादन दोष
- सच्छिद्रता: कास्ट-अॅलुमिनियम रोटरमध्ये रिक्तता.
- खराब बाँडिंग: अपुरी पट्टी-ते-कोर बंधन.
- साहित्य समावेश: कास्टिंगमध्ये अडकलेले दूषक.
- कमजोर शेंड-रिंग जोडणी: खराब बार-टू-एंड-रिंग जोडणी.
ऑपरेटिंग परिस्थिती
- वारंवार सुरुवात: प्रत्येक प्रारंभ एक तापीय आणि यांत्रिक ताणाचा घटना आहे.
- उच्च-जडत्व भार: दीर्घ प्रवेग वेळ बारच्या तणावला वाढ करतात.
- रिव्हर्सिंग सेवा: प्लागिंग अत्यंत करंट तयार करते.
- सिंगल-फेजिंग: एक टप्पा गुणवंत हरकत झाल्यावर उर्वरित रोटर बारांवर ओव्हरलोड होते.
२. वैशिष्ट्यपूर्ण साइडबँड हस्ताक्षर
साइडबँड का दिसतात
वैशिष्ट्यपूर्ण निदान पद्धत कारण आणि परिणाम च्या स्पष्ट साखळीच्या माध्यमातून उद्भवते:
- टुटलेली बार करंट वाहू शकत नाही, रोटरमध्ये विद्युत असमरूपता निर्माण करते.
- That asymmetry lags the rotating field by the slip frequency fs — the difference between synchronous and rotor speed, in Hz.
- It produces a torque pulsation at the pole-pass frequency FP = number of poles × fs — equivalently twice the per-unit slip times the line frequency (2·s·fलाइन).
- टॉर्क पल्सेशन 1× व्हायब्रेशनला मॉड्युलेट करते जे सामान्य यांत्रिक असंतुलनातून येते.
- The result is sidebands spaced at running speed ± pole-pass-frequency intervals.
कंपन नमुना
- मध्यवर्ती शिखर: १× चालू गती (fr).
- निम्न साइडबँड: fr − FP (where FP = poles × fs is the pole-pass frequency).
- उच्च साइडबँड: fr + FP.
- बहुविध साइडबँड: fr ± 2FP, fr ± 3FP कंपन तीव्रता वाढते.
- सममिती: साइडबँड १× शिखर भोवती सममितीरित्या बसतात.
Worked Example
पूर्ण भार येथे ४-ध्रुव, ६० हर्ट्झ मोटर:
- समकालिक गती: १८०० RPM.
- वास्तविक गती: १७५० RPM (२९.१७ Hz).
- Slip: 50 RPM, so the slip frequency fs = 50/60 = 0.833 Hz.
- Pole-pass frequency: FP = 4 poles × 0.833 Hz = 3.33 Hz.
- कंपन शिखर येथे: 25.8 Hz, 29.17 Hz and 32.5 Hz.
- A broken bar is confirmed by the symmetric sidebands at ±3.33 Hz.
कारण स्लिप वारंवारता या नमुना संपूर्ण आधार आहे, प्रश्नातील मोटरसाठी हे अचूकपणे मोजणे फायदेशीर आहे; मोटर स्लिप & वास्तविक RPM कॅल्क्युलेटर नेमप्लेट डेटा थेट हे करते.
३. वर्तमान सिग्नेचर विश्लेषण (MCSA)
मोटर वर्तमान विश्लेषण भोवती एक जवळचा नमुना प्रकट करते लाईन वारंवारता:
- मध्यवर्ती शिखर: रेषा वारंवारता (५० किंवा ६० हर्ट्झ).
- साइडबँड्स: fलाइन ± 2·s·fलाइन, where s is the per-unit slip — the same ±FP spacing as in vibration, because 2·s·fलाइन equals the pole-pass frequency.
- उदाहरण: the 4-pole motor above (s = 50/1800 ≈ 2.8%) shows sidebands at 60 ± 3.33 Hz — that is, at 56.7 Hz and 63.3 Hz.
- फायदा: अनिरूपक आणि सतत निरीक्षणासाठी उपयुक्त.
- संवेदनशीलता: बहुतेक वेळा अचूक मोटर पट्टे हे कंपनापेक्षा आधी शोधते. द मोटर विद्युत दोष वारंवारता कॅल्क्युलेटर हे अचूक वर्तमान साइडबँड भविष्यद्वाणी करते.
४. प्रगती टप्पे
एकल तुटलेली पट्टी
- लहान साइडबँड दिसतात, १× शिखराच्या सुमारे २०–४०%.
- हलका टॉर्क स्पंदन, बहुतेक वेळा अदृश्य.
- मोटरचे कार्यप्रदर्शन जवळजवळ सामान्य आहे.
- मोटर निरीक्षणाखाली महिने धरून चालू शकते.
- तरीही बदलण्याची योजना केली पाहिजे.
एकाधिक समीप तुटलेल्या पट्टी
- मजबूत साइडबँड, १× शिखराच्या ५०% पेक्षा जास्त.
- लक्षणीय टॉर्क स्पंदन.
- स्लिप आणि तापमान वाढले.
- समीप पट्टीचा अतिताप होत असल्याने प्रगती वेगवान होत आहे.
- बदलणे जरूरी आहे — काही आठवड्याचा प्रश्न आहे.
गंभीर स्थिती
- साइडबँड्स 1× शिखर मोठेपणा ओलांडू शकतात.
- चालविलेल्या उपकरणापर्यंत पोहोचणारी गंभीर टॉर्क नाडी.
- उच्च कंपन आणि तापमान.
- एंड-रिंग विफलता किंवा संपूर्ण रोटर विघटनाचा जोखीम.
- तात्काळ बदलण्याची आवश्यकता आहे.
5. क्षेत्रात शोधा
कंपन विश्लेषण
The defining challenge is resolution: the sidebands sit only a few hertz from the 1× peak (at the pole-pass frequency, typically 1–4 Hz), so the analyser must separate them cleanly.
- उच्च-रेजोल्यूशन वापरा FFT — 0.2 Hz रेजोल्यूशनपेक्षा चांगले — साइडबँड्स सोडवण्यासाठी; FFT रेजोल्यूशन कॅलक्युलेटर लाइन संख्या आणि स्पॅन निवडण्यात मदत करतो.
- भार अंतर्गत मोटर चाचणी करा, कारण साइडबँड्स वर्तमान प्रवाहाने वाढतात.
- Calculate the expected slip and pole-pass frequency for the motor in advance.
- Search the spectrum for symmetric sidebands at ±FP 1× शिखराच्या सभोवतालच.
- साइडबँड मोठेपणा कालांतराने ट्रेंड करा.
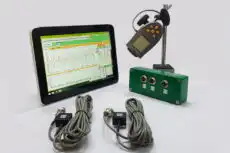
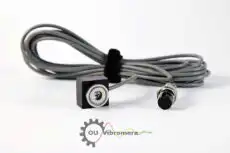
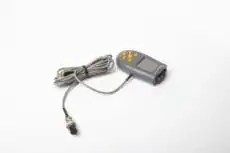
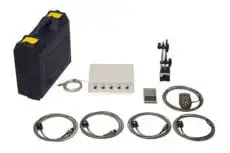
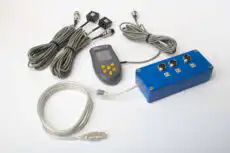
हे काम पोर्टेबल साधनांच्या पोहोचमध्ये अच्छादित आहे. Balanset सारख्या दोन-चैनेल विश्लेषक Balanset-1A captures the vibration spectrum at the motor bearing while its optical laser tachometer reads true shaft speed, letting you fix the precise 1× frequency, compute the slip, and look for the pole-pass-spaced sidebands that confirm broken bars — all with the motor running under its normal load. Because the same instrument also measures 1× amplitude and phase, it cleanly separates a genuine rotor-bar signature from a simple चालू वेग असंतुलन जो रोटर बदलण्याऐवजी संतुलन करणे आवश्यक आहे असा असंतुलन।
MCSA चाचणी
- मोटर लीड्सवर वर्तमान जाचक क्लॅम्प करा।
- वर्तमान तरंगरूप प्राप्त करा आणि त्याचा FFT मोजा।
- f वर साइडबंडचा शोध घ्यालाइन ± 2·s·fलाइन (that is, fलाइन ± FP).
- निरोगी मोटर बेसलाइनच्या विरुद्ध तुलना करा।
- हे कंपन लक्षणे स्पष्ट होण्यापूर्वी समस्या झंकृत करू शकते।
6. सुधारात्मक कारवाई
तात्काळ प्रतिक्रिया
- निरीक्षण वारंवारता वाढवा — मासिक, नंतर साप्ताहिक, नंतर दैनिक।
- साइडबंड मोठेपणाची वृद्धी दर ट्रॅक करा ट्रेंड विश्लेषण.
- स्पेअर मोटर ऑर्डर करा किंवा रोटर बदली योजना करा।
- शक्य असल्यास ड्यूटी सायकल कमी करा, स्टार्ट कमी करा।
- अपयशाचे विश्लेषण करण्यासाठी प्रगती दस्तऐवज करा।
दुरुस्ती पर्याय
- रोटर बदली: मोठ्या मोटर्सचा (100 HP पेक्षा जास्त) सर्वात विश्वसनीय पर्याय।
- रोटर पुनः कास्टिंग: विशेषीकृत दुकानांना अॅल्युमिनियम रोटर पुनः कास्ट करू शकतात।
- मोटर बदली: बहुधा लहान मोटर्स (50 HP पेक्षा कमी) साठी सर्वात किफायतशीर मार्ग।
- मूल कारण तपास: बार्स का असफल होने का कारण निर्धारित करें ताकि इसे दोबारा होने से रोका जा सके।
प्रतिबंध
- स्टार्टिंग करंट और थर्मल स्ट्रेस को कम करने के लिए सॉफ्ट स्टार्टर्स या VFDs का उपयोग करें।
- उच्च-जड़त्व लोड के लिए स्टार्टिंग फ्रिक्वेंसी को सीमित करें।
- मोटर्स को वास्तविक ड्यूटी साइकल के लिए रेट किए जाने वाले - उच्च-चक्र सेवा के लिए बार-बार-स्टार्ट डिज़ाइन।
- पर्याप्त मोटर वेंटिलेशन और कूलिंग सुनिश्चित करें।
- सिंगल-फेजिंग स्थितियों से सुरक्षा प्रदान करें।
टूटे हुए रोटर बार मोटर की विफलता के लगभग 10-15% के लिए खाते हैं motor failures, yet they leave an unmistakable pole-pass sideband signature that supports reliable early detection by vibration or current analysis. Understanding the thermal-fatigue mechanism, recognising the characteristic sideband pattern, and embedding the checks in a स्थिती-नियंत्रण कार्यक्रम एक मोटर को एक नियोजित आधार पर प्रतिस्थापित किया जा सकता है — एक भी टूटे हुए बार के कारण कई बार विफलता और विस्तारित अनियोजित डाउनटाइम में बदलने से पहले।
