Industrial Fan Balancing: In-Situ Procedure by Fan Type
A field technician's reference for balancing centrifugal, axial, radial, and exhaust fans — from diagnosing whether vibration is actually imbalance to verifying corrections against ISO 14694 limits.
Why Does the Fan Shake? Diagnosis First
The most common mistake in fan balancing is starting before you know what you're correcting. Not every vibration is imbalance. Bolting on correction weights when the real problem is misalignment, looseness, or resonance won't fix anything — and can make things worse.
Start with vibration measurement. Run the fan at operating speed and capture an FFT spectrum. What you see in the spectrum tells you what to do next.
Dominant peak at running speed. Phase is stable. Balancing will fix this.
Strong second harmonic, elevated axial vibration. Fix alignment first.
Many harmonics (3×, 4×, 5×…). Cracked frame, loose bolts, foundation damage.
Vibration jumps sharply at one RPM. Change speed or stiffness — not balance.
What actually causes fan imbalance? In industrial settings, these are the top sources — and they differ by environment:
Material buildup. The number one cause for exhaust fans, induced draft fans, and any fan handling particulate. Dust, ash, calcium deposits, sugar, cement powder — they accumulate unevenly across blades. Cleaning alone can cut vibration by 30–50%. If you balance a dirty fan, the correction compensates for the deposit — and the next time a chunk falls off, you're back to square one.
Wear and corrosion. Abrasive process streams erode blade leading edges unevenly. Chemical fumes corrode blades at different rates depending on airflow patterns. Over months, the mass distribution shifts.
Deformation. Thermal cycling on hot-gas fans causes progressive warping. Impact damage from ingested objects bends blades. Even a single bent blade at 1,500 RPM produces measurable imbalance.
A clean fan is half balanced. Before you mount a single sensor, clean the impeller down to bare metal. Inspect every blade for cracks, deformation, and loose rivets. Tighten hub bolts. Then measure. Half the time, vibration drops enough that no correction is needed.
ISO 14694 and ISO 21940: Which Limits Apply
Two standards govern industrial fan vibration. One is fan-specific (ISO 14694), the other is general rotor balancing quality (ISO 21940, formerly ISO 1940). You'll use both — one to set the vibration limit on the installed machine, the other to define the rotor balance quality during assembly or shop balancing.
ISO 14694 — Fan BV categories
ISO 14694 defines Balance and Vibration categories specifically for industrial fans. The commissioning vibration limit (velocity, mm/s RMS, measured on bearing housings) depends on the application:
| Category | Application | Commissioning limit | Alarm level |
|---|---|---|---|
| BV-3 | Standard industrial duty — ventilation, general exhaust, boiler fans up to 300 kW | 4.5 mm/s | 9.0 mm/s |
| BV-4 | Process-critical fans — petrochemical, power plant ID/FD fans | 2.8 mm/s | 5.6 mm/s |
| BV-5 | Precision fans — semiconductor cleanrooms, laboratory HVAC | 1.8 mm/s | 3.5 mm/s |
ISO 21940-11 — Balance quality grades (G)
For the rotor itself (impeller + shaft assembly), balance quality is expressed as grade G (mm/s):
| Grade | Application | Notes |
|---|---|---|
| G 16 | Agricultural fans, large low-speed units | Acceptable below ~600 RPM |
| G 6.3 | Most general industrial fans | Standard target for BV-3 class |
| G 2.5 | Turbine-driven fans, high-speed units, BV-4/BV-5 class | Needed above ~3,000 RPM or for process-critical fans |
Use ISO 14694 BV to decide when the installed fan vibration is acceptable — this is your pass/fail criteria in the field. Use ISO 21940 G when sending an impeller to a balancing shop or specifying balance quality to a fan manufacturer. For most general industrial fans: BV-3 + G 6.3. For process-critical: BV-4 + G 2.5.
Balancing by Fan Type
The trial weight method works on every fan. But the practical details — how many correction planes, where to attach weights, what to watch for — depend on the impeller geometry and the operating environment.
Centrifugal fans (backward-curved, forward-curved)
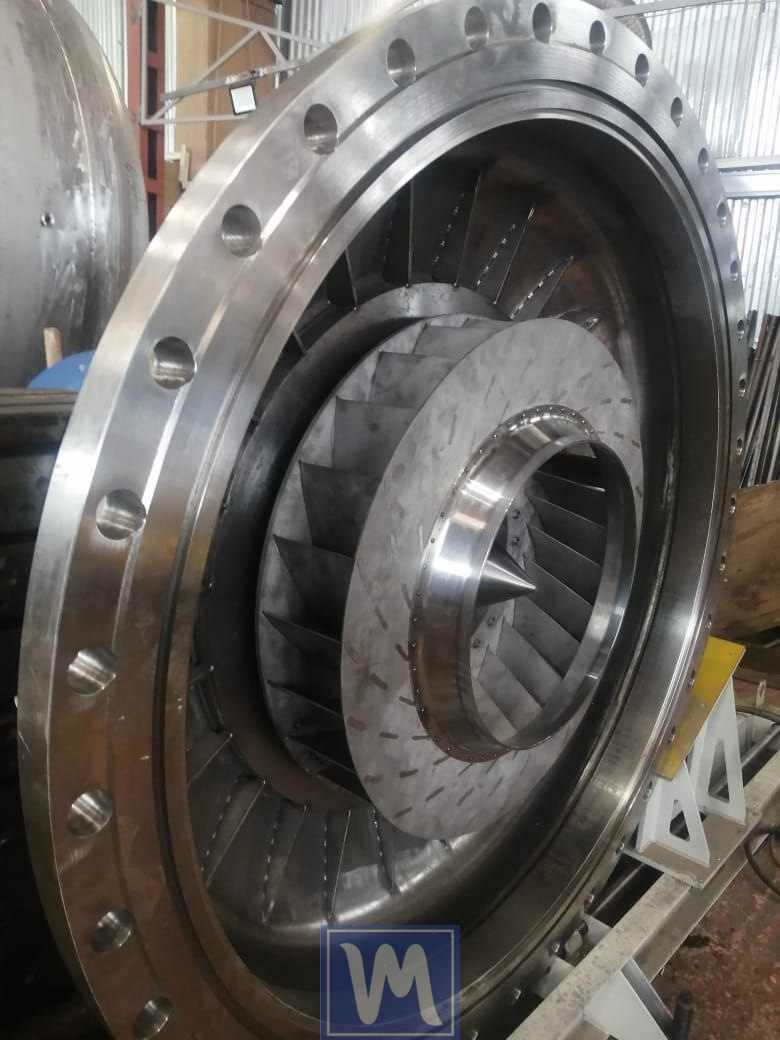
The workhorse of industrial HVAC and process ventilation. Narrow wheels (width < ½ diameter) → one-plane balancing. Wide wheels and double-inlet designs → two-plane, sensors on both bearings. Product buildup inside hollow blade cavities and on the backplate is common. Correction weights go on the hub disc or backplate — welded for permanence.
Axial fans (propeller-type)
Disc-like rotors — almost always single-plane. Weights go on the hub or blade root. Avoid adding mass to blade tips — it changes aerodynamic behavior. Watch for blade pitch angle variation: unequal pitch produces aerodynamic vibration at blade-pass frequency, which balancing cannot correct. Verify pitch with a protractor before balancing.
Exhaust & induced draft fans
Hot, dirty, corrosive — the toughest balancing environment. Balance hot, not cold. Thermal distortion changes the balance state; a correction applied at ambient may be wrong at 200°C process temperature. Use welded steel weights — adhesive and tape fail at temperature. Access is often limited; request or install inspection doors before the balancing visit.
Radial-blade (paddle) fans
Flat radial blades, often used for material handling (wood chips, grain, waste). Massive wear on leading edges from abrasive particles. The simplest geometry to balance — weights weld directly to the hub disc. But check blade thickness: if blades are worn below minimum thickness, replace them before balancing.
Single-plane vs. two-plane: the quick rule
Disc-like rotor (width much less than diameter) → single-plane. Covers: axial fans, narrow centrifugal wheels, narrow radial wheels.
Drum-like rotor (width comparable to diameter) → two-plane. Covers: wide centrifugal wheels, double-inlet fans, long squirrel-cage blowers.
If in doubt, start with single-plane. If vibration doesn't drop below the ISO limit, switch to two-plane — the imbalance includes a couple (rocking) component that single-plane can't correct.
The Balancing Procedure — Step by Step
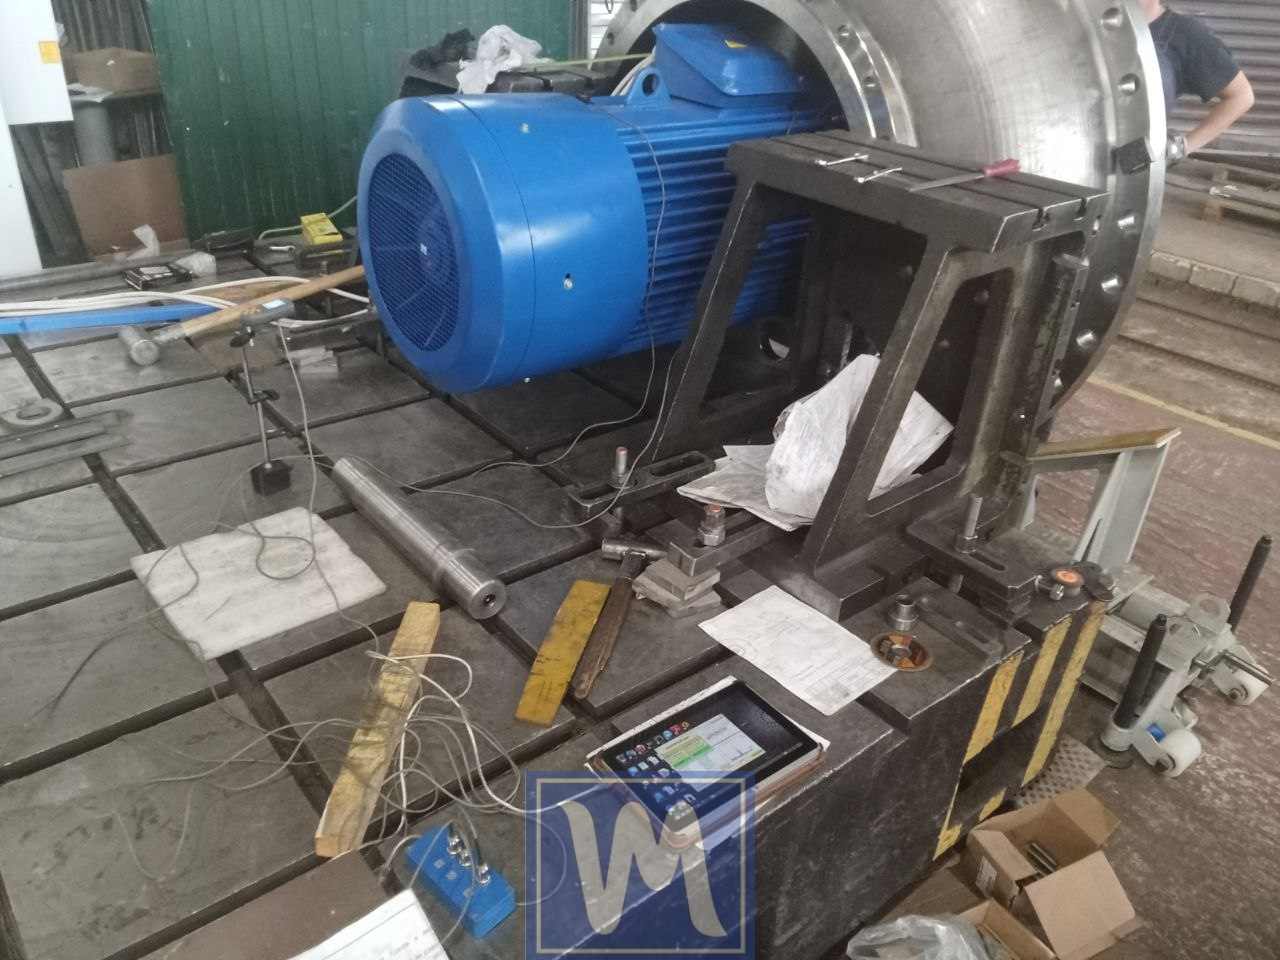
Equipment: Balanset-1A portable balancer, laptop, accelerometer(s), laser tachometer, trial weight set, correction weights (steel), welding equipment for permanent attachment.

Clean, inspect, and pre-check
Clean the impeller completely — every blade, every cavity, the backplate, the hub. Inspect for cracks, bent blades, missing rivets, and worn leading edges. Check hub bolts, set screws, and keyway condition. Verify that bearing housings are tight on the foundation and that there's no soft foot.
Run the fan and capture an FFT spectrum. Confirm that the dominant vibration is at 1× RPM (imbalance). If 2× or higher harmonics dominate, address the mechanical cause before balancing.
Install sensors and tachometer
Mount the accelerometer radially on the impeller-side bearing housing (the bearing closest to the fan wheel). Use a magnetic mount on cast iron housings; bolt-on pads for stainless or aluminum. For two-plane jobs, install a second sensor on the opposite bearing.
Attach reflective tape to the shaft or a visible rotating surface. Position the laser tachometer with clear line-of-sight. Connect to the Balanset-1A, launch the software, verify RPM readout.
Record initial vibration (Run 0)
Run the fan at operating speed. Wait for readings to stabilize — 15–30 seconds for most fans, longer for large thermal-loaded units. The Balanset-1A displays vibration velocity (mm/s) and phase angle (°).
This is your baseline. Example: 18.6 mm/s at 72° — deep into ISO 14694 BV-3 Zone C ("tolerable short-term only").
Trial weight run (Run 1)
Stop the fan. Attach a trial weight to a blade or hub at a known angular position. The weight should be heavy enough to change vibration by at least 20–30% but light enough not to cause damage. For a 200 kg impeller, start with 20–40 g.
Run the fan, record the new vibration vector. The software now has two data points and computes the influence coefficient — how the rotor responds to mass at a given location.
Install correction weight
The software displays: "Install 65 g at 195°". Remove the trial weight. Prepare a correction mass — weigh it on electronic scales. Weld it at the computed angle.
For hot exhaust fans: use mild steel or stainless steel weights, tack-welded with full penetration. For ATEX/explosion-proof environments: bolt-on weights only (no welding). For clean-air HVAC: clamp-on weights or balancing putty may be acceptable if vibration levels are moderate.
Verify and trim (Run 2)
Run the fan again. Residual vibration should be below the ISO 14694 commissioning limit: 4.5 mm/s for BV-3, 2.8 mm/s for BV-4. If it's above target, the software suggests a trim — a small additional weight to fine-tune. In practice, 80% of fan jobs are complete after one correction pass.
Secure and document
Weld the correction weight permanently (full bead, not just tack). Save the Balanset-1A report — it archives vibration spectra, correction mass/angle, and before/after comparison. This data feeds into your maintenance management system and provides a baseline for future trending.
Field Report: 132 kW Induced Draft Fan
A cement plant in Southern Europe had a 132 kW induced draft fan pulling kiln exhaust gas at 280°C. The fan was a single-inlet centrifugal design, 1,800 mm wheel diameter, running at 1,470 RPM. Bearings had been replaced twice in 14 months — the plant was averaging one unplanned stop per quarter from this fan alone.
Vibration monitoring showed readings climbing above 15 mm/s within weeks of each bearing change. The maintenance team assumed bearing quality was the problem and switched suppliers. It wasn't the bearings — it was the impeller. Calcium andite deposits accumulated unevenly on the backplate and in blade cavities, creating progressive imbalance.
We arrived during a scheduled kiln stop. First step: cleaning. The crew pressure-washed the impeller — vibration dropped from 22 mm/s to 11.4 mm/s. Still above BV-3 limit. We set up the Balanset-1A, ran the trial weight, and applied correction — 85 g welded to the backplate at 218°.
Induced draft fan — cement kiln exhaust, 280°C
132 kW centrifugal fan, 1,800 mm wheel, 1,470 RPM. Calcium deposits on impeller caused progressive imbalance. Two bearing failures in 14 months before intervention.
Key decision after that job: the plant added quarterly vibration checks to their maintenance plan and installed a permanent access door on the fan casing for faster sensor placement. Bearing replacement cost avoided in year one: approximately €4,500. The Balanset-1A paid for itself on the first job.
When Balancing Doesn't Fix It
You've cleaned, measured, corrected, and vibration is still above the limit. Before you repeat the balancing cycle, check these:
1. Structural resonance. If the fan's operating RPM coincides with a natural frequency of the support frame, pedestal, or ductwork, vibration amplifies regardless of balance quality. Test: vary the speed by 5–10% up and down. If vibration drops sharply with a small RPM change, that's resonance. The fix is stiffening the structure or changing operating speed — not adding more correction weight.
2. Soft foot. Uneven contact at the motor or bearing pedestal feet. When you tighten one bolt, the frame distorts and adds stress. Loosen each foot bolt one at a time and check for movement with a dial indicator. If any foot lifts more than 0.05 mm, shim it. Soft foot can add 2–4 mm/s of vibration that no amount of balancing will remove.
3. Misalignment. If the fan is belt-driven, check belt tension and pulley alignment. If direct-driven, check coupling alignment (angular + offset). Misalignment shows up as 2× RPM in the FFT spectrum and elevated axial vibration. Fix alignment before balancing.
4. Thermal bow (exhaust fans). The impeller changes shape as it heats up. A balance correction applied cold may be wrong at operating temperature. Solution: run the fan at process temperature for 30+ minutes, then measure and balance under hot conditions. This is harder but necessary for fans above 150°C.
Step 1: FFT spectrum — what frequency dominates? Step 2: Coast-down test — does vibration track speed smoothly (imbalance) or spike at one RPM (resonance)? Step 3: Phase stability — is the phase angle repeatable run to run (imbalance) or jumping around (looseness/clamping)? The Balanset-1A captures all three. If the answer isn't imbalance, stop balancing and fix the root cause.
After Impeller Replacement: Always Rebalance
A new impeller from the factory is shop-balanced — usually to G6.3 or better. But the shop balance is done on the manufacturer's balancing machine, not on your shaft, in your bearings, with your coupling.
When the new impeller is installed, every interface introduces error: key fit, taper seat, coupling alignment, set screw position. Even 20 microns of eccentricity at the hub — invisible to the eye — creates measurable imbalance at 1,470 RPM.
Always plan for a final in-situ trim balance after installation. The correction is usually small (10–30 g), but the difference in bearing life is large. Skipping this step is the most common reason new impellers "vibrate from day one."
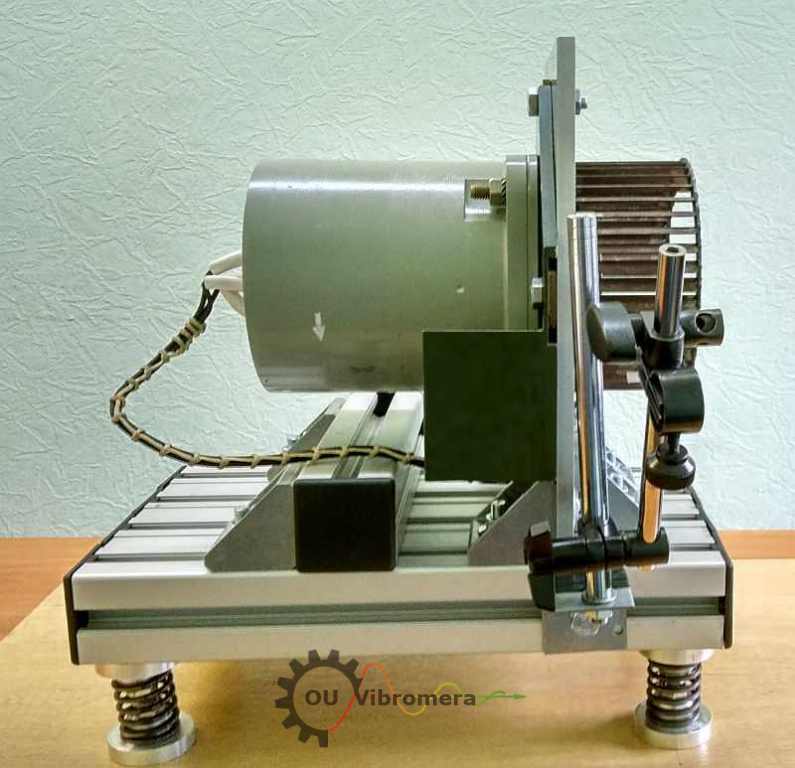
Equipment: Balanset-1A Specifications
The procedure above uses the Balanset-1A portable balancing system. Key specs for fan work:
Kit includes two accelerometers, laser tachometer, reflective tape, magnetic mounts, software on USB, and carrying case. No subscriptions. No recurring license fees.
Fans vibrating above ISO limits?
Balanset-1A handles everything from a 300 mm duct fan to a 3-meter ID fan. One device, no recurring fees, 2-year warranty, DHL worldwide.
Frequently Asked Questions
Ready to stop replacing bearings and start fixing the root cause?
Balanset-1A. One device for every fan — from a rooftop exhaust to a 3-meter ID fan. Ships worldwide via DHL. No subscriptions.

0 Comments