ਕੇਬਲ ਮੁਆਵਜ਼ੇ ਨੂੰ ਸਮਝਣਾ
ਕੇਬਲ ਮੁਆਵਜ਼ਾ is the electronic adjustment in eddy-current proximity probe systems that corrects for the effect of extension-cable length on system ਕੈਲੀਬ੍ਰੇਸ਼ਨ. These probes are calibrated as a complete system — probe, cable, and proximitor electronics together — and the cable’s capacitance and inductance influence the RF oscillator frequency and impedance, which in turn shifts the all-important voltage-to-gap relationship. Cable compensation re-tunes the proximitor so that measurements stay accurate when the installed cable length differs from the standard calibration length (typically 5 m or 9 m).
Done properly, compensation keeps ਵਿਸਥਾਪਨ measurements accurate regardless of cable-length variation in field installations. That gives engineers freedom in where they route and place sensors while preserving the measurement integrity that shaft ਵਾਈਬ੍ਰੇਸ਼ਨ ਨਿਗਰਾਨੀ, clearance assessment, and ਰੋਟਰ ਡਾਇਨਾਮਿਕਸ analysis depend on.
1. Why Cable Compensation Is Needed
How the Cable Becomes Part of the Sensor
An eddy-current system is not a probe with a passive wire attached — the cable is an electrical element of the measuring circuit itself:
- Every extension cable has its own capacitance and inductance.
- That cable becomes part of the proximitor’s RF oscillator circuit.
- A different cable length means a different total capacitance and inductance.
- The change shifts the oscillator’s frequency and impedance.
- That in turn alters the output-voltage-versus-gap relationship — the very curve the system relies on.
- The net result is a measurement error if the change is not compensated for.
How Large Is the Effect?
- The error can reach 5–20% for large changes in cable length — far too much for a protection-grade measurement.
- ਦੋਵੇਂ ਸੰਵੇਦਨਸ਼ੀਲਤਾ (the slope, in V/mil or V/mm) and the offset are affected.
- The usable linear range of the probe shifts as well.
- An uncompensated measurement is, in practice, unreliable for anything quantitative.
2. Compensation Methods
There are three established ways to deal with cable length, trading flexibility against accuracy.
ਇਲੈਕਟ੍ਰਾਨਿਕ ਮੁਆਵਜ਼ਾ (ਆਧੁਨਿਕ ਸਿਸਟਮ)
- Adjustable components inside the proximitor — typically potentiometers or DIP switches.
- Set once for the specific installed cable length.
- Restores the system’s calibrated accuracy.
- Some modern proximitors auto-detect cable length and compensate automatically.
Factory Calibration for a Specific Length
- The whole system is calibrated with the exact cable that will be installed.
- No field compensation is then required.
- It is the most accurate method available.
- It is also the least flexible — changing the cable later forces a recalibration.
ਕਈ ਕੈਲੀਬ੍ਰੇਸ਼ਨ ਪੁਆਇੰਟ
- The system is characterised at several cable lengths.
- Calibration data is supplied for each one.
- The user simply selects the calibration that matches the installed length.
3. Standard Cable Lengths and Cable Type
ਆਮ ਲੰਬਾਈਆਂ
- 5 metres (16 ft): a common standard in the US.
- 9 metres (30 ft): a common standard internationally.
- 1 metre: a short system for special, close-coupled applications.
- ਕਸਟਮ: effectively any length is possible once compensation is applied.
ਐਕਸਟੈਂਸ਼ਨ ਕੇਬਲ
- A special low-noise coaxial cable, not ordinary signal wire.
- It has a specified capacitance per unit length — the figure compensation is built around.
- Typically RG-174 or a similar type.
- The correct cable type for the system must be used; a substitute changes the electrical behaviour.
4. Compensation Procedure
ਸੈੱਟਅਪ ਕਦਮ
- Measure total cable length: the probe lead plus the extension cable, combined.
- Consult the manual: find the compensation setting that corresponds to that length.
- Adjust the proximitor: set the compensation controls exactly as the manual specifies.
- ਪੁਸ਼ਟੀ ਕਰੋ: check the output at a known gap, or against a calibrator.
- ਦਸਤਾਵੇਜ਼: record the cable length and the compensation setting used.
ਤਸਦੀਕ
Verification is where compensation is proven, not assumed:
- Use a gap calibrator or a micrometer stand to set known gaps.
- Check the output voltage at each known gap.
- Confirm the sensitivity (V/mil or V/mm) matches specification.
- Confirm the offset — the output voltage at the nominal gap.
- Make sure the linear range is centred where the shaft will actually sit. A proximity probe gap-voltage tool helps set that centre point correctly.
5. Common Issues
ਗਲਤ ਮੁਆਵਜ਼ਾ
- ਲੱਛਣ: readings that do not match expectations, and a non-linear response across the gap range.
- ਕਾਰਨ: the wrong cable length entered, compensation never adjusted, or a damaged cable.
- ਪਛਾਣ: a routine calibration check exposes the error.
- ਹੱਲ: measure the actual cable length and set the compensation correctly.
ਕੇਬਲ ਦੀ ਲੰਬਾਈ ਅਣਜਾਣ
- A common situation on an existing installation where the length was never documented.
- Physically measure it, or estimate it from the cable routing.
- Adjust compensation while monitoring a known gap.
- Iterate until the output reads correctly at that gap.
ਮਿਲੀਆਂ-ਜੁਲੀਆਂ ਕੇਬਲ ਕਿਸਮਾਂ
- Different cable types carry different capacitance per metre.
- Compensation is built around one standard cable type.
- A non-standard cable can introduce error even when compensation is nominally “set”.
- Always use the manufacturer-specified cable to keep the assumption valid.
6. Why It Matters for Accuracy
ਵਾਈਬ੍ਰੇਸ਼ਨ ਮਾਪ
- Incorrect compensation produces ਐਂਪਲੀਟਿਊਡ (ਆਯਾਮ) errors in the vibration reading.
- That undermines the reliability of ਰੁਝਾਨ over time.
- It can misrepresent true ਵਾਈਬ੍ਰੇਸ਼ਨ ਗੰਭੀਰਤਾ.
- The consequence is false alarms — or, worse, real problems missed.
ਸਥਿਤੀ ਮਾਪ
- Absolute shaft position accuracy hinges on correct compensation.
- It directly affects clearance and bearing-clearance ਨਿਗਰਾਨੀ।
- Trip setpoints are only as trustworthy as the measurement behind them.
- Bad compensation can cause spurious trips — or fail to protect the machine when it matters.
7. Documentation Requirements
ਇੰਸਟਾਲੇਸ਼ਨ ਰਿਕਾਰਡ
Compensation is invisible once set, so the paperwork is what makes it maintainable:
- Total cable length for each channel.
- The compensation settings applied.
- The calibration verification data.
- All stored alongside the system documentation.
ਤਬਦੀਲੀ ਨਿਯੰਤਰਣ
- If a cable length is ever changed, the compensation must be updated.
- Recalibrate or at least re-verify after any such change.
- Document the modification so the next technician inherits the truth.
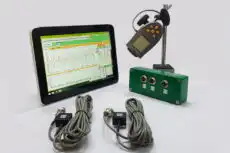
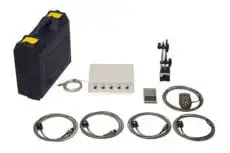
8. Where Cable Compensation Fits in Field Practice
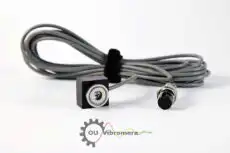
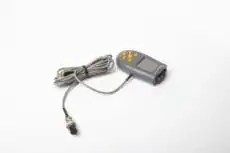
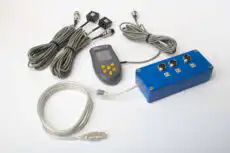
Cable compensation belongs to the world of permanently installed ਪ੍ਰੌਕਸਿਮਿਟੀ ਪ੍ਰੋਬ systems on critical turbomachinery, where the displacement reading must be trustworthy to the micron for ਮਸ਼ੀਨਰੀ ਸੁਰੱਖਿਆ. It is worth contrasting that with portable field work, where the workflow is different: when an engineer balances a machine in its own bearings with a portable instrument such as the Balanset-1A, the sensor is a seismic ਐਕਸੀਲਰੋਮੀਟਰ with a fixed, factory-characterised lead and an optical ਲੇਜ਼ਰ ਟੈਕੋਮੀਟਰ — so cable-length compensation is not a variable the user has to manage. Understanding cable compensation therefore helps an analyst know exactly which class of system needs this calibration step and which does not.
In summary, cable compensation is a critical but frequently overlooked aspect of eddy-current proximity probe systems. Compensating accurately for the real cable length, proving it through calibration checks, and documenting the settings are what allow these permanently installed displacement systems to deliver accurate, reliable data for shaft vibration monitoring, rotor position tracking, and machinery protection in critical turbomachinery.
