ರೋಟರ್ ಬಾರ್ ದೋಷಗಳನ್ನು ಅರ್ಥಮಾಡಿಕೊಳ್ಳುವುದು
ರೋಟರ್ ಬಾರ್ ದೋಷಗಳು — also called broken or cracked rotor bars — are fractures, cracks, or high-resistance connections in the conductor bars of a squirrel-cage induction ಮೋಟರ್ rotor. A squirrel-cage rotor is built from aluminium or copper bars embedded in the slots of a laminated iron core, with both ends of every bar joined by a pair of shorting rings (end rings). When a bar fractures, or an end-ring joint cracks, current can no longer flow cleanly through the damaged conductor. The result is electromagnetic asymmetry, pulsating torque, and a highly recognisable vibration and current signature marked by sidebands ಇವುಗಳ ನಡುವೆ ಅಂತರವಿಟ್ಟು ಧ್ರುವ-ಪರಿಗಮನ ಆವರ್ತನ (the number of poles × the slip frequency).
Rotor bar failures account for an estimated 10–15% of induction-motor breakdowns. They are dangerous precisely because they are progressive: a single broken rotor bar overloads its neighbours, and what begins as one cracked conductor can cascade into multiple breaks, severe torque pulsation, and eventual rotor destruction if it is not caught early.
1. Types of Rotor Bar Defects
The fault family covers several distinct mechanisms, all of which disturb the rotor’s electrical symmetry in similar ways:
- Broken rotor bars: A complete fracture of a conductor bar, usually located near an end ring where thermal and mechanical stress concentrate. A break almost always begins as a fatigue crack and progresses to a full separation.
- Cracked end rings: Fractures in the shorting rings that tie the bars together, most often at the bar-to-ring junction. Their electrical effect mirrors a broken bar. They are more common in large machines, in motors that start frequently, and on high-inertia loads.
- High-resistance joints: A poor electrical connection between bar and end ring caused by manufacturing flaws, thermal cycling, or corrosion. Symptoms resemble a broken bar but are often intermittent and produce more subtle signatures than a clean break.
- Rotor porosity: Casting voids in die-cast aluminium rotors that reduce the effective conductor cross-section. Porosity is a manufacturing defect that may lie dormant for years before progressing into cracks and breaks.
2. Why Rotor Bars Fail
Bar failures are driven by a combination of thermal, mechanical, manufacturing, and operational factors that compound one another over the motor’s life.
Thermal stress
Every start and stop cycles the rotor through expansion and contraction. Because aluminium expands far more than the surrounding iron core, this differential growth works the bars loose and fatigues the joints. Frequent starts deliver repeated thermal shocks, and any localised high-resistance spot becomes a hot spot that accelerates the damage.
ಯಾಂತ್ರಿಕ ಒತ್ತಡ
Conductor bars also endure ಕೇಂದ್ರಮುಖ ಬಲವನ್ನು (significant in high-speed machines), pulsating electromagnetic forces during normal running, and the heavy currents of starting that impose mechanical shock. External vibration transmitted from the driven load fatigues the bars further.
Manufacturing defects and operating conditions
Casting porosity, weak bar-to-end-ring bonding, material inclusions, and inadequate heat treatment all sow the seeds of later failure. In service, the worst offenders are frequent starting, high-inertia loads with long acceleration times, locked-rotor events with their extreme currents, and single-phasing — running with one supply phase lost, which forces a badly asymmetric current pattern through the cage.
3. The Vibration and Current Signature
The diagnostic hallmark of rotor bar damage is a family of sidebands clustered around running speed.
- ಕೇಂದ್ರ ಶಿಖರ: 1× ಚಾಲನ ವೇಗ (fr), the normal ರನ್ನಿಂಗ್-ಸ್ಪೀಡ್ line.
- ಪಾರ್ಶ್ವಪಟ್ಟಿಗಳು: symmetrical pairs at fr ± FP, ಎಫ್r ± 2FP, ಎಫ್r ± 3FP, where FP is the pole-pass frequency — the number of poles × the ಸ್ಲಿಪ್ ಆವೃತ್ತಿ (typically a few hertz).
- ಮಾದರಿ: evenly spaced, symmetrical sidebands at pole-pass intervals — quite unlike the sidebands of bearing faults, which sit around defect frequencies.
Calculating the slip and pole-pass frequencies
The slip frequency is the gap between synchronous and actual speed, expressed in hertz: fs = (Nಸಮಕಾಲಿಕ − Nವಾಸ್ತವಿಕ) / 60, and the sideband spacing is the pole-pass frequency FP = poles × fs. Consider a 4-pole, 60 Hz motor with a synchronous speed of 1800 rpm running at 1750 rpm under load. Then fs = (1800 − 1750) / 60 = 0.833 Hz, FP = 4 × 0.833 = 3.33 Hz, and the running-speed line sits at 29.17 Hz. Sidebands therefore appear at 29.17 ± 3.33 Hz — that is, at 25.8 Hz and 32.5 Hz. A ಸುಸಮ ಆವರ್ತನ ಕ್ಯಾಲ್ಕುಲೇಟರ್ ಮತ್ತು ಒಂದು motor slip calculator make this conversion painless when you are setting up a measurement on the shop floor.
Load dependence
Because slip — and therefore the current flowing in the broken bars — grows with load, the sidebands are load-sensitive. At no load they are minimal; under light load they begin to emerge; and at full load they are at their strongest and most diagnosable. The practical rule is simple: always test a suspect motor under normal operating load for best sensitivity.
Current signature (MCSA)
Motor Current Signature Analysis reveals the same physics in the electrical domain. Here the sidebands cluster around the ಲೈನ್ ಆವೃತ್ತಿ rather than running speed, and they appear at fಲೈನ್ ± 2·s·fಲೈನ್, where s is the per-unit slip — the same ±FP spacing as in vibration, since 2·s·fಲೈನ್ = FP. For the 4-pole 60 Hz motor above (s = 50/1800 ≈ 2.8%), that places sidebands at 56.7 Hz and 63.3 Hz. Their amplitude rises with the number of broken bars, and in some cases MCSA detects the fault earlier than vibration does. The same slip-related physics underlies the related ಧ್ರುವ-ಪರಿಗಮನ ಆವರ್ತನ used in ವಿದ್ಯುತ್ ದೋಷ ದೋಷನಿರ್ಣಯ.
4. Detection, Diagnosis, and Field Measurement
Resolving sidebands only a few hertz away from a dominant running-speed peak demands fine frequency resolution. A disciplined procedure runs as follows:
- Calculate the expected pattern: determine synchronous speed from poles and line frequency, measure the actual running speed, and compute the slip and pole-pass frequencies.
- Acquire a high-resolution spectrum: use a fine FFT resolution (better than about 0.2 Hz) so the closely-spaced sidebands separate cleanly from the 1× line. A FFT resolution calculator helps you pick the right span and line count.
- Search for sidebands: look for symmetric peaks at 1× ± pole-pass frequency and its multiples.
- Test under load: capture data with the motor carrying its normal operating load.
- Confirm the pattern: verify the sidebands are symmetrical and correctly spaced before declaring a diagnosis.
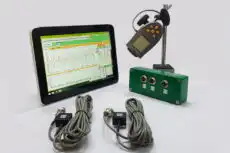
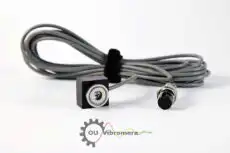
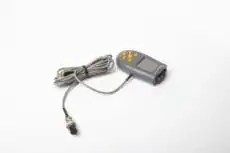
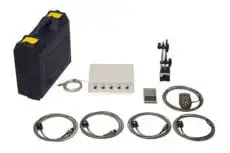
This kind of high-resolution spectrum capture is exactly the work a portable two-channel instrument such as the ಬ್ಯಾಲೆನ್ಸೆಟ್-1ಎ is built for. Working in the motor’s own bearings at operating speed, it records the running-speed line and its pole-pass sidebands directly on the running machine, so you can confirm a broken-bar diagnosis on site without disassembly and then track its severity over time.
ತೀವ್ರತಾ ಮೌಲ್ಯಮಾಪನ
A widely used rule of thumb ranks severity by the height of the sidebands relative to the 1× peak:
- Sideband below 40% of 1×: possibly a single cracked or broken bar — continue to monitor.
- 40–60% of 1×: a confirmed broken bar (or bars) — plan a replacement.
- Above 60% of 1×: multiple broken bars — replacement is urgent.
- Sidebands taller than the 1× peak: a severe condition demanding immediate action.
5. Consequences and Progression
Left unaddressed, a single defect rarely stays single. The damage evolves through recognisable stages:
- Initial failure (one bar): slight torque pulsation, small emerging sidebands, and minimal loss of performance. A motor may run for months in this state.
- Progressive failures (multiple bars): the current that should have flowed through the broken bar diverts into its neighbours, overheating them; thermal stress then breaks those bars too. Torque pulsations and vibration climb, and a machine can deteriorate from one to several broken bars within weeks.
- Severe condition: several adjacent broken bars produce violent torque pulsation, high vibration and noise, and rotor overheating. The endgame is complete rotor failure, with a real risk of collateral stator damage from the excessive circulating currents.
6. Corrective Actions and Prevention
Once a defect is confirmed, the response is to manage it deliberately rather than wait for failure:
- On detection: tighten the monitoring interval (monthly to weekly), confirm the diagnosis with MCSA, plan a motor or rotor replacement, stage a spare for critical duties, and investigate why the bars broke in the first place.
- Repair options: rotor replacement is the most reliable fix for large machines; complete motor replacement is often the most economical route for small ones; specialist shops can recast aluminium rotors; and a single broken bar may permit limited continued operation under close monitoring.
- ತಡೆಗಟ್ಟುವಿಕೆ: minimise frequent starts with soft starters or variable-frequency drives, eliminate single-phasing, ensure adequate ventilation and cooling, specify motors rated for the actual duty cycle, and rely on early detection to act before the fault multiplies.
Rotor bar defects are among the most diagnostically distinctive motor faults: their characteristic pole-pass sidebands make them reliably detectable through both ಕಂಪನ ಡಯಾಗ್ನಾಸ್ಟಿಕ್ಸ್ and current analysis. Catching them early turns a potential catastrophic rotor failure and extended unplanned downtime into a planned, manageable repair.
