認識 Vibromera.com —— 我們的新國際網站。 造訪 Vibromera.com →
現場筆記

聯合收割機動平衡校正:多年錯誤操作後的經驗教訓

我曾多年認為振動只是聯合收割機運行的一部分。事實並非如此。以下是我關於滾筒、轉子、切碎機及其他部件動平衡校正的所有知識——先是錯誤的方式,後是正確的方式。

更新 閱讀時間 18 分鐘

Disclosure: I'm the developer of the Balanset-1A. The field data below comes from my own service work on customer machines.

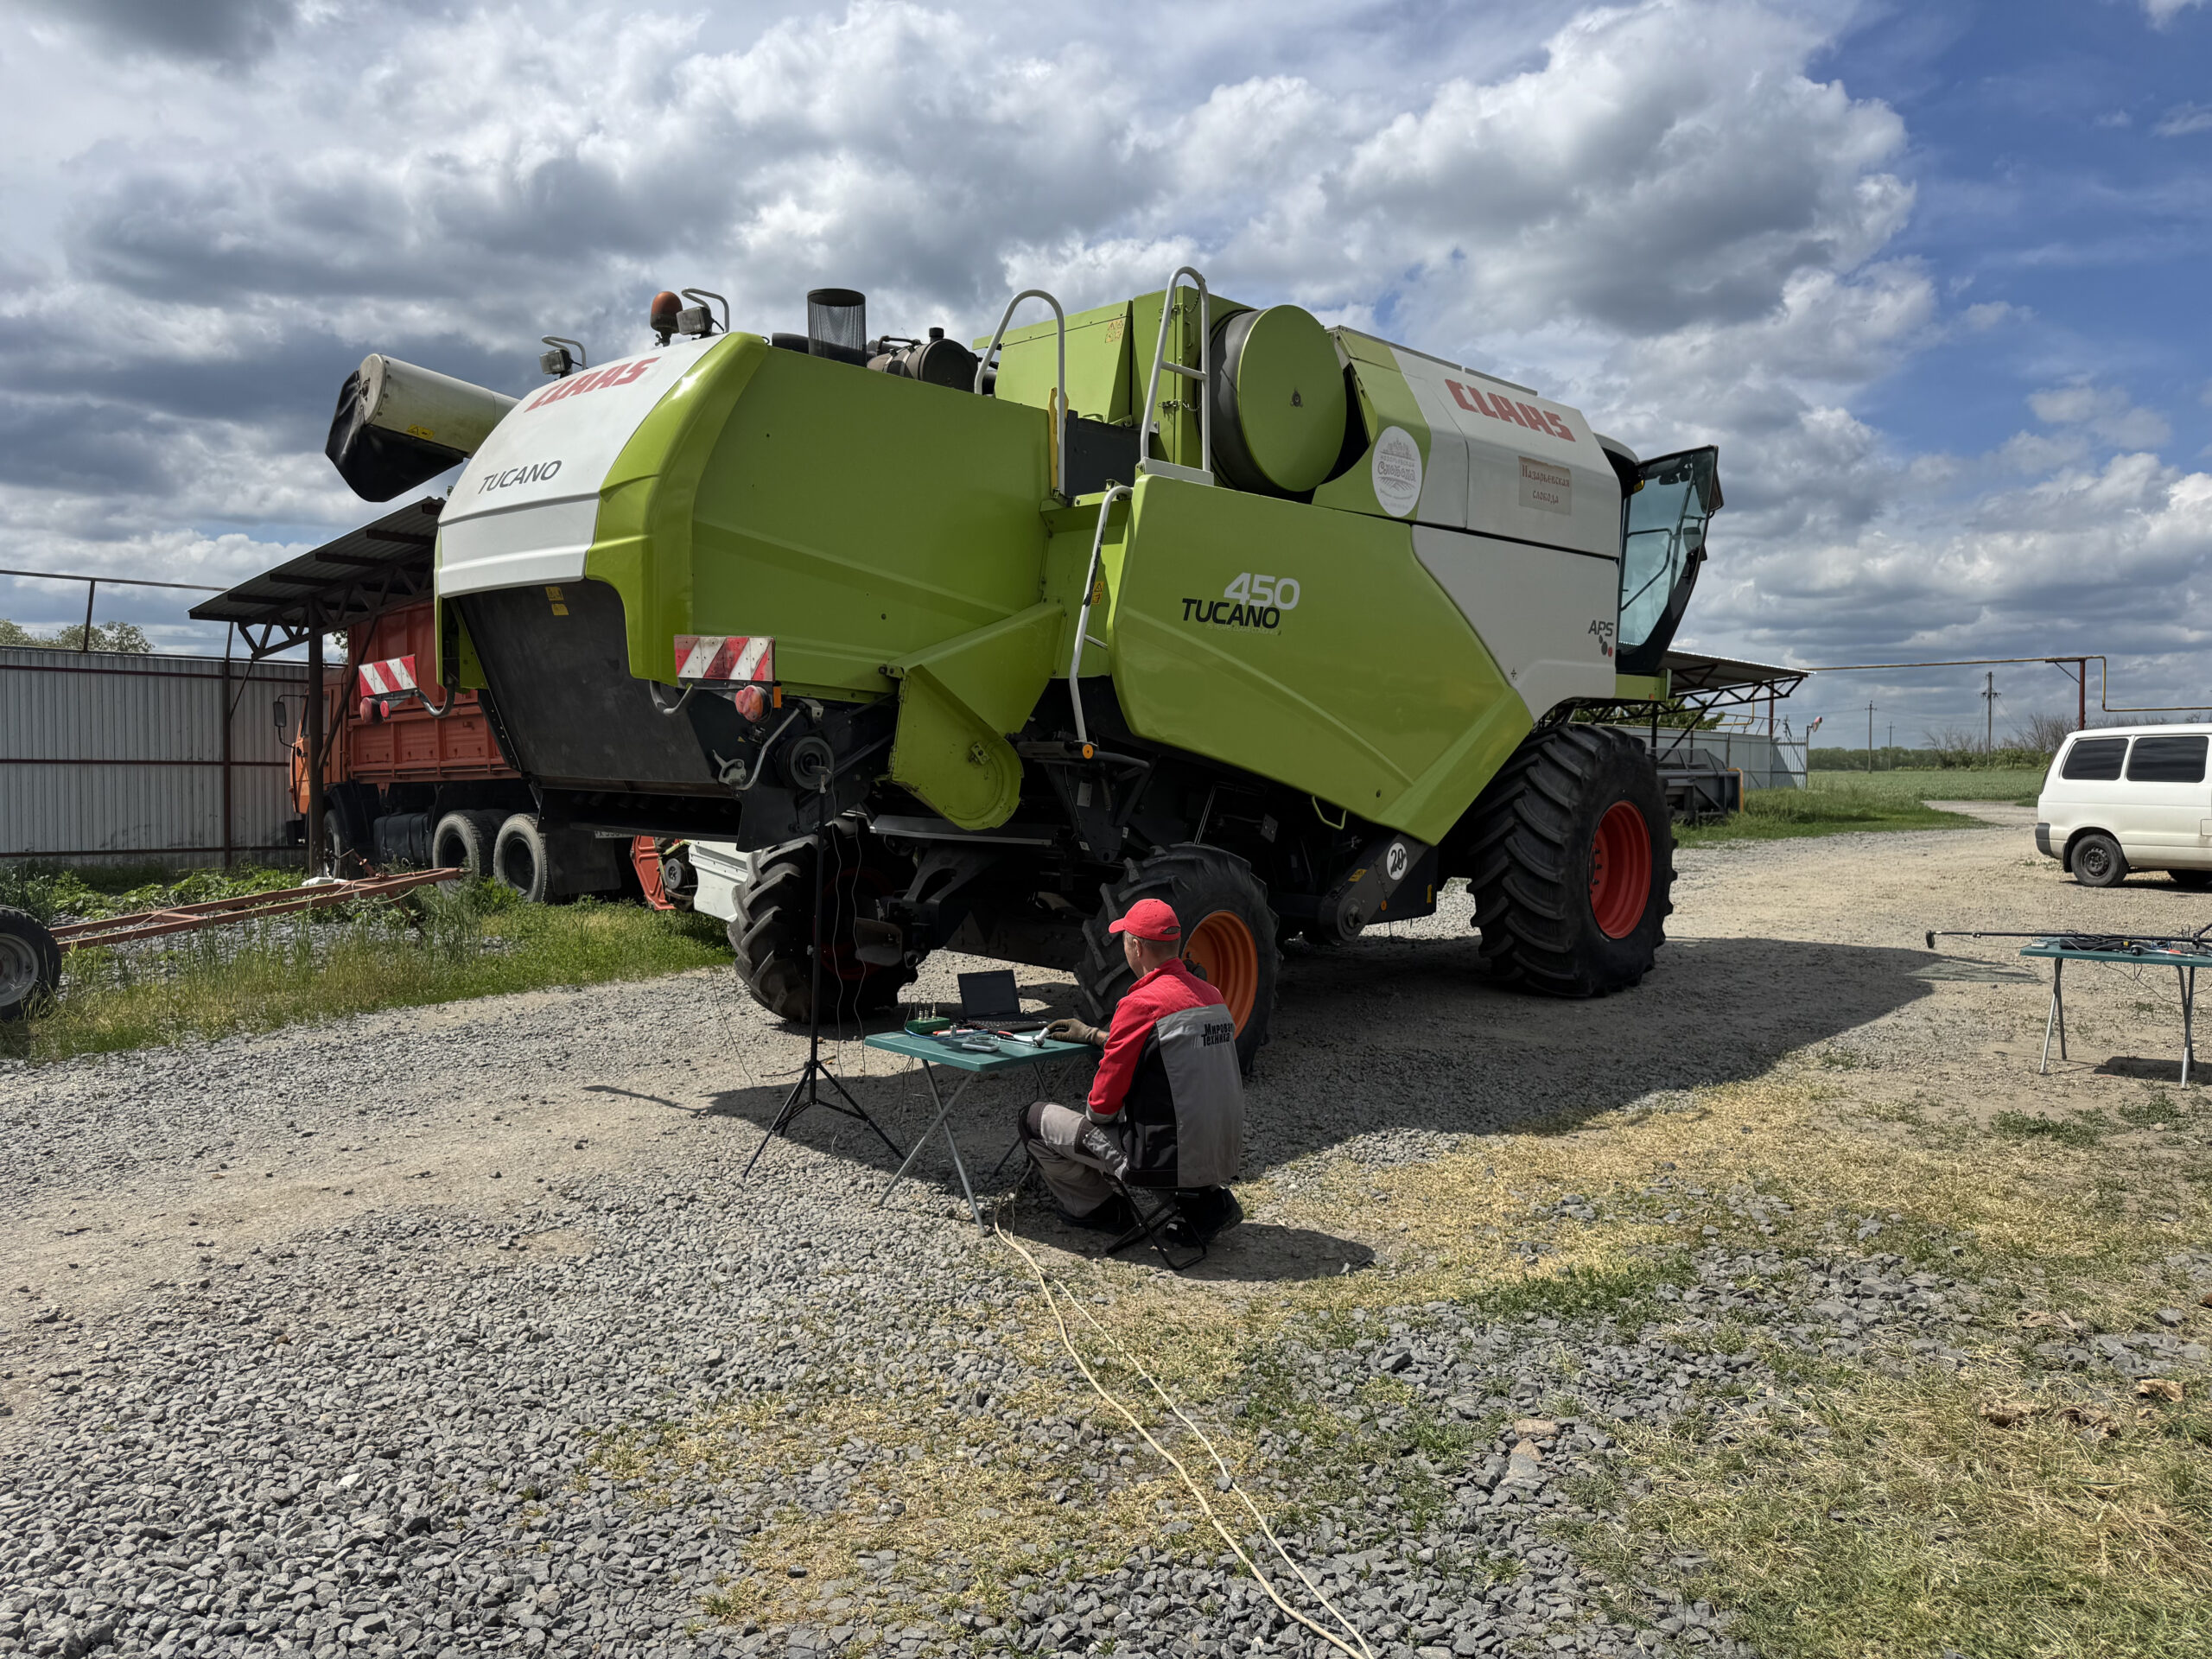
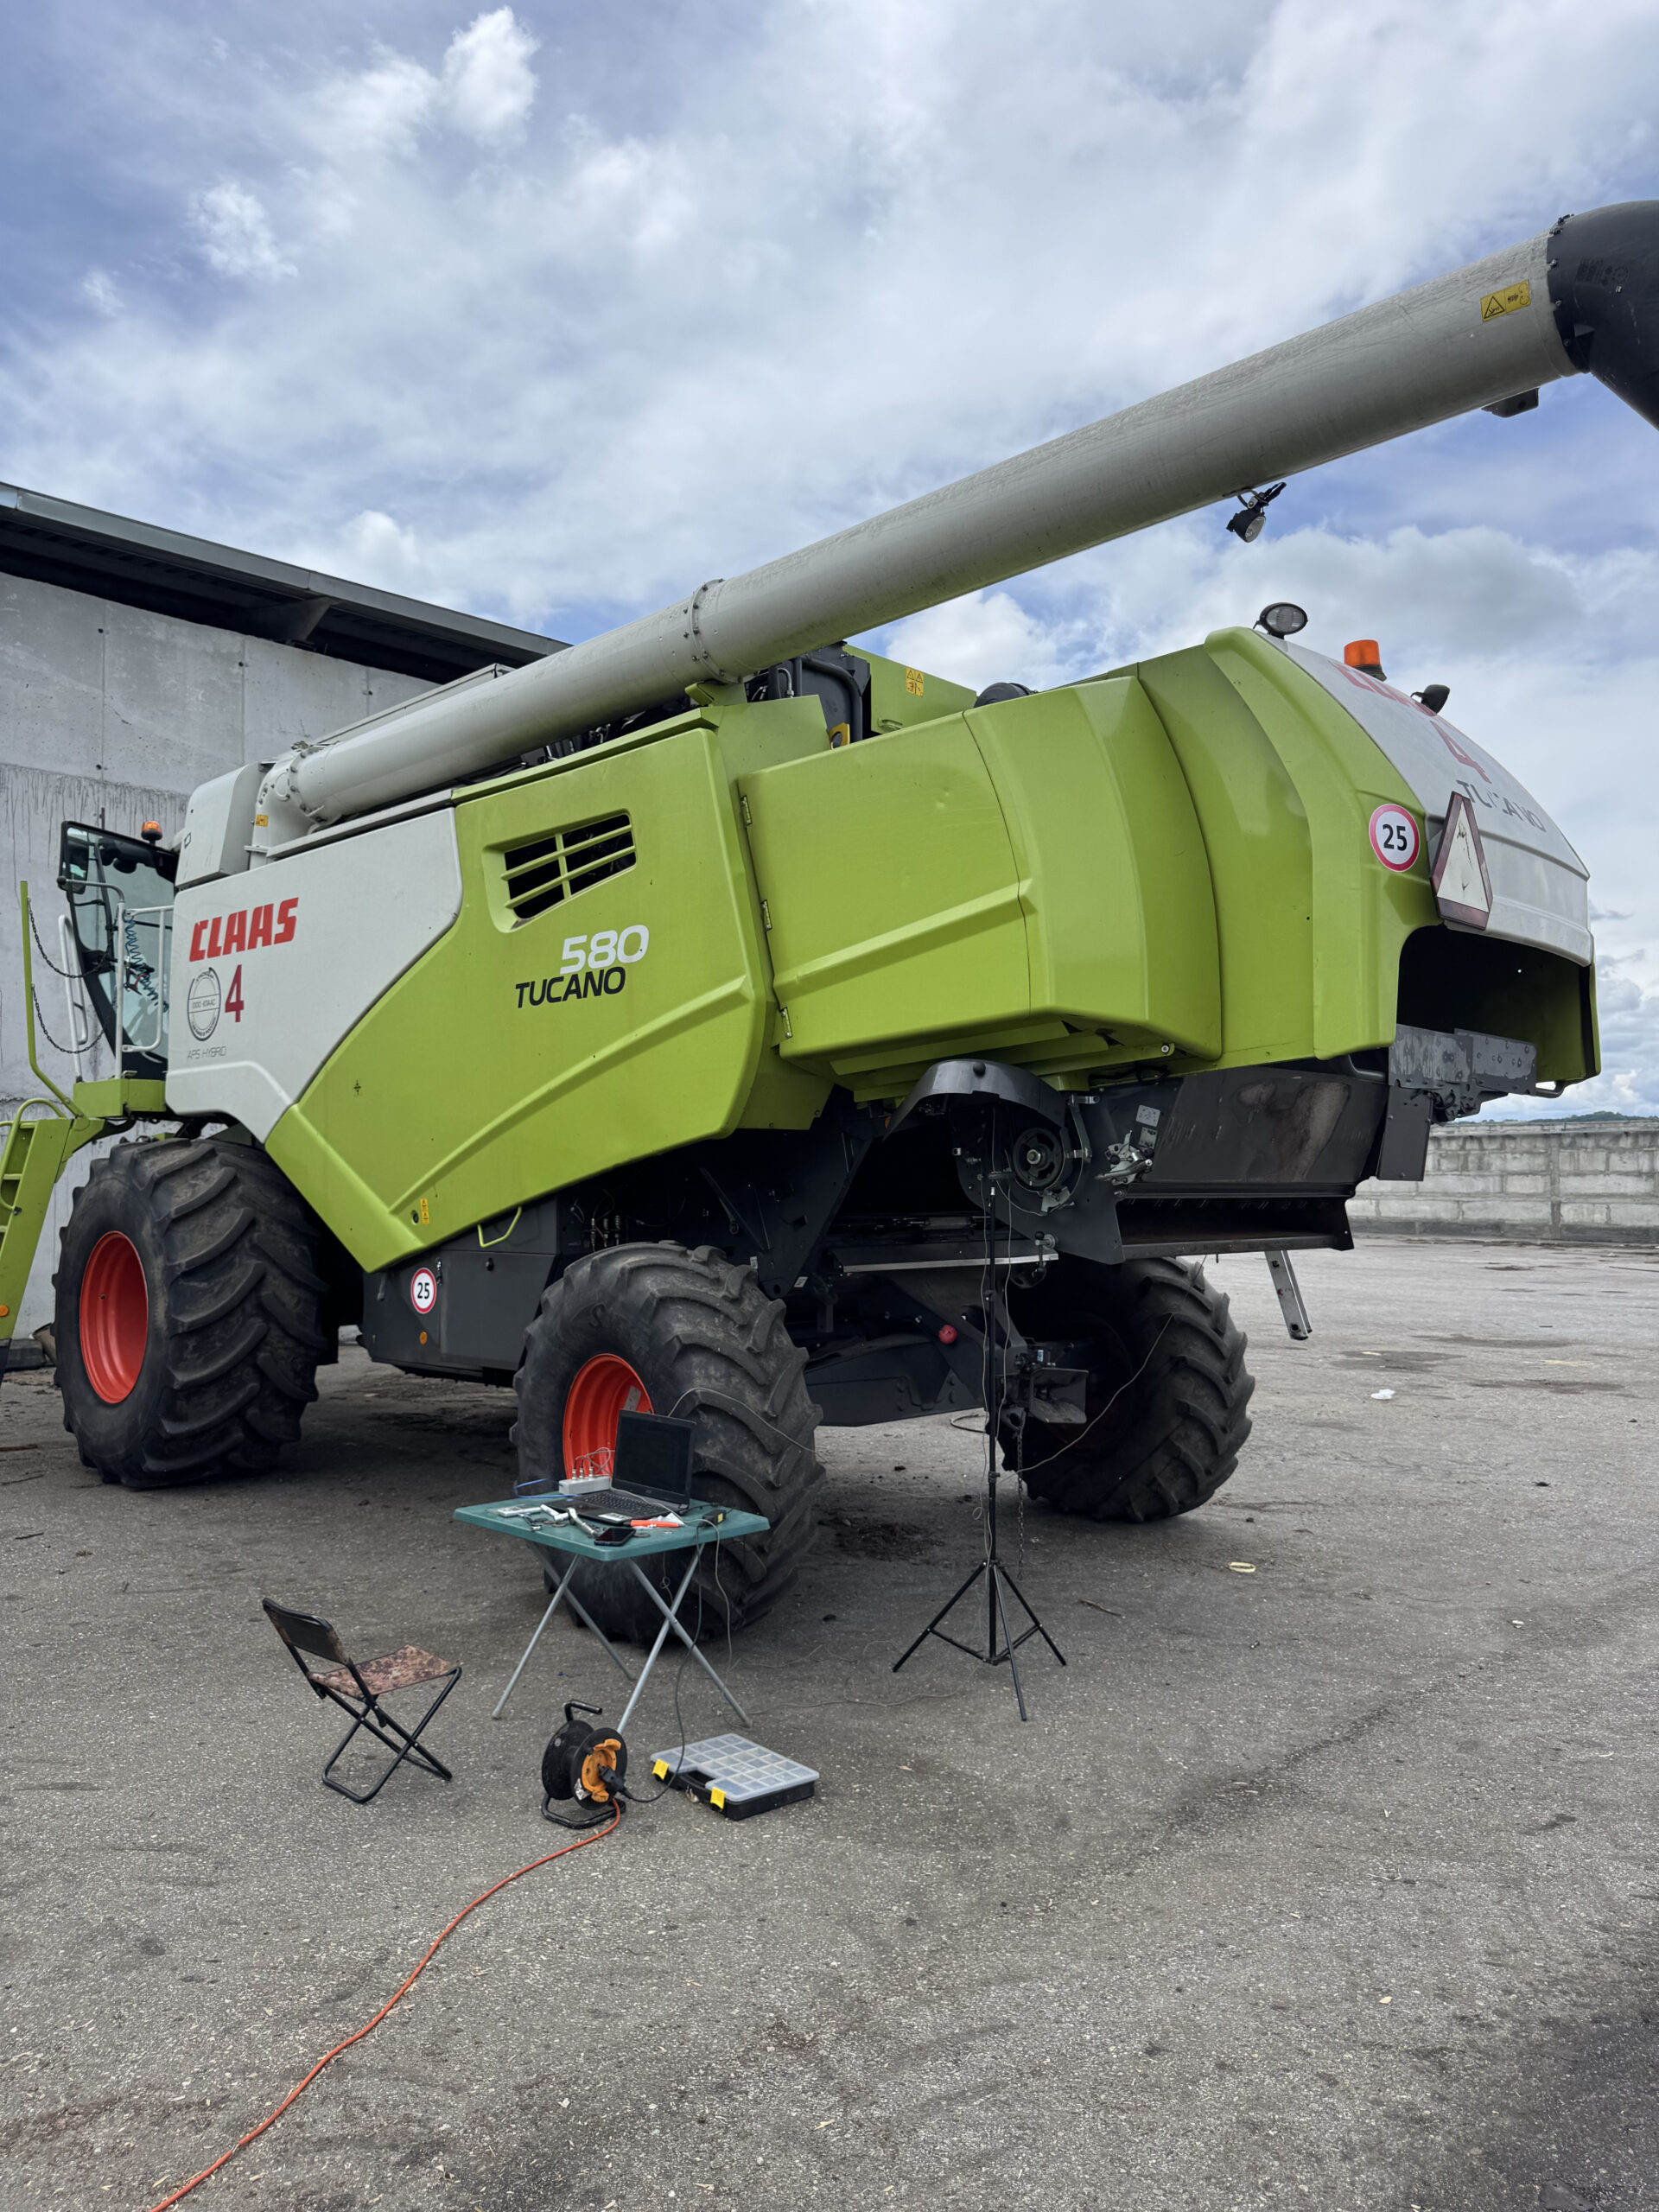
現場聯合收割機——使用 Balanset-1A 進行現場動平衡校正的感測器設定

我如何從「這很正常」轉變為「這是個問題」

我必須老實說。在從事聯合收割機工作的最初幾年裡,我認為振動只是……機器在運轉。聯合收割機不就是這樣嗎?它們會震動。一切都會震動。駕駛室震動,方向盤在手中嗡嗡作響,螺栓每隔幾天就鬆動,您只需再次擰緊。這就是常規。

然後有一天在收割期間——當然是在旺季,因為問題總是在旺季發生——聯合收割機開始劇烈震動。不是平常的嗡嗡聲。這種振動會傳到您的牙齒。脫穀滾筒出了嚴重問題。我們幾週前更換了一些敲擊槌,事後沒人想到要檢查平衡。為什麼要檢查?我們多年來都是這樣做的。

那次故障讓我們損失了三天。小麥收割旺季的三天。
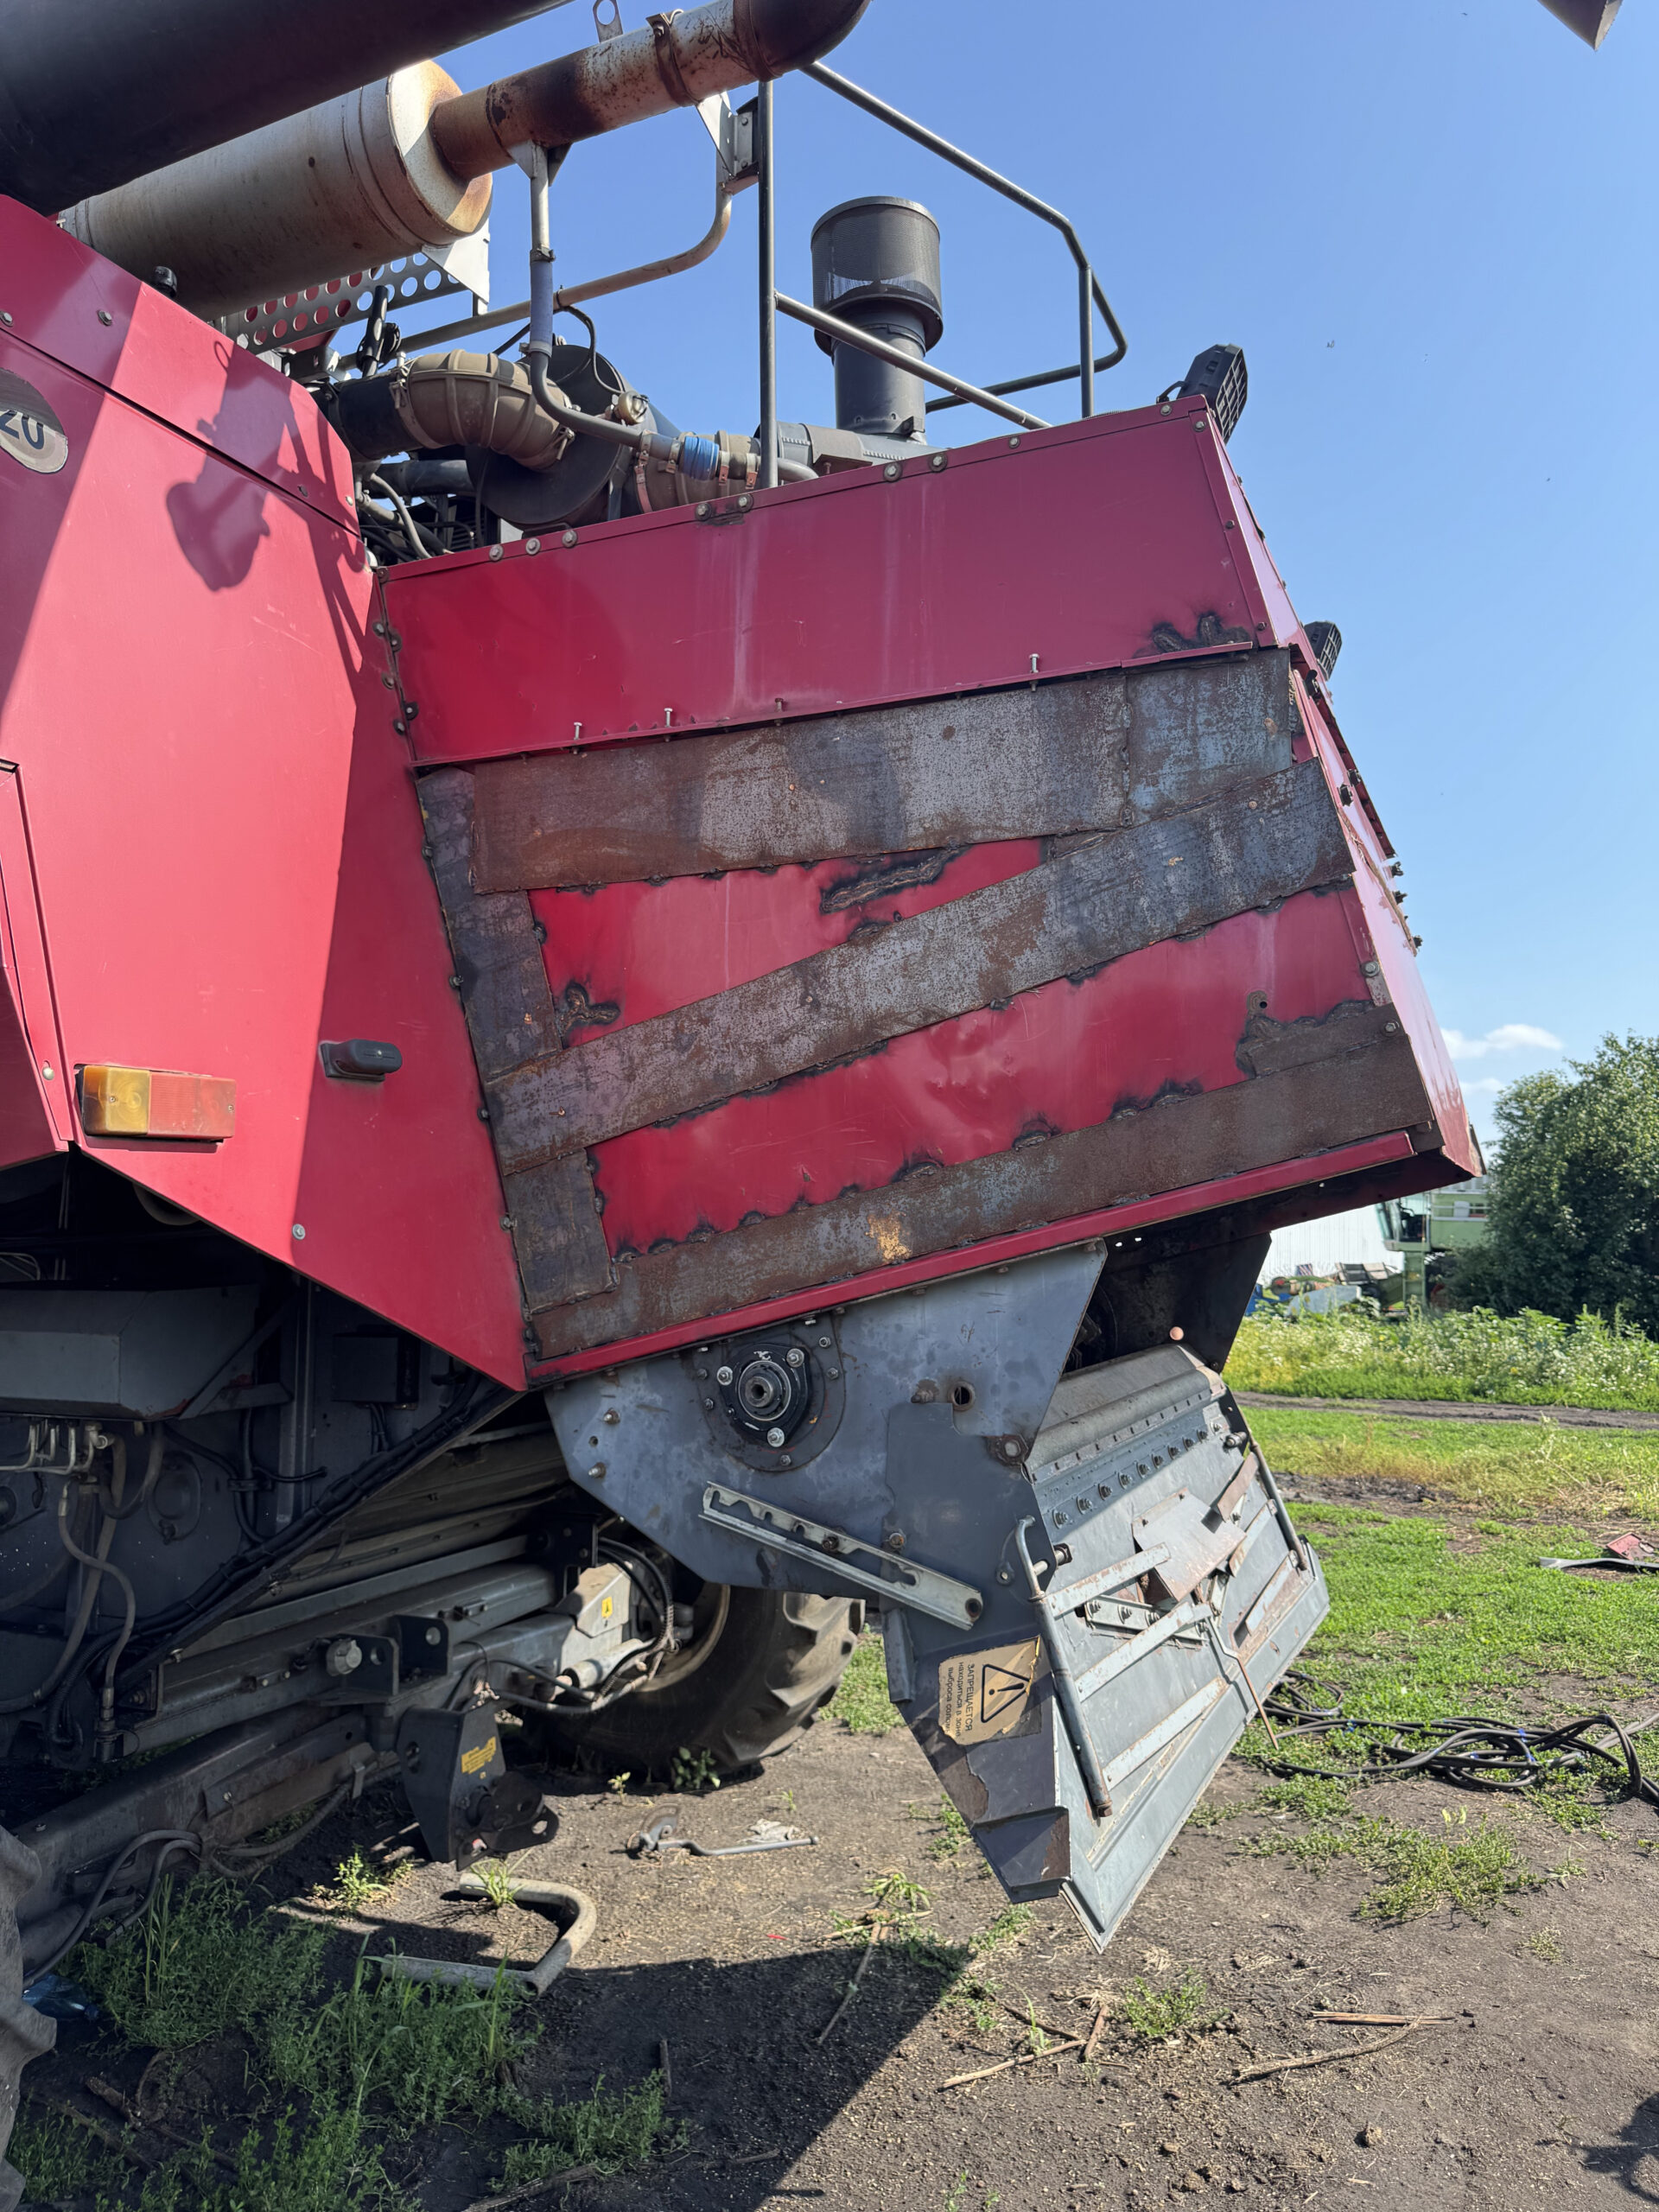
撕裂的稻草行走器外殼——轉子不平衡導致長期振動損壞的結果
這就是忽視振動的後果。稻草行走器軸承座被撕裂。這台不是我的,但我曾在另外兩台機器上看到類似的損壞。

就是這張照片改變了我的想法。一位同事的聯合收割機——稻草行走器軸承座因振動被撕裂。軸承過熱,框架在焊縫處開裂,維修費用比便攜式平衡儀還貴。貴得多。

The thing about imbalance is it's sneaky. A heavy rotating part — drum, rotor, chopper — develops a "heavy side" over time. Wear, dirt buildup, a replaced blade that weighs 15 grams more than the old one. At 1,000 RPM, those 15 grams on a 300 mm radius pull with about 5 kgf of rotating force that hammers the bearings on every revolution — a thousand times per minute, 60,000 times an hour. The bearings don't fail immediately. They fail mid-harvest, when you absolutely cannot afford downtime.

€2,000+
軸承組更換

主滾筒或轉子軸承——零件加人工加停機時間

3–5 天
Unplanned downtime

等待零件、拆卸、維修、重新組裝——收割中途

90 分鐘
動平衡校正時間

每個組件平均,現場,無需拆卸

在我獲得 Balanset-1A, my options were limited. You could spin the drum on prisms and try to find the heavy side — that's static balancing, and it's better than nothing, but it only finds the resultant heavy side. What it cannot see is couple unbalance — two equal heavy spots at opposite ends of a long drum, 180° apart. Their forces cancel at rest, so the drum sits still in any position on the prisms. Then you spin it up to 900 RPM and those two spots form a rocking couple that hammers both bearings in antiphase and tries to shake the combine apart.

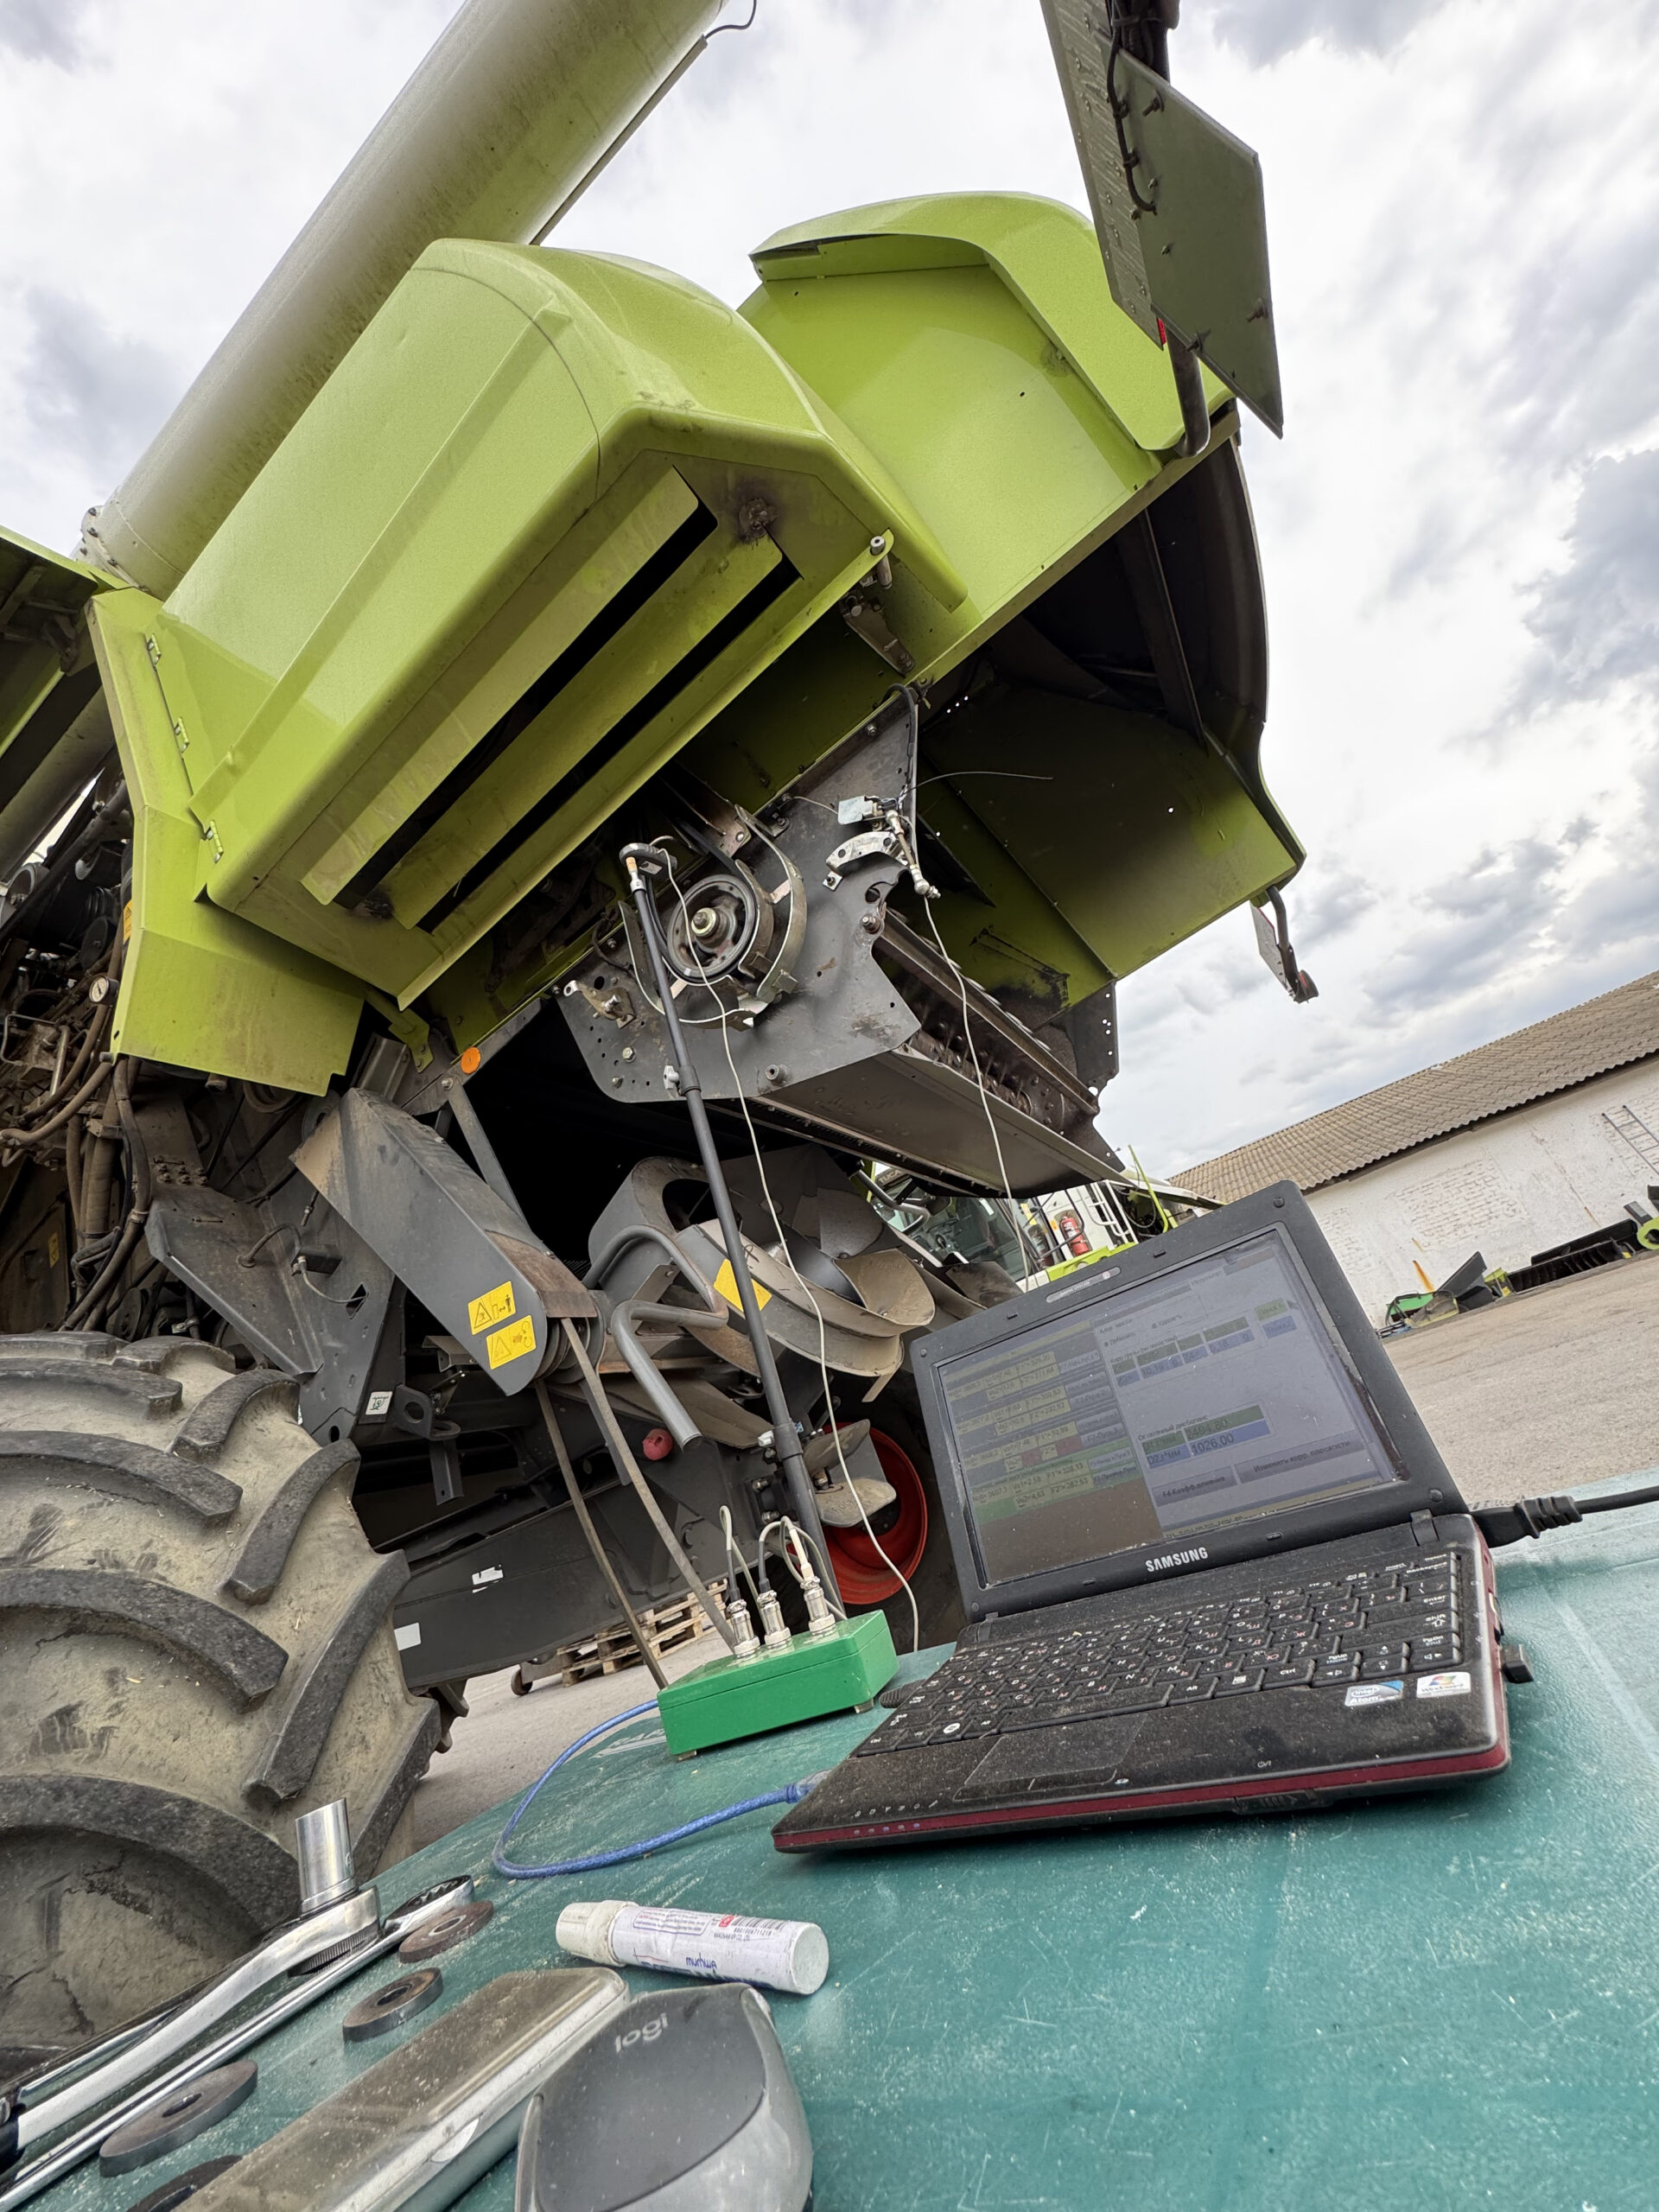
動平衡校正設定期間安裝在聯合收割機軸承座上的振動感測器
Accelerometer on a bearing housing. This is where the vibration lives — right here at the bearing.

Balanset-1A:它是什麼以及我如何使用它

Balanset-1A 完整套件——感測器、雷射測速儀、介面模組、筆記型電腦、攜帶箱
Everything you need fits in a case the size of a drill box. Two sensors, tachometer, interface module, cables. Plus a laptop.

The kit is simple. Two vibration sensors (accelerometers) that attach magnetically to the bearing housings. A laser tachometer on a magnetic stand that reads a reflective mark on the rotating part — this tells the software exactly where the shaft is at every moment. An interface module that connects everything to a laptop via USB. Electronic scales for weighing trial weights. Reflective tape. The whole thing weighs about 4 kg and fits in a carrying case.

Here's what I actually do with it, stripped of all the technical language:

I attach the sensors. I launch the software. The software says "run the machine." I run it. Numbers appear — vibration level, and a phase angle that roughly tells me where the heavy spot is. Then the software asks for a trial run — its built-in First Trial Weight Estimator suggests a starting mass and angle, I bolt a weighed steel plate to the drum at that position and enter the actual mass and angle into the program. Run it again. The software now has two readings — one without the weight, one with — and from the difference it calculates exactly how much metal to add and where. I take the trial weight off and weld the correction weight on — full bead, not a tack. Run one more time to verify. Done.

Balanset-1A 軟體在筆記型電腦螢幕上顯示振動測量值和校正計算
The software interface. It tells you the correction — mass, angle, which plane. You don't need to understand the math.

The nice thing is I don't need to understand the math behind it. The software does the influence coefficient calculation. I just need to mount a weight where it tells me to and weigh it accurately. The first time I used it, I was nervous — I expected it to be complicated. It wasn't. The screen literally says "install 180 grams at 210 degrees on Plane 1." That's it. I bolt a 180-gram plate at 210 degrees, run the combine, and the vibration drops from "I can feel it through the floor" to "the instrument barely registers it."

雷射測速儀定位以讀取聯合收割機轉子軸上的反光標記
Tachometer aimed at the reflective mark. Positioning matters — needs clear line-of-sight.
聯合收割機現場動平衡校正——筆記型電腦和感測器設定在機器旁
The full setup in the field. Laptop on a crate, sensors on the bearings, tachometer on its stand.
Safety — seriously

During balancing, the combine runs with covers open and a rotor spinning at operating speed. I always cordon off the area. Nobody stands near the spinning parts. I stay well back during measurement runs. This is the part you don't skip.

The Parts That Break: What Actually Needs Balancing in a Combine

Not everything in a combine needs balancing. But everything that rotates fast, carries heavy mass, and takes a beating from crop flow — that needs it. Here's the breakdown, roughly in order of how often I end up working on them:

Straw chopper rotor

3,000 – 4,000 RPM · 1 or 2 planes

The most frequent balancing job. Dozens of knives spinning at insane speeds. Every knife replacement shifts the balance. Missed it once — the housing cracked within a season.

Threshing drum

600 – 1,200 RPM · 2 planes

Heavy cylinder with beaters. Factory-balanced, but years of wear, dirt, replaced beaters, and welded cracks destroy that balance. Two-plane because it's long.

Rotary separation rotor

~800 – 1,100 RPM · 2 planes

Long shaft, large mass, handles both threshing and separation. Dirt packs into screw blades, metal bends, wear is uneven. Two-plane is mandatory.

Straw walker beater

~600 – 800 RPM · 1 plane usually

Smaller drum after the threshing drum. Impact loading from uneven straw flow. Wet straw cements onto one side. After slat replacement — check balance.

Cleaning fan

~800 – 1,400 RPM · 1 plane

Small mass, but runs at decent speed. Dust accumulation on blades, or a blade bent by a pebble. Low-mass corrections — need precise weighing.

Elevator augers

~300 – 600 RPM · 1 plane

Grain and tailings augers. Lower speed, but wet grain packs on flights, flights bend from stones. Usually only balance after repair or straightening.

The Actual Procedure — How I Balance a Combine Assembly

I've done this enough times that it's become routine. But the first time felt like a lot. So here's exactly what happens, step by step, with the notes I wish someone had given me when I started.

01

Clean everything first

This is the step people want to skip, and it's the one that matters most. Get all the packed straw, mud, dust, and grain residue out. Pressure washer, scraper, compressed air — whatever it takes. I've had cases where cleaning alone dropped vibration by half. If you balance a dirty drum, you're correcting for the dirt — and next time the dirt shifts, your balance is gone.

While cleaning, inspect everything. Cracked beaters, worn knives, loose hub bolts, bent flights. Fix what you find. No point balancing a damaged rotor.

02

安裝感測器與轉速計

Accelerometers go on the bearing housings, radial direction (horizontal usually works best — stick them on with the magnet). For two-plane jobs, one sensor on each bearing. For single-plane, one sensor on the bearing closest to the rotating mass.

Stick reflective tape on the shaft end or on a visible rotating surface. Position the laser tachometer on its magnetic stand — it needs a clear line to the reflective mark. Plug everything into the Balanset-1A module, connect USB to the laptop, launch the software.

實用提示: On the chopper, the magnetic stand often can't mount directly on the combine body because of vibration and geometry. I sometimes use a separate metal stand nearby. Just needs to be rigid and pointed at the mark.
03

運轉並記錄基線(Run 0)

啟動聯合收割機,接合您要進行動平衡校正的組件驅動。讓其達到運轉速度。等待讀數穩定——通常需 15–20 秒。軟體會顯示以 mm/s 為單位的振動值以及以度為單位的相位角。

這是您的「校正前」數值。我通常也會把它寫在便利貼上,因為我喜歡讓它隨時可見。

04

試重 — 平面 1(Run 1)

停止機器。軟體會指示您安裝試重。我使用鋼板——將其螺栓固定或點焊在轉子一端方便的位置。先在電子秤上精確稱重。將質量與角度輸入軟體。

再次運轉。軟體會將新的振動值與基線進行比較,並計算轉子對該位置質量的響應。這就是「影響係數」——基本上,軟體在學習轉子的特性。

多重? Size the trial weight so its centrifugal force stays around 5–10% of the rotor's weight. The upper bound is easy to work out: m [g] ≈ 90,000,000 × M [kg] ÷ (n [rpm]² × r [mm]). A 200 kg drum at 1,000 RPM with the weight at a 300 mm radius works out to about 60 g — which is why I start with 30–50 grams there. The safe mass shrinks with the square of speed: a weight that is harmless at 1,000 RPM is a real load at 4,000 RPM, where 10–15 grams at a typical knife radius already pulls with a force comparable to the weight of a light rotor itself. Too heavy is not "temporarily worse" — it overloads the bearings and the bolt or weld holding the weight. Too light and the software can't distinguish the change from noise. The software's built-in First Trial Weight Estimator suggests a sensible starting mass and angle, and the Bump Test helps you check the setup for resonance before you trust the numbers. The trial run counts if the amplitude changes by at least 20–30% or the phase shifts by 20–30 degrees.

How big should a trial weight be?

A safe starting point is a weight whose centrifugal force stays within 5–10% of the rotor weight. As a formula:

m試重 = k · M · g / (R · ω²), k = 0.05–0.10

其中 M is the rotor mass (kg), g = 9.81 m/s², R is the mounting radius of the weight (m), and ω = 2π·RPM/60 (rad/s). Example: a 50 kg rotor at 3,000 rpm with the weight at R = 0.2 m gives m ≈ 0.07·50·9.81/(0.2·314²) ≈ 1.7 g — grams, not hundreds of grams. That looks surprisingly small for a 50 kg rotor, but check the force: at 3,000 rpm those 1.7 g already pull F = m·R·ω² ≈ 34 N — about 7% of the rotor's weight. Starting small is the point: stepping up is cheap, while an oversized weight is a real load on bearings and welds. The same force check works in reverse for any weight you are about to bolt on.

You don't have to compute this by hand: the Balanset software includes a First Trial Weight Estimator that recommends both the mass and the starting angle from your rotor data, and a 衝擊測試 to check that you are not working near a natural frequency.

A good trial weight changes the reading by at least 20–30% in amplitude or 20–30° in phase. If the response is smaller, increase the weight stepwise — never jump straight to a heavy weight "to see something happen."

05

試重 — 平面 2(Run 2,若為雙平面)

對於長轉子(脫穀鼓筒、迴轉轉子),將試重移至另一端。再次運轉。現在軟體擁有兩個平面的資料,可以計算考慮交叉耦合效應的校正量——即一端質量對另一端振動的影響方式。

對於盤狀零件(清潔風機、單皮帶輪),可跳過此步驟——單一平面已足夠。

06

安裝校正配重

The screen says something like: "Plane 1: 85 g at 172°. Plane 2: 42 g at 305°." Remove the trial weight. Cut or assemble steel plates to the right mass (this is where the electronic scales earn their keep). Weld or bolt them at the angles shown.

在敲擊器和切碎機刀片上,我常在刀片安裝螺栓上使用額外的墊圈——簡單、牢固,且不改變刀片幾何形狀。在光滑的鼓筒上,我點焊小鋼板。在螺旋輸送器葉片上,我使用螺栓固定。

07

驗證並完成

One more run. The software shows residual vibration. If it's below the target — typically under 2–3 mm/s for agricultural equipment — you're done. That target isn't arbitrary: per ISO 10816-1 (now ISO 20816-1), large machines of Class III–IV sit in Zone A — vibration of a new machine — below roughly 1.8–2.8 mm/s RMS. If not, the software suggests a trim correction. In my experience, about 80% of jobs are done after one correction pass. The chopper sometimes needs two iterations because the knife arrangement creates complex imbalance patterns.

將所有校正配重永久焊接(全焊道,而非僅點焊)。將報告儲存於筆記型電腦。我為每台機器建立一個資料夾,記錄日期與校正前/後的數值——這對於追蹤設備是否隨時間劣化非常有用。

現場資料:來自實際作業的數據

我將在此處具體說明,因為關於「性能提升」的模糊說法對任何人都沒有幫助。這些是我過去幾個季節在聯合收割機上工作的實際數值。
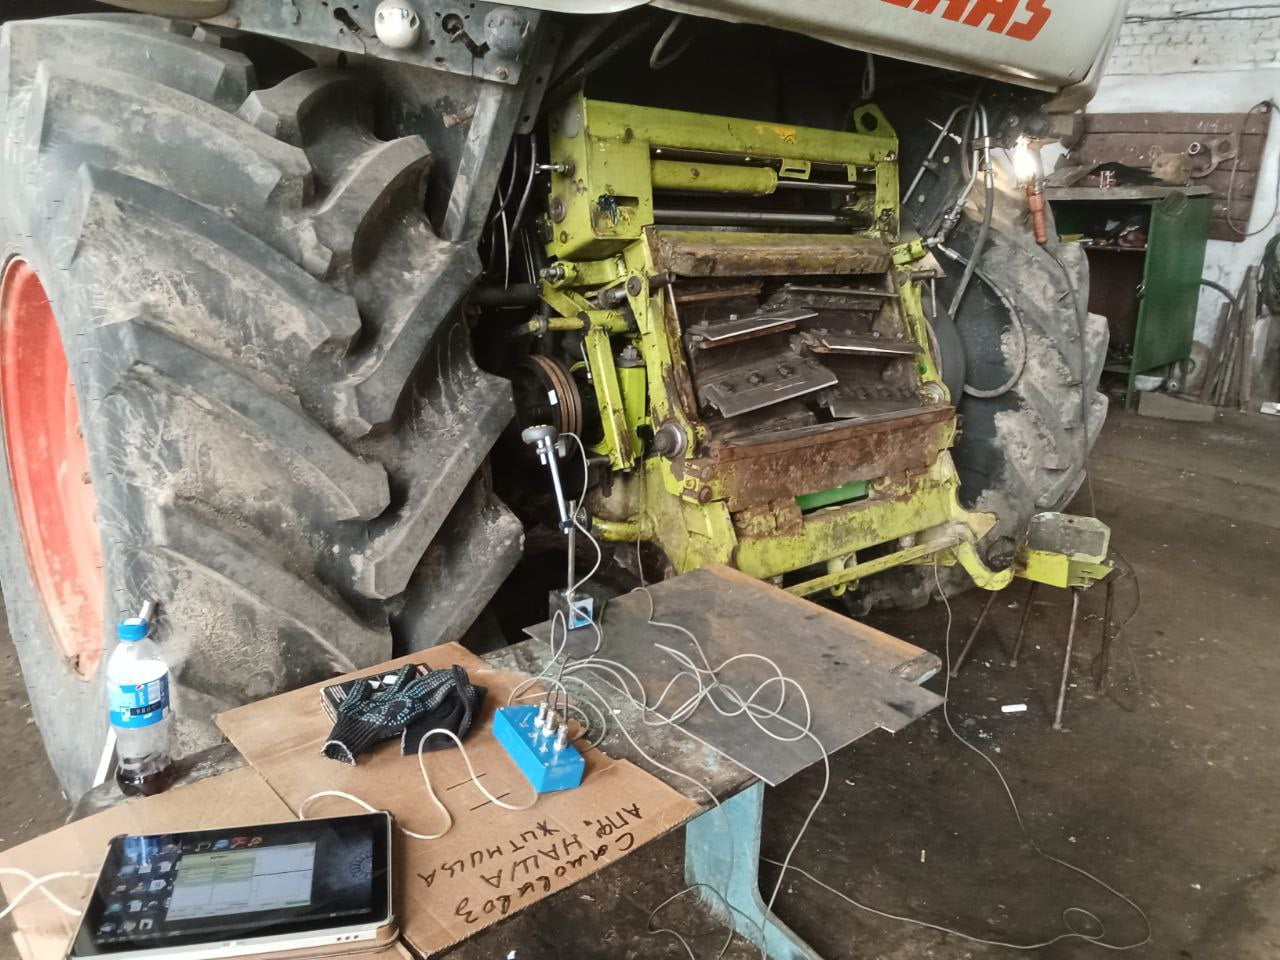
脫粒鼓附有 Balanset-1A 感測器,用於動態平衡測量
脫穀鼓筒上的感測器。校正前的振動讀數為 14.2 mm/s——遠高於任何可接受的水平。
現場資料 — 脫穀鼓筒

Walker-type combine, after drum overhaul

Post-overhaul: three beaters replaced, shaft bearing seats reworked. The drum rolled fine on prisms (static balance OK). At operating speed, it shook the whole machine. Two-plane correction — 180 g at one end, 95 g at the other. For scale: ISO 21940-11 grade G16, the balance class for agricultural machinery, allows about 153 g·mm per kg on a 1,000 RPM rotor — about 30,560 g·mm for a 200 kg drum, or roughly 51 g per plane at a 300 mm radius. Corrections this far above that number show how much the overhaul had shifted the balance.

14.2
校正前 mm/s
1.8
校正後 mm/s
87%
降低幅度
110 分鐘
總時間

The rotary rotor job was different. This was a single-rotor axial-flow machine. The rotor had been running a full season without checks, and dirt had packed into the screw entry section unevenly. We cleaned it first (mandatory), but vibration was still elevated — the blades themselves had worn asymmetrically.

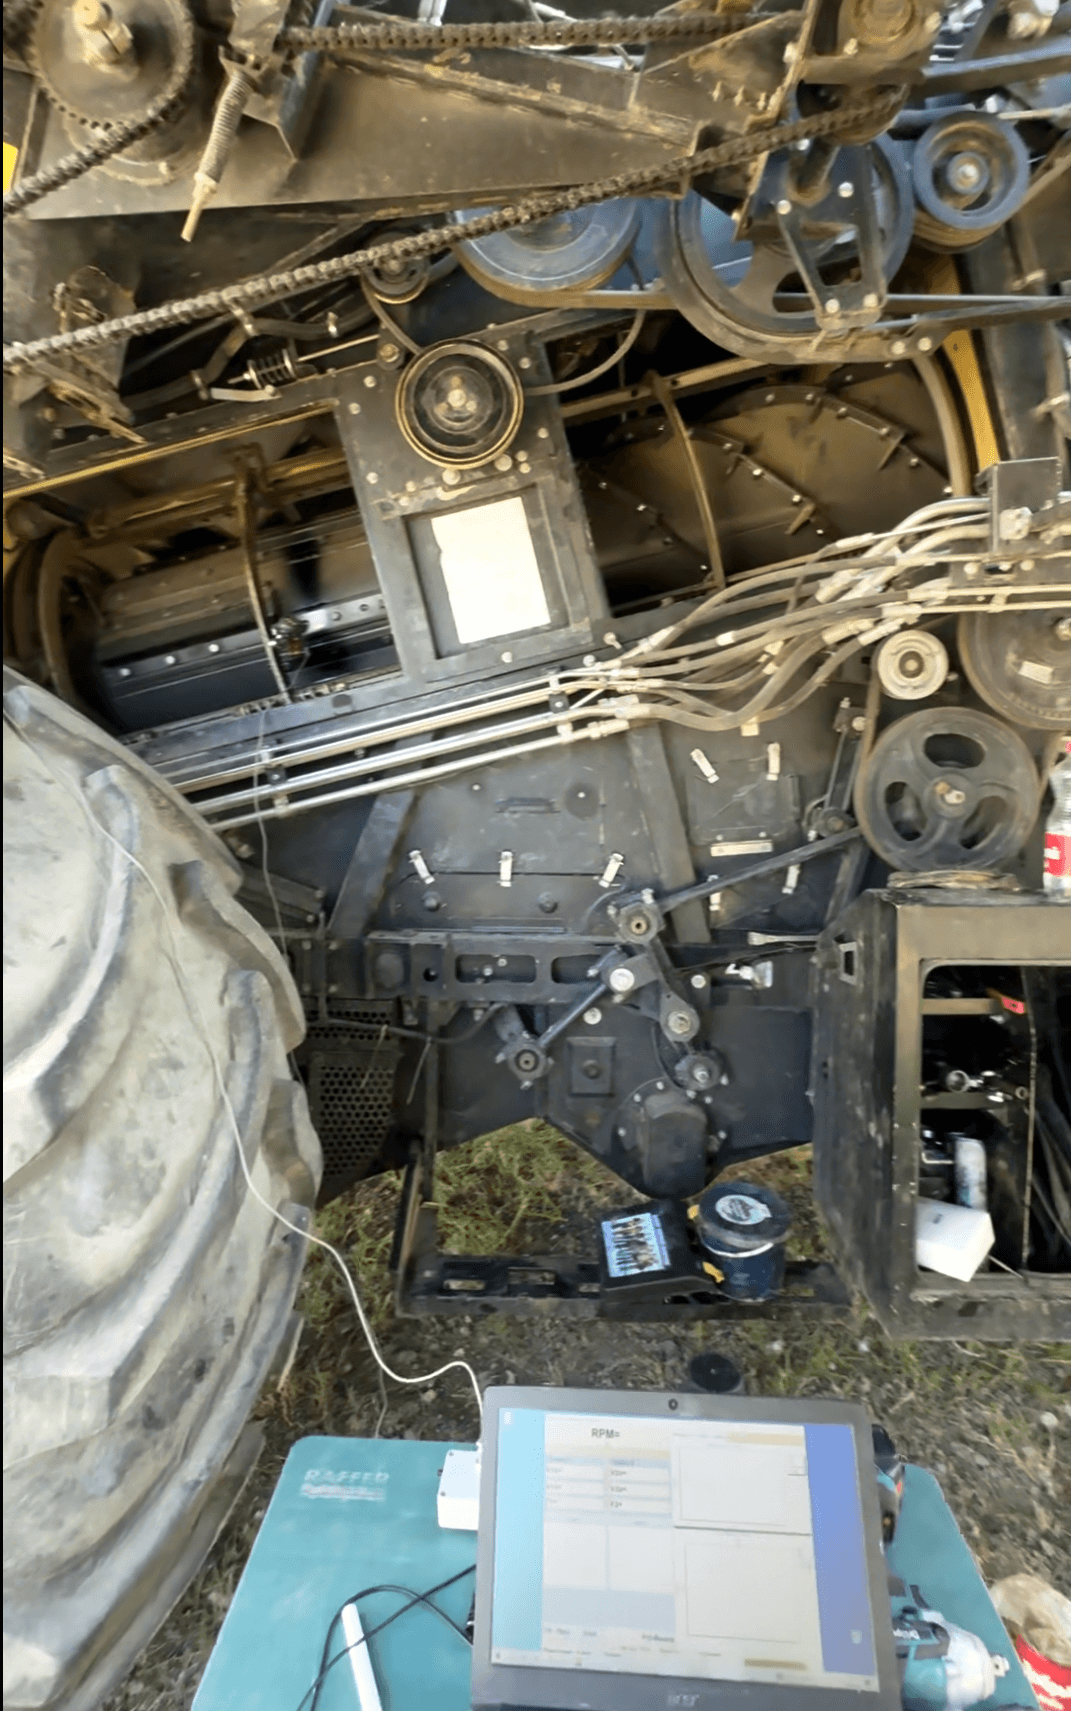
轉子式聯合收割機轉子安裝感測器,用於原位動態平衡
迴轉轉子 — 長軸、大質量。此處必須進行雙平面動平衡校正。
轉子式聯合收割機轉子軸承座上的感測器放置細節
轉子軸承座上的感測器。空間狹窄但可操作。
Balanset-1A 極座標圖顯示不平衡向量方向和大小
極座標圖 — 箭頭顯示重側位置及其嚴重程度。
Balanset-1A 的 FFT 頻譜分析,顯示聯合收割機振動的頻率成分
Spectrum view. Almost all the energy sits at 1× RPM with no significant 2× — that points to unbalance rather than misalignment or looseness. A stable phase reading across runs confirms it.

雙平面校正後:振動從 9.6 mm/s 降至 1.4 mm/s。軸承溫度原本比正常值高 15°C,在一天內恢復正常。該轉子在該季節剩餘時間內無故障運行。更換迴轉轉子的軸承?我甚至不願去想那筆費用。

受夠了每個季節更換軸承嗎?

The Balanset-1A pays for itself the first time it prevents a bearing failure — a single €2,000+ repair costs more than the kit. One kit for every rotating assembly in the combine. No subscriptions, no recurring fees.

切碎機:最大的頭痛問題(也是最大的回報)

我為切碎機單獨設立一個章節,因為它是我最常進行動平衡校正的組件,也是我見過最嚴重故障的部件。

想想乾草切碎機是什麼:一根裝有數十個擺動刀片(或錘片)的軸,以 3,000–4,000 RPM 旋轉。在該速度下,即使幾公克的不平衡也會產生巨大的離心力。而且刀片的重量不會保持不變。它們會磨損。它們會崩缺。它們會被更換——而更換的一套刀片質量絕不會與拆下的完全相同。人們嘗試按重量將刀片配對,這確實有幫助,但在 4,000 RPM 下,「差不多」實際上並不够接近。

我的原則

Every time knives get replaced on the chopper — every single time — I check the balance. No exceptions. I've learned this the hard way. One time I skipped it because the knives were "matched pairs from the dealer." Three weeks later: housing crack. The residual unbalance was only 12 grams at the knife radius — about 3,000 g·mm. At 3,500 RPM that is a rotating load of roughly 40 kgf hammering the housing 58 times a second, for three weeks — enough to crack steel.

切碎機的動平衡校正程序與其他設備相同,但有一些特殊之處。高轉速意味著轉速計的定位更為關鍵——反光標記經過得很快,雷射需要清晰的讀數。我通常將轉速計安裝在獨立的支架上,而不是聯合收割機機身上,因為聯合收割機本身的振動太大,無法提供穩定的安裝。
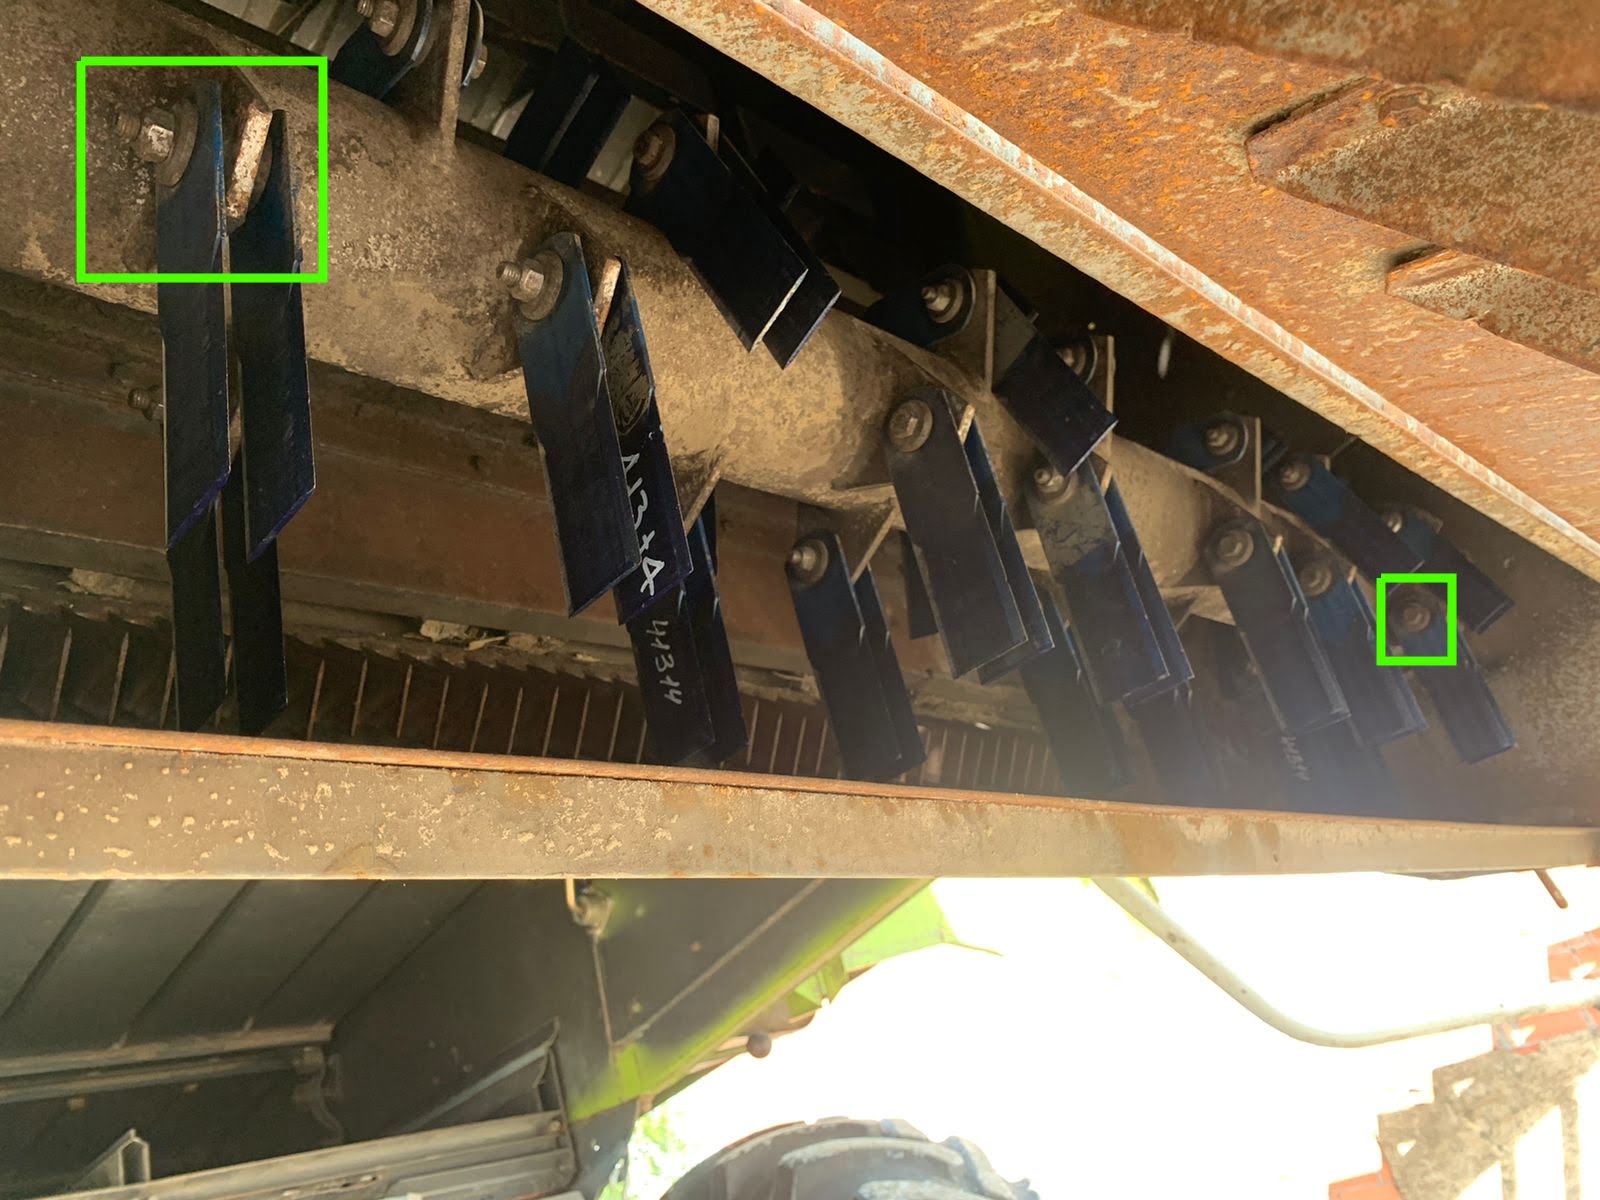
稻草切碎機轉子上的校正配重安裝——鋼板焊接於計算位置
切碎機上的校正配重。這是一塊小鋼板,焊接在軟體計算出的角度上。
稻草切碎機轉子,刀片安裝螺栓上已裝設平衡墊圈
另一種方法:在刀片螺栓上增加墊圈。簡單,不影響刀片間隙,日後容易調整。

有時切碎機需要兩次校正迭代。第一次校正使其接近平衡,但由於刀片在支點上擺動,質量分佈並非完全剛性——會隨轉速略有變化。第二次校正捕捉殘餘不平衡。我為切碎機作業預留 90 分鐘。

但回報是真實的。平衡後的切碎機運轉明顯更安靜——從駕駛室就能聽出差別。外殼不會裂開。軸承不會過熱。皮帶不再跳脫。這是整台聯合收割機上價值最高的動平衡校正作業。

皮帶輪、飛輪及其他人們常忽略的部件

清潔風機是容易被忽略的部件。它很小。但它以相當高的轉速運轉,且灰塵會不均勻地積聚在葉片上。我曾在兩台聯合收割機上校正過風機——兩次都是因為發現清潔效果不如預期(不平衡風機導致氣流不均,進而使篩網清潔不均)。先清潔葉片,然後檢查振動。校正量很小——5–10 克——因此精確稱重很重要。
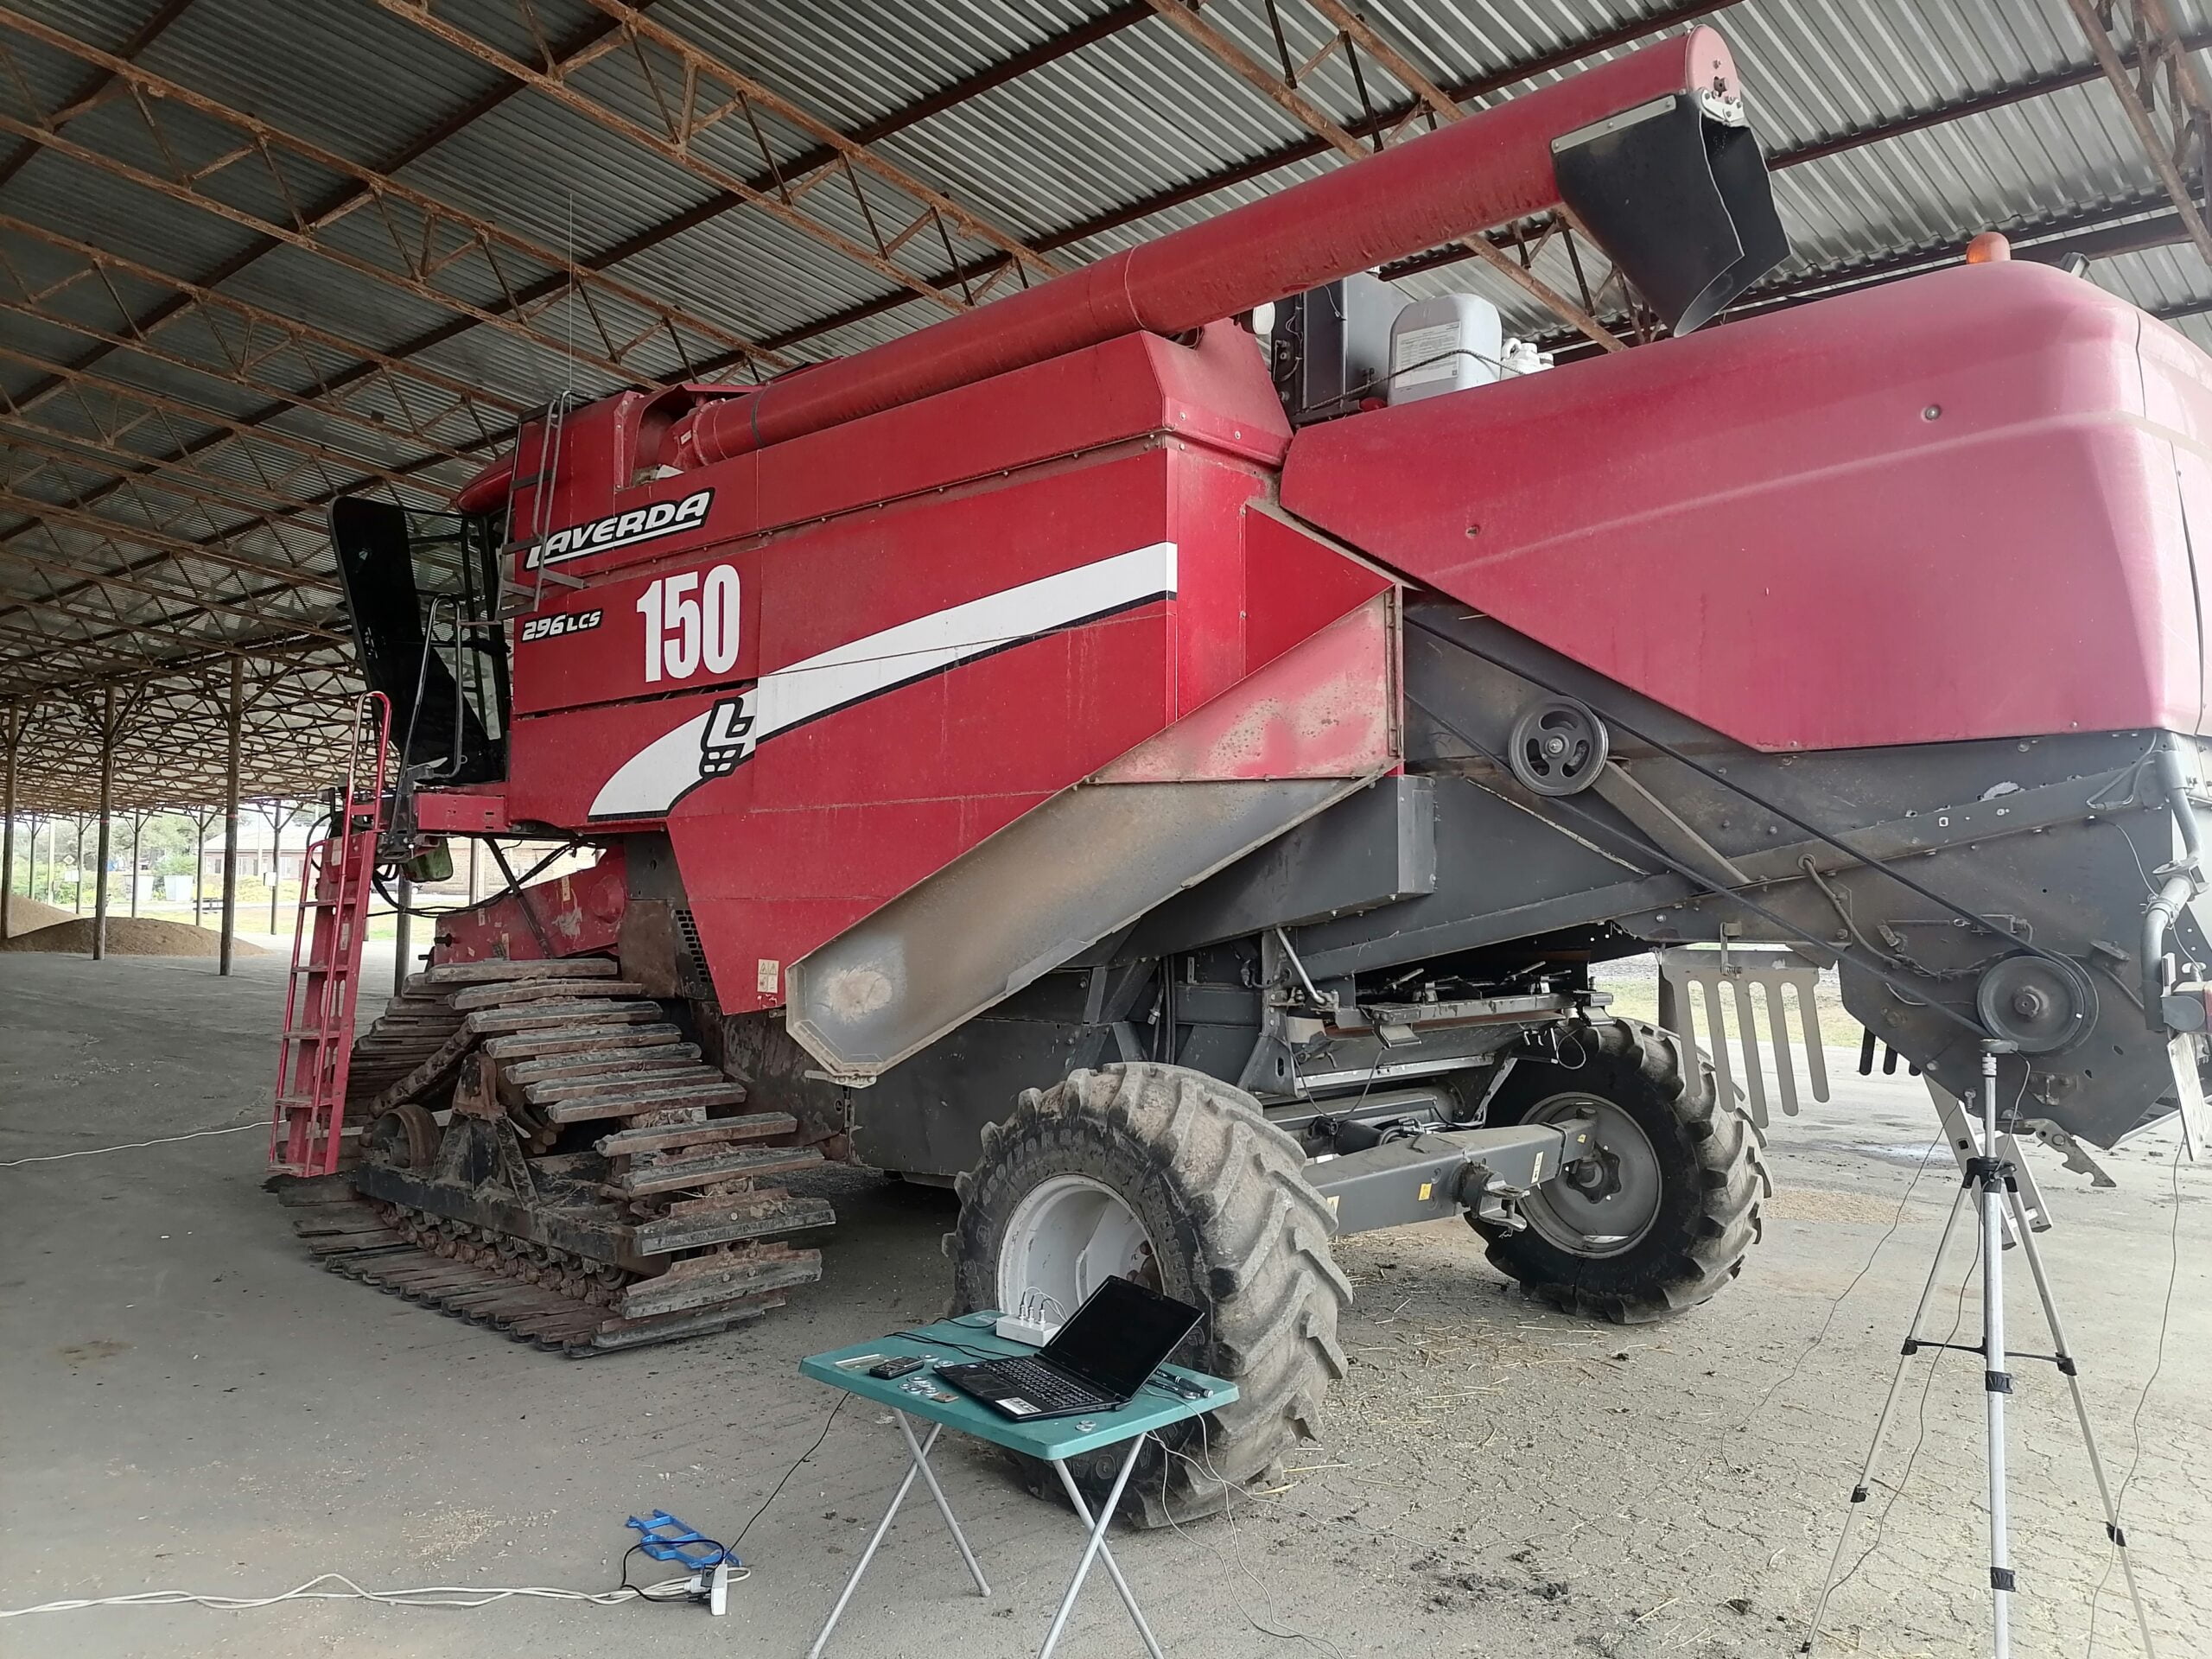
使用 Balanset-1A 感測器對聯合收割機的清潔風機進行動平衡校正
清潔風機設定。質量小,但感測器在轉速下仍能捕捉到微小的不平衡。

提升螺旋輸送機——糧食和尾料——轉速較低,但在任何維修後仍值得檢查。我曾發現一台螺旋輸送機在撞到石頭後被校直,但校直並未完全正確。聯合收割機發出有節奏的撞擊聲,無人能追蹤來源。將 Balanset-1A 放在提升機軸承座上,兩分鐘內就找到了問題。加上幾個小配重,撞擊聲就消失了。
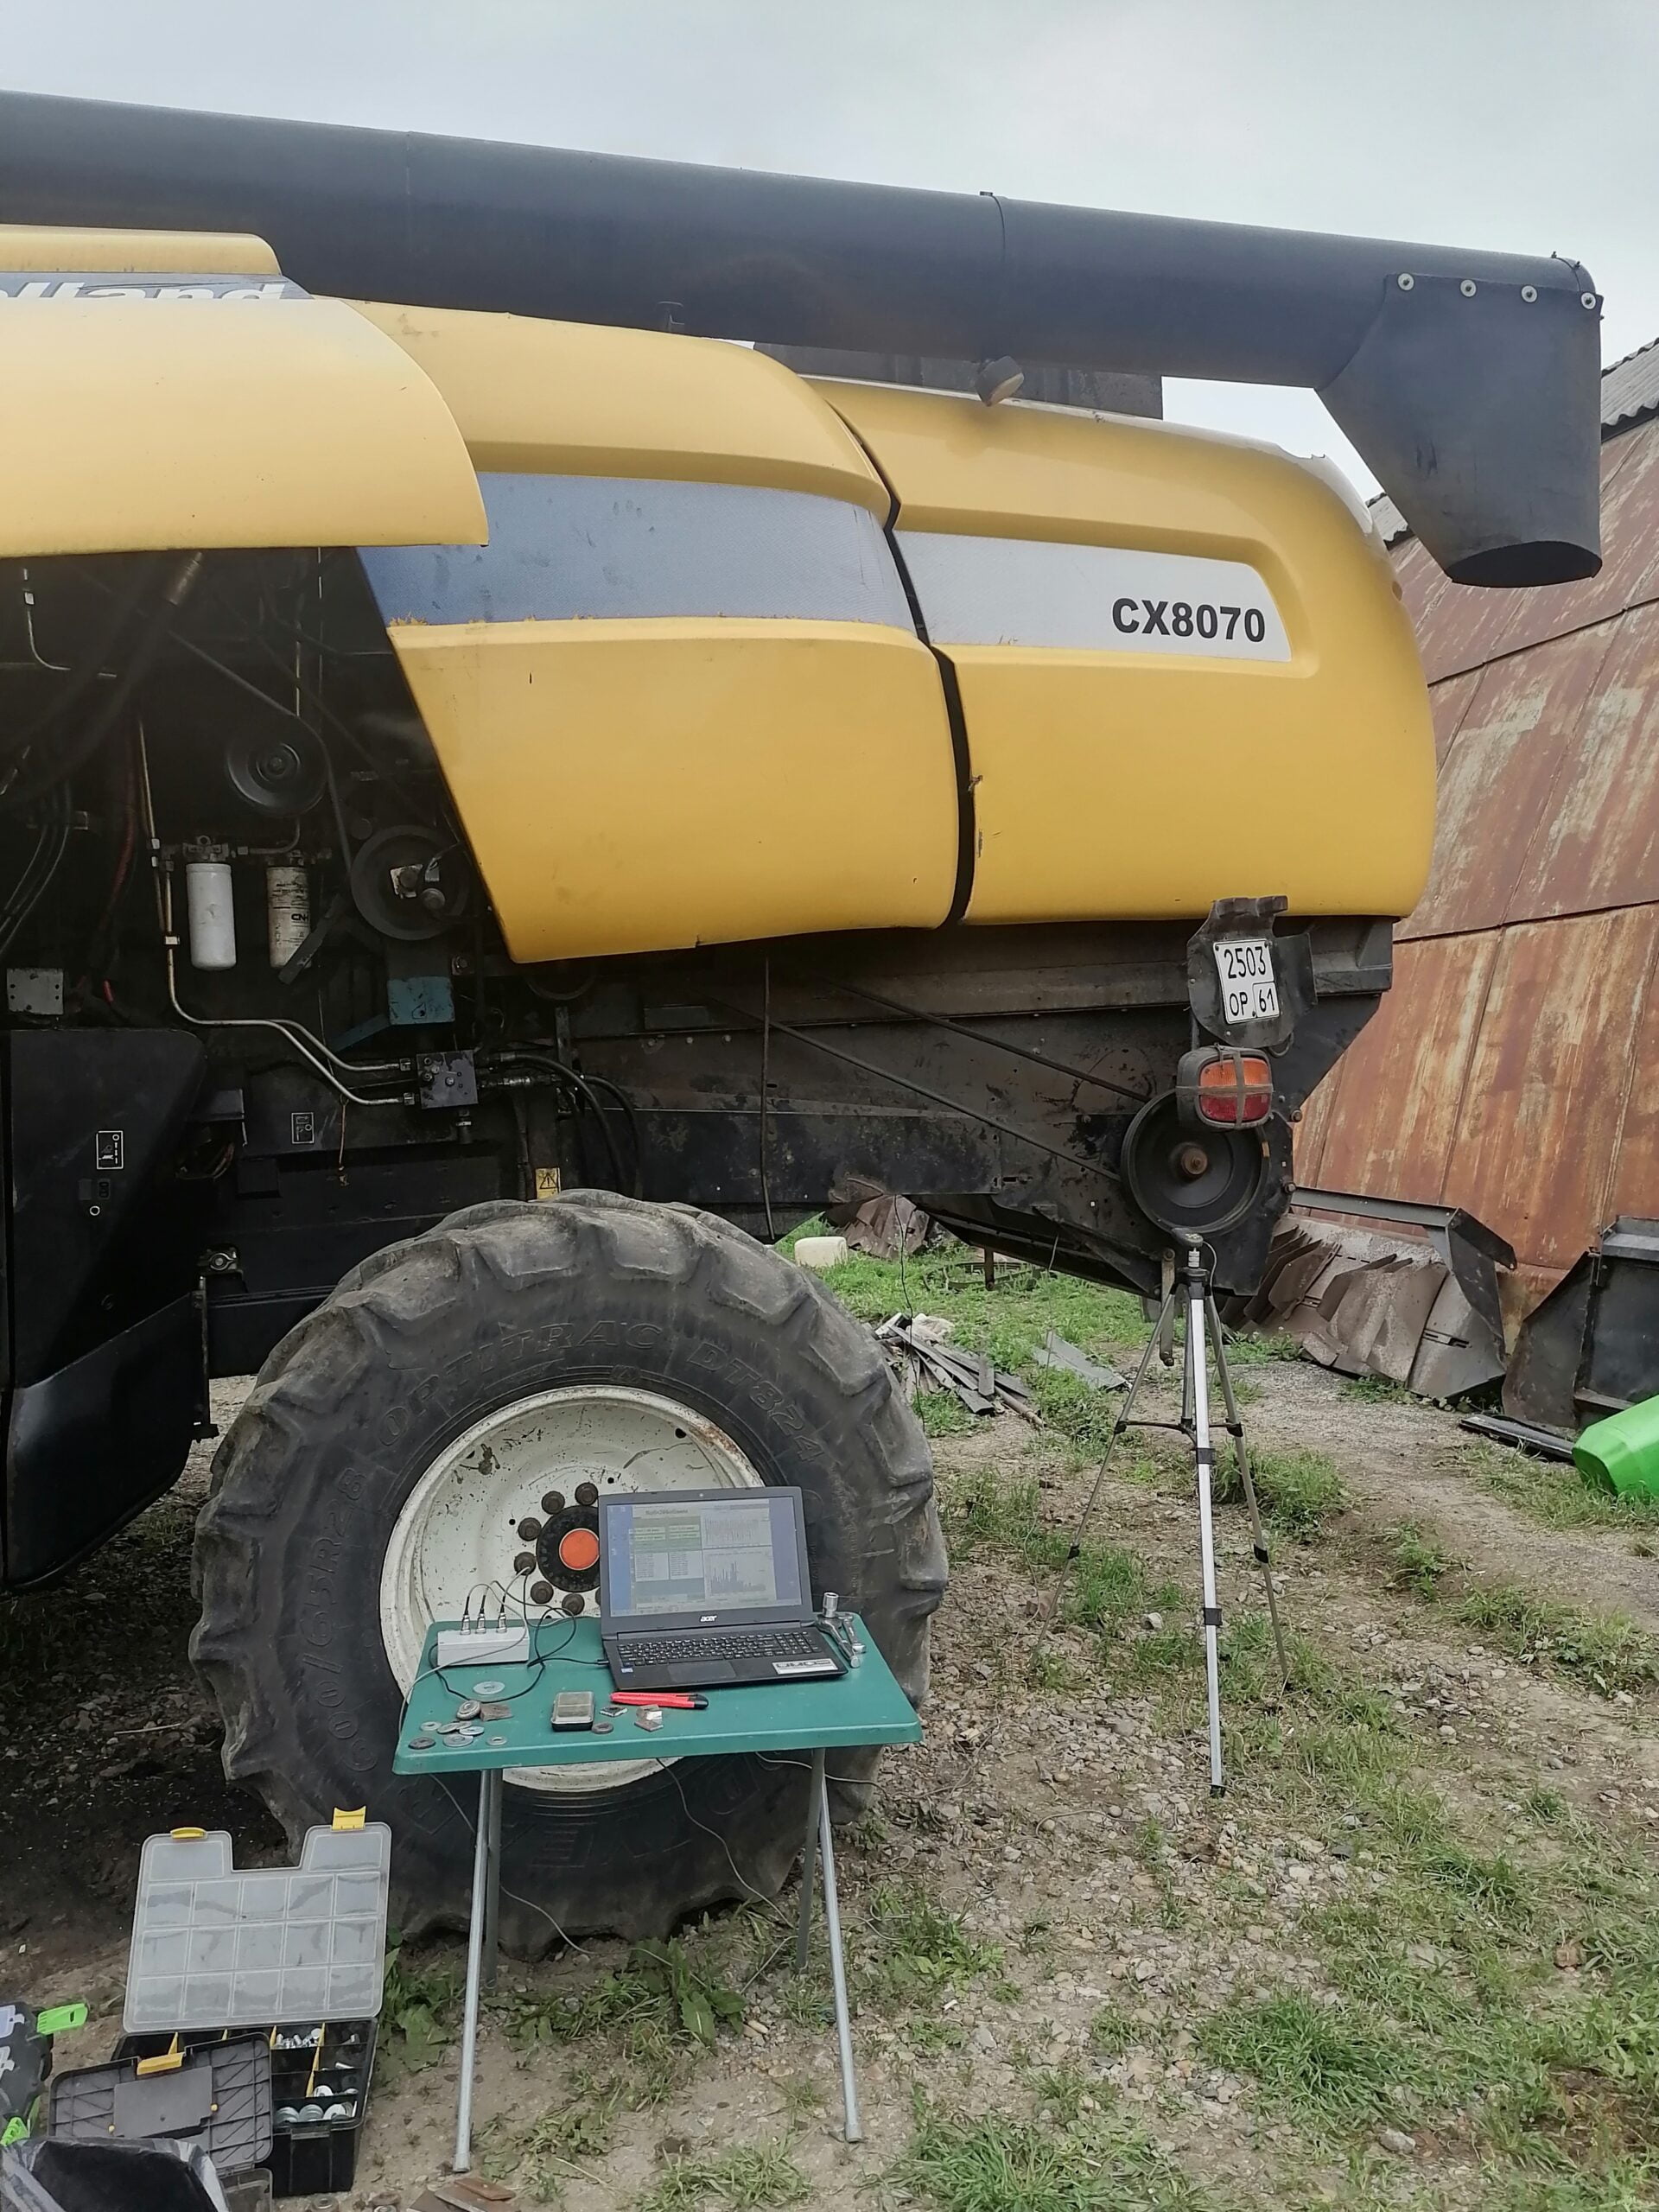
聯合收割機維護期間,輸送螺旋槳的振動測量
螺旋輸送機振動檢查。我用標準驅動旋轉它,感測器放在提升機軸承座上。

然後還有皮帶輪和飛輪。我不常校正這些部件——只有在進行維修工作(更換軸承、焊接、重新鏜孔座)時才做。但我想分享一個故事,雖然技術上不是關於聯合收割機,但原理相同。

我們有一輛卡車在重大大修後出現引擎振動。無人能找到原因。支架沒問題,噴油嘴沒問題,正時沒問題。我帶來 Balanset-1A,將感測器附在引擎缸體上,在飛輪上貼上反光標記。果然——飛輪-離合器組件不平衡。在安裝螺栓上加兩個墊圈,引擎運轉就平順了。進行大修的技師重新加工了飛輪端面,事後未檢查平衡。容易忽略,容易修復——如果你有工具的話。
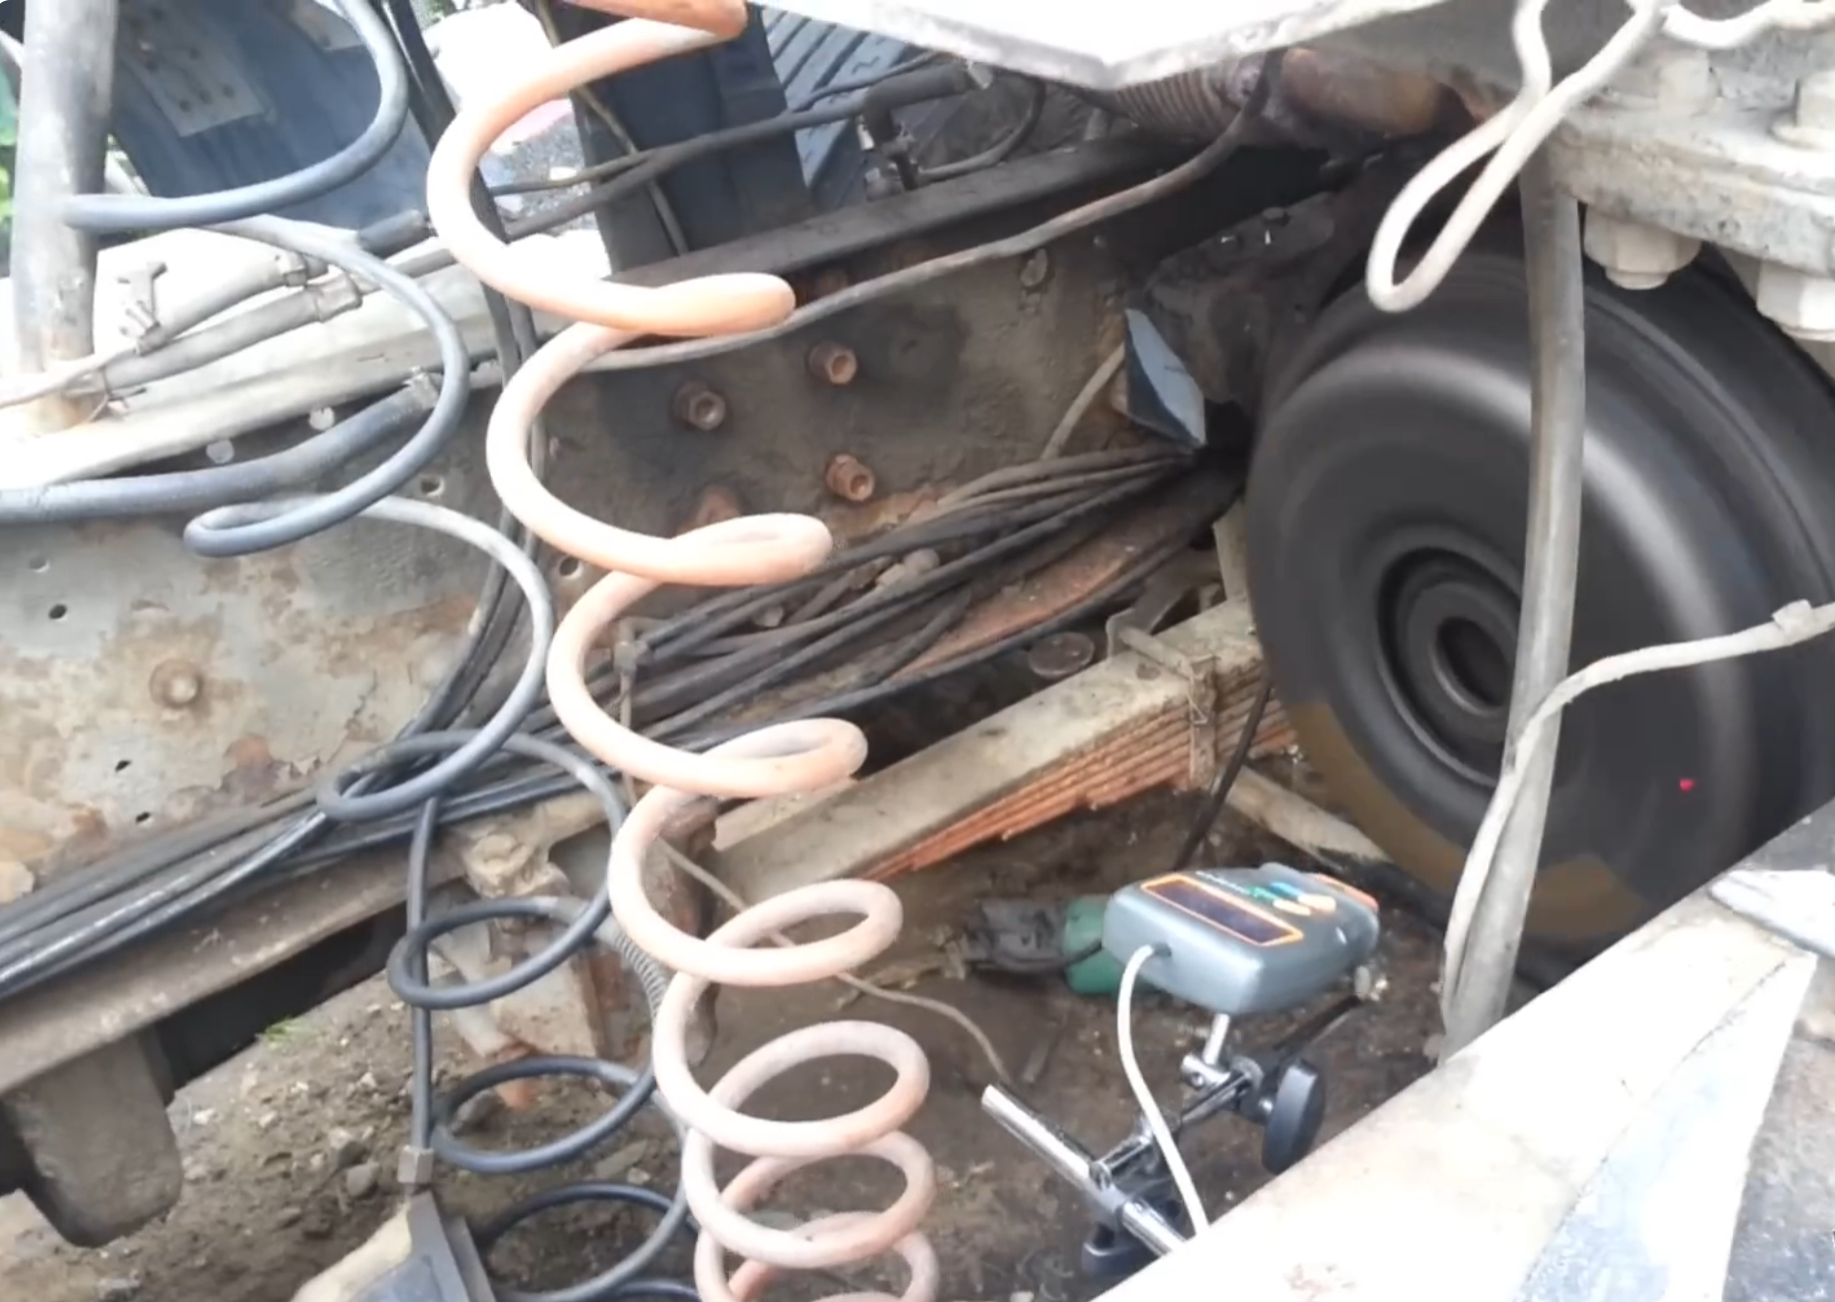
卡車飛輪動平衡校正期間的 Balanset-1A 測量畫面——振動資料疊加
卡車飛輪動平衡校正。不是聯合收割機,但使用相同設備、相同方法、相同結果。

Balanset-1A 規格

對於任何想知道技術細節的人 Balanset-1A:

Balanset-1A — 關鍵規格
振動範圍0.2 – 80 mm/s RMS
頻率範圍5 – 1000 Hz (±10% up to ~550 Hz)
轉速範圍250 – 90,000
相位精度± 1°
校正平面1 或 2
通道2
含外殼重量4 kg
軟體授權終身,已包含
保固2 年
價格(完整套件)€ 1,975

套件涵蓋所有內容:兩個加速規、帶磁性支架的雷射測速儀、介面模組、USB 線、電子秤、反光膠帶、攜帶箱、USB 上的軟體。插入任何執行 Windows 的筆記型電腦。無重複授權費、無訂閱、無「高級層級」的胡說八道。你只需購買一次。

常見問題

可以——這就是重點。鼓保持在軸承中,你在軸承座上安裝感測器,以運轉速度運行,Balanset-1A 會計算校正量。無需起重機,無需運輸。我曾在現場、穀物卡車旁,筆記型電腦放在板條箱上,對鼓、轉子和切碎機進行現場動平衡校正。
稻草切碎機——每次更換刀片後。脫粒鼓——大修或更換敲擊器後。轉子式轉子——每季至少一次。清潔風機和螺旋輸送機——較少,通常僅在維修或可見磨損後。皮帶輪和飛輪——僅在加工或焊接後。
For a short disc-like part, maybe. For a drum or rotary rotor — no. Static balancing only finds the resultant heavy side at rest. It misses couple imbalance — two equal heavy spots at opposite ends of the rotor, 180° apart, whose forces cancel at rest and only show up in rotation. I've seen drums that sat still in any position on the prisms and shook violently at 1,000 RPM. Dynamic balancing with vibration sensors is the only way to catch both types.
Pure measurement time is 20–40 minutes per rotor. On a combine, budget 45 minutes for a simple single-plane job (fan, pulley), about 90 minutes for a chopper, and up to 2 hours for a two-plane drum or rotary rotor — the difference is cleaning, access, and welding, not the instrument. Compare that to 3–5 days of downtime from a mid-harvest bearing failure.
No formal training. The software walks you through each step: its First Trial Weight Estimator suggests a starting trial mass and angle, you weigh the weight, mount it, and enter the values — and after the trial run it calculates and displays the exact correction mass and angle for each plane. If you can weld a plate to a drum and read a number on a screen, you can do this. I was nervous the first time — by the third job it was routine. We also provide WhatsApp support if you get stuck.
至少:收割季開始時、旋轉組件任何部件更換後、以及重大清潔或維修後。對於切碎機:每次更換刀片後。對於辛勤工作的聯合收割機的鼓和轉子:季中檢查也建議。我合作的一些農場已將每季兩次作為標準——這是防止收割中期故障的便宜保險。

一台設備。聯合收割機中的每個旋轉部件。

Balanset-1A. Drums, rotors, choppers, fans, augers, flywheels. Ships worldwide via DHL. 2-year warranty. Pays for itself with the first prevented breakdown.

Categories: 範例解決方案

0 Comments

發佈留言

Avatar placeholder
WhatsApp
Balanset-1A · €1975諮詢工程師