← Balanset-1A Bilik Bazası — bütün fəsillər
Lazer taxometr dəstin ən kapriz və ən kövrək hissəsidir. Yaxşı xəbər: harada axtarmağı bilsəniz, demək olar ki, bütün problemlər dəqiqələr ərzində həll olunur.
Əlamət → səbəb → həll
Ekranda dövr göstərilsə də, proqramda “Taxometr xətası”
-
F4 parametrlərində Tacho unevenness = 200 təyin edin (standart dəyər kiçikdir, buna görə nişandakı istənilən qeyri-bərabərlik xətaya səbəb olur).
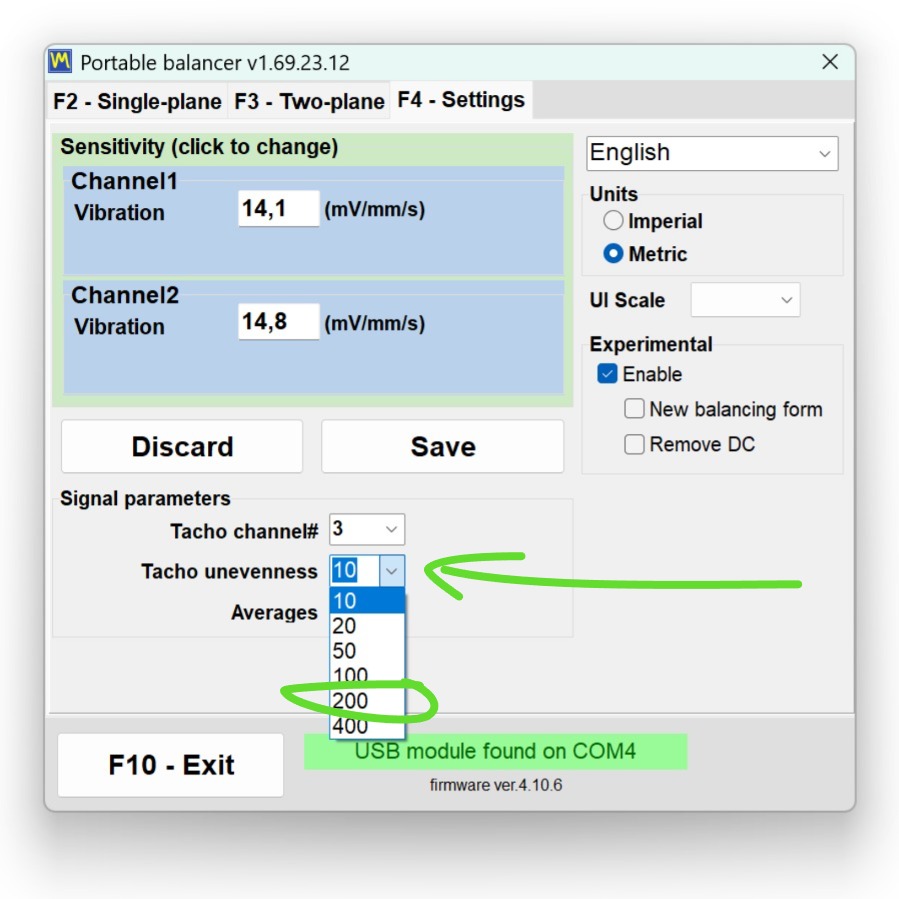
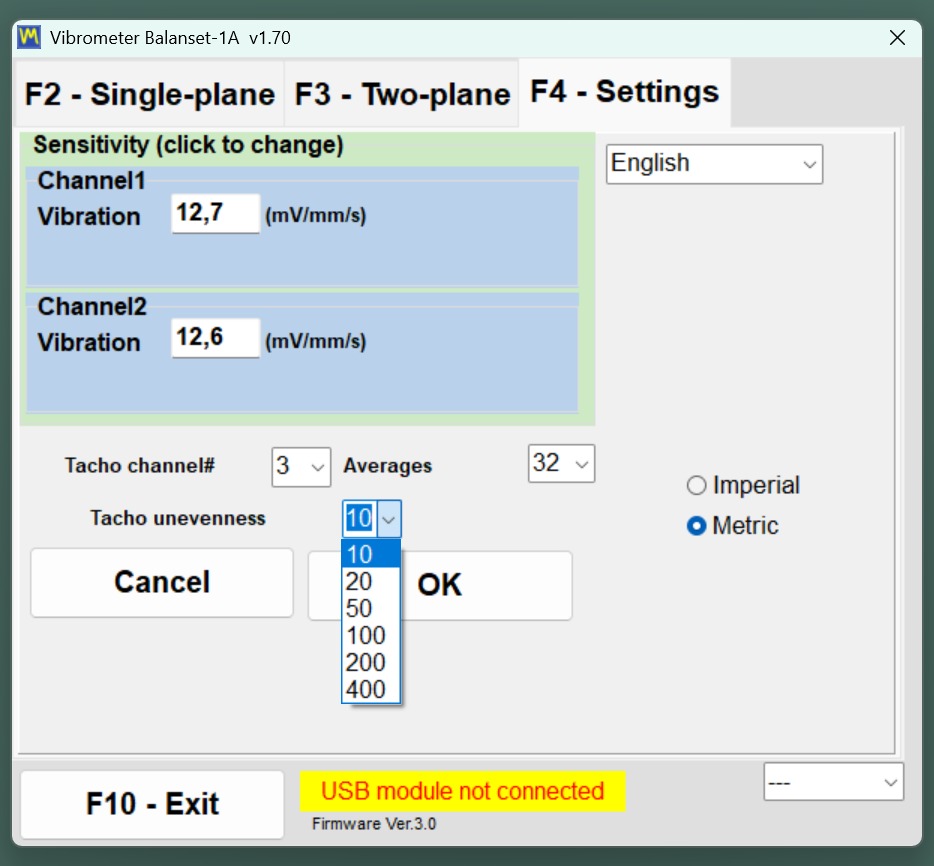
- Kömək etmədi — kontaktı yoxlayın: taxometr konnektorunu (X3) bir neçə dəfə çıxarıb-taxın.
- Daha yeni proqram versiyalarında taxometr yoxlaması standart olaraq daha sərtdir — yeniləmədən sonra bu parametri yenidən yoxlayın.
Dövr 2–4× yüksək göstərilir / sıçrayır
Taxometr əlavə “nişanlar” görür:
- rotorun parlaq sahələri əks etdirici lentə bənzər davranır. Diaqnostika: göstəriciləri bölün. Real hal: cihaz həqiqi 2856 rpm-də 8695 göstərdi — 8695/2856 = 3, yəni üç parlaq nöqtə. Həll: matlaşdırın parlaq sahələri, ya da onları mat lentlə örtün;
-
qasnaq dəlikləri: iki dəlik = iki nişan; dövr ikiqat artır (2000 əvəzinə 4000). Nişanı bərk səthə yapışdırın, şüanın yolundakı dəlikləri örtün;
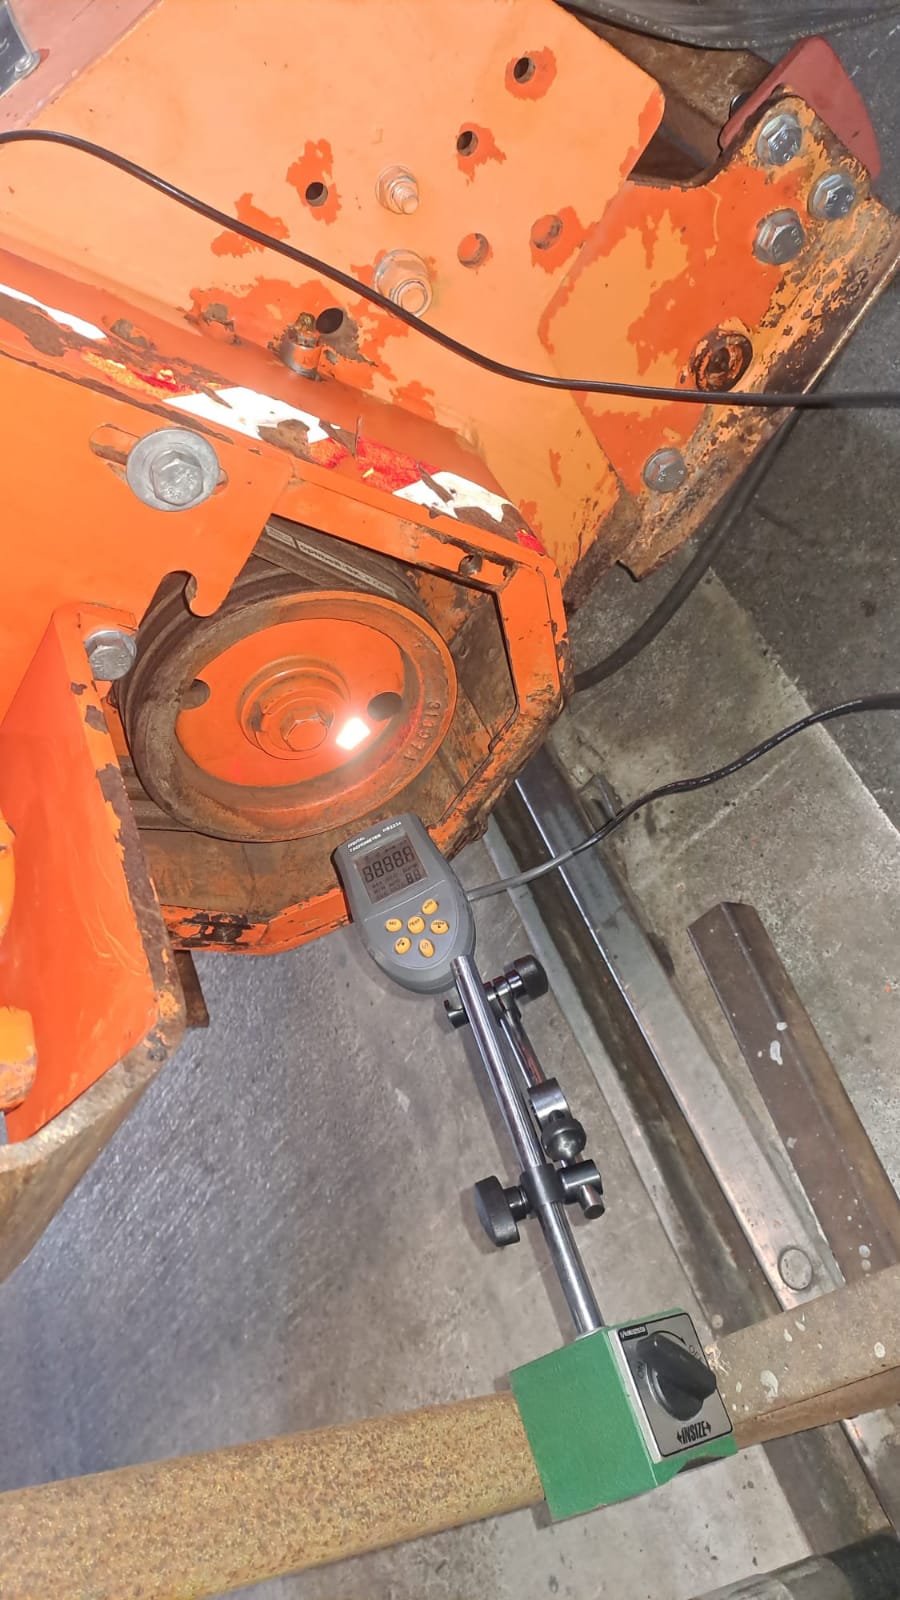
Taxometrə dövrü ikiqat göstərdən iki dəlikli qasnaq. -
bıçaqlar: bıçaq üzərində nişan üstəlik parlaq qonşu bıçaqlar = taxometr “bıçaqları sayır” (real hal — 4 bıçağı nişan kimi saydı). Nişanı yapışdırın mufta və ya val;
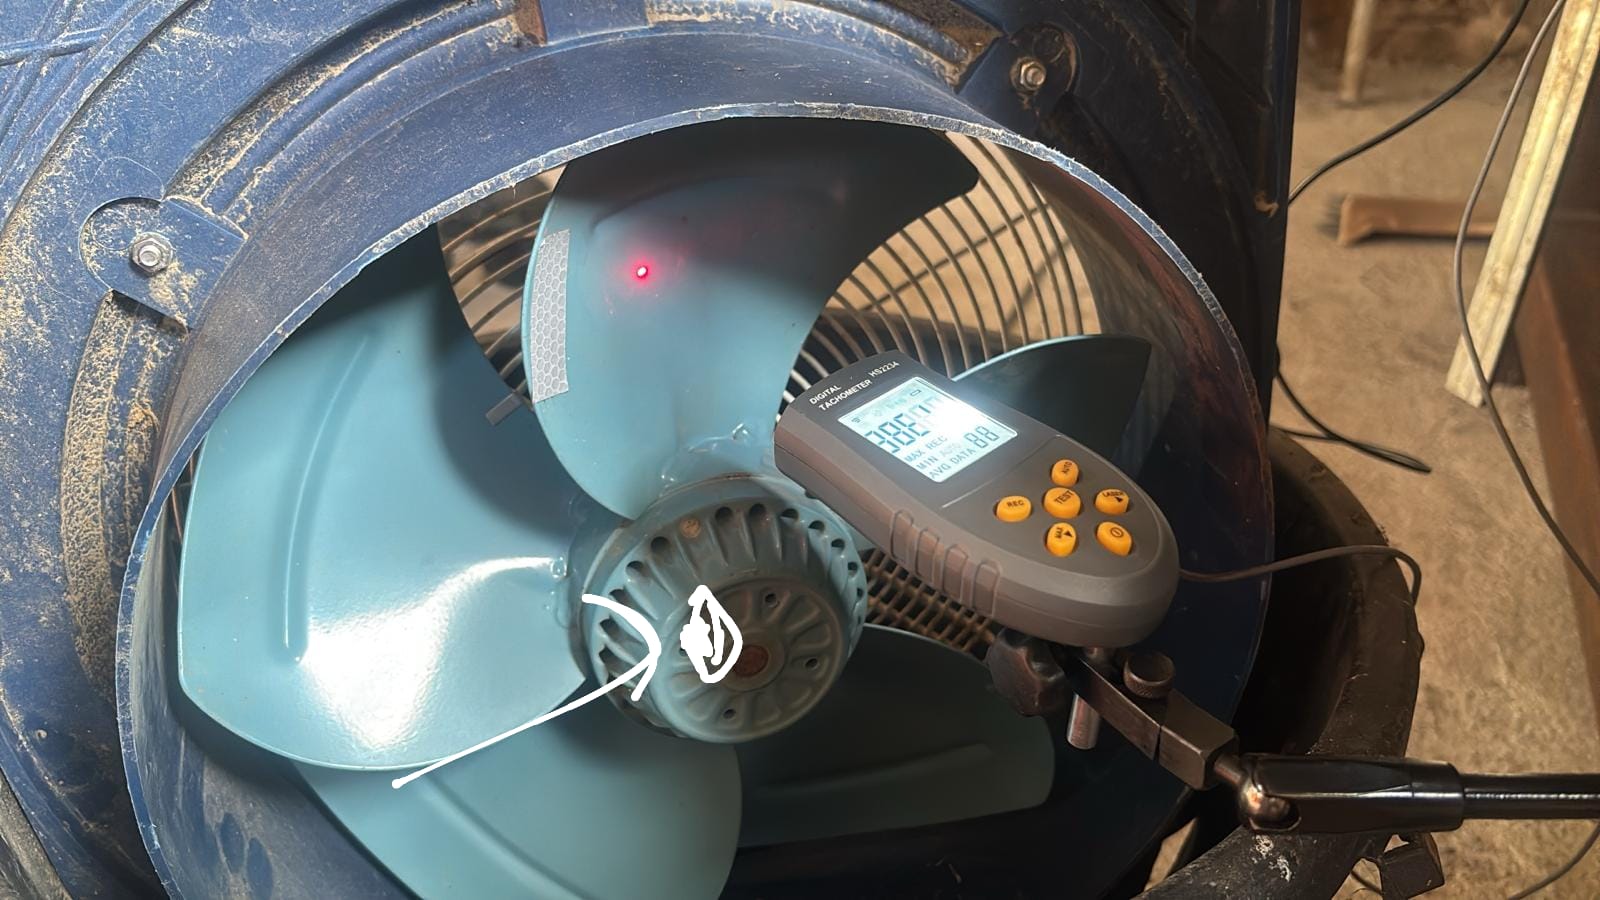
Ventilyator pərində nişan — onu hub-a köçürün. - qaynaq tikişləri və kənarlar da parıldayır — tuşlama nöqtəsini dəyişin.
Günəş: açıq havada taxometr “korlanır”
Sahə işinin klassikası. Parlaq işıq fotoelementi doldurur.
-
Kölgəlik taxometr və nişan: karton parçası, üstünə əski atılmış stul, brezent — nə olursa.
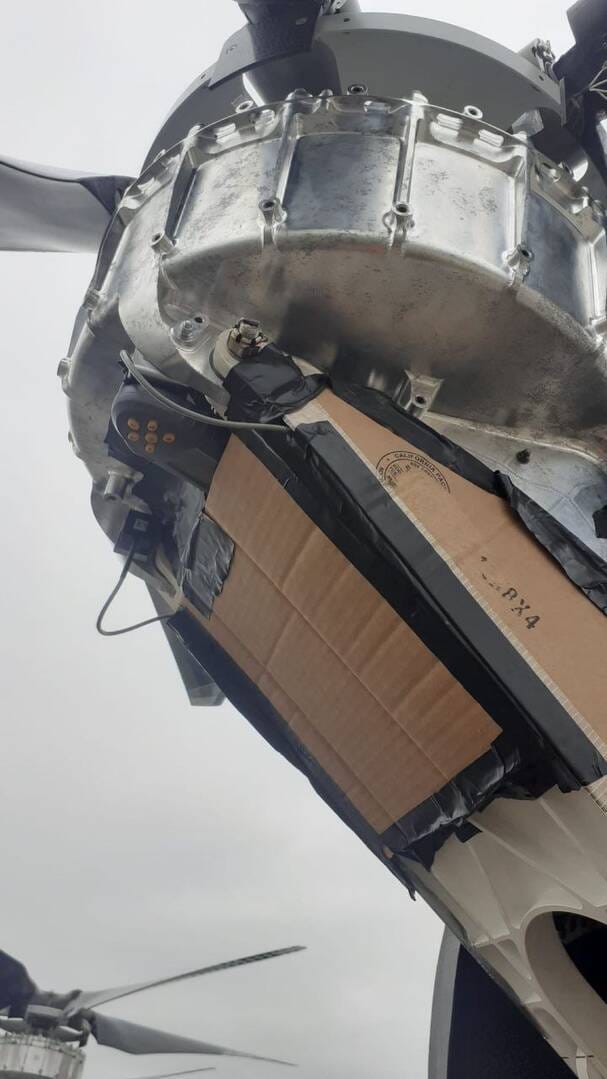
Maşının üzərində özündüzəltmə karton və lentdən kölgəlik. -
Çap edin 3D kölgəlik (qapaq): ver2.stl / ver3.stl modelləri vibromera.eu saytındadır (wp-content/ver3.stl, forum mövzusu “Tachometer sunshade light shield 3D print model”).
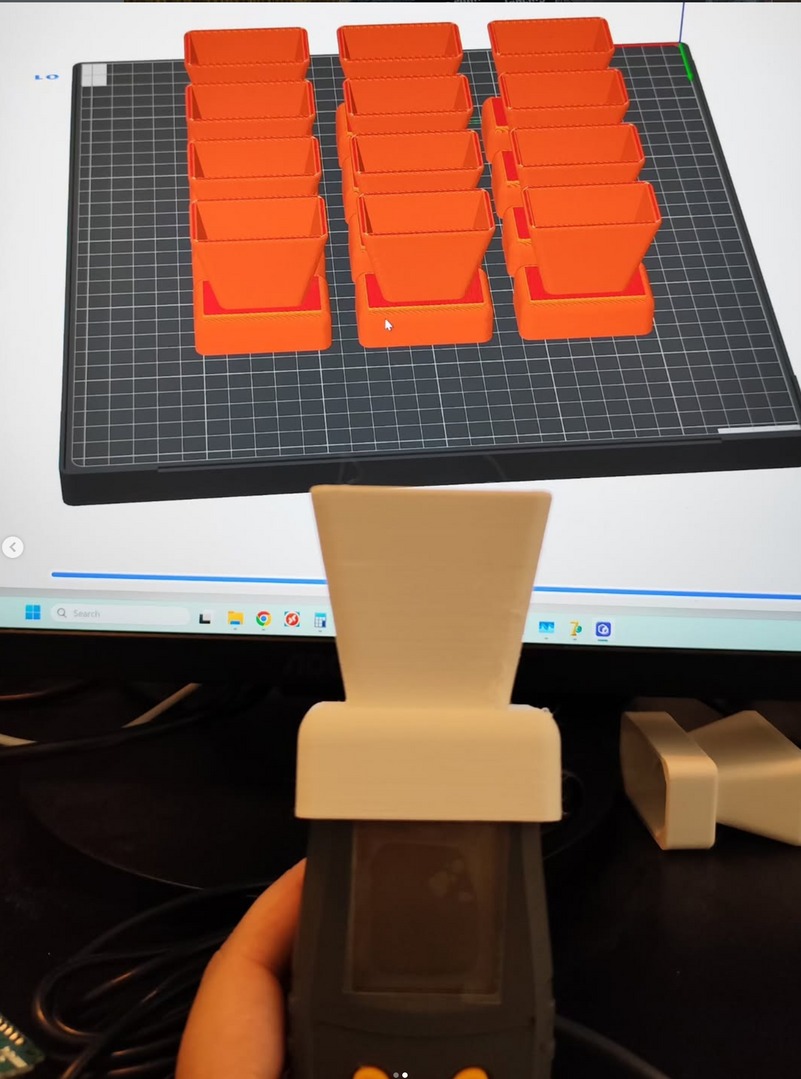
Taxometrə quraşdırılmış 3D-çap kölgəliyi. 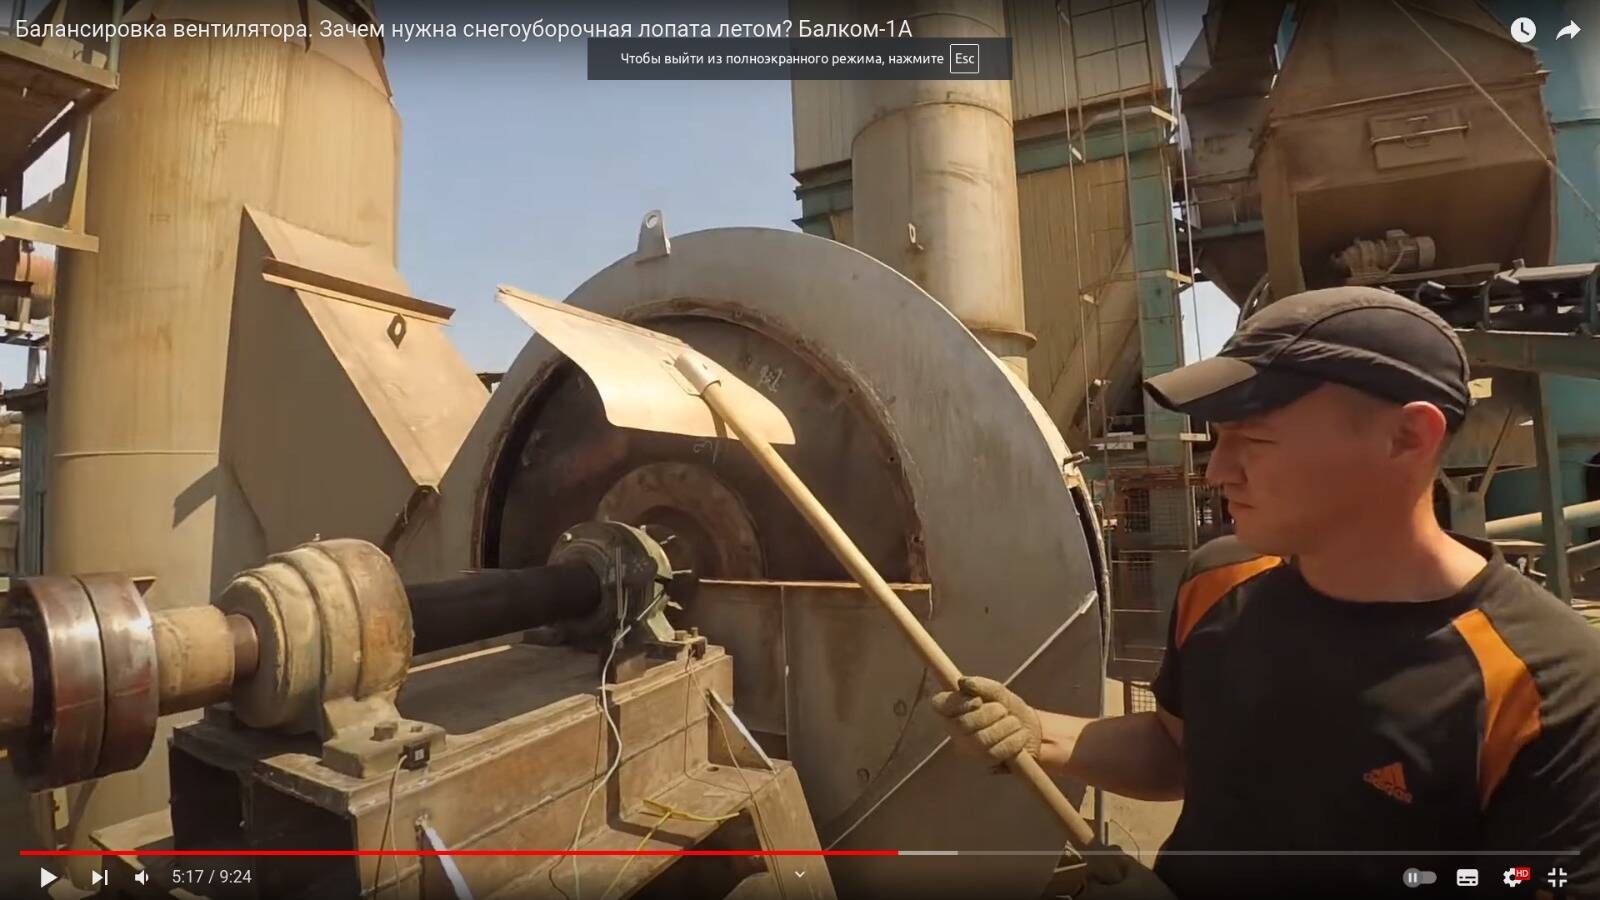
Sahədə improvizə edilmiş kölgəlik. - Dəyişin bucaq və məsafə nişana — bir az bucaq parıltını azaldır.
- Nişan 10–15 mm olmalı və möhkəm yapışdırılmalıdır.
Taxometrin ekranı dövrü göstərir, amma proqram heç nə almır
- X3 konnektorunu yoxlayın (yenidən taxın).
- Proqram təminatını və proqram-avadanlığını (firmware) yeniləyin (köhnə versiyalarda ötürmə xətaları var idi).
- Əgər USB/taxometr kabelini tərpətdikdə blokun platasındakı indikator LED-i sönürsə — konnektorda və ya blokun içində kontakt zəifdir: bu, zəmanət halıdır, dəstəyə yazın.
Taxometr 10 saniyə işləyir, sonra bir dəyərdə “donur”
Məlum avadanlıq qüsuru — taxometr dəyişdirilir (zəmanət).
Yıxıldıqdan sonra ümumiyyətlə saymır
Taxometr kövrəkdir. Yıxılmadan sonra adətən əvəzlənməlidir. Korpusu açmağın mənası yoxdur — qidalanma kabellə gəlir, içəridə istifadəçinin tənzimləyə biləcəyi hissə yoxdur.
Nişan üçün qaydalar
- Nişan dəst daxilindəki əks etdirici lentin bir parçasıdır, ~10–15 mm.
- Onu yapışdırın mufta və ya val, təmiz quru səthdə, bıçaq üzərində yox.
- Bir rotorda nişan. Şüanın yolunda başqa əks etdirici obyektlərin olmadığından əmin olun.
- Seriya ölçmələri arasında nişanı yenidən yapışdırmayın və ya taxometri hərəkət etdirməyin — faza sıfırı sürüşür və bütün seriya boşa gedir.
- Taxometr həmişə çevrənin eyni nöqtəsinə tuşlanır.
- Lent qurtarıbsa, istənilən əks etdirici lent, o cümlədən təhlükəsizlik jiletindəki lent müvəqqəti istifadə oluna bilər. Dəstdəki lent isə daha etibarlıdır.
Taxometrin stend sınağı
Şübhə olduqda taxometri məlum dövrdə nişan yapışdırılmış dəzgah-şlifdə/drelldə yoxlayın — bıçaqlı maşında yox: bıçaqlarda siqnal düşmələri və əlavə tetiklər əsl mənzərəni gizlədir.
Dəyişən tezlikli intiqaldan (VFD) müdaxilə
Yerlə birləşdirilməmiş VFD taxometr və verici kabellərinə səs-küy induksiya edə bilər: dövrün sıçraması, “səs-küylü” siqnal. Həll: VFD-ni yerlə birləşdirin, qoyun ferrit halqaları kabellərdə, filtrlərdən istifadə edin, kabelləri elektrik xətlərindən uzaq çəkin.

