Introduction
Grain harvesters are complex machines, and like any other equipment, they require proper maintenance to operate without failure. One important but often overlooked aspect of such maintenance is rotor balancing. In this article, we will discuss the importance of rotor balancing, common issues you may encounter, and procedures to follow to ensure optimal harvester performance during the peak harvest season.
The Importance of Rotor Balancing
Rotor balancing in harvesters is essential for several reasons:
- Reducing bearing wear: Unbalanced rotors create excessive vibration, leading to premature wear of bearings and other components.
- Improving energy efficiency: Balanced rotors require less effort to rotate, resulting in fuel savings and lower operating costs.
- Minimizing vibration: Vibration can lead to structural fatigue and damage to other parts of the harvester. Balancing helps reduce vibration and extend the machine’s lifespan.
- Enhancing work quality: Balanced rotors ensure smoother and more efficient operation of the harvester, leading to improved harvest quality and reduced grain loss.
- Increasing operator comfort: Reduced vibration creates a more comfortable and safer working environment for the operator.
Types of Rotors in Harvesters
In rotary harvesters, the primary rotor often requiring balancing is the main threshing drum. In straw walker harvesters, the focus is usually on the threshing drum and beater. Straw chopper rotors also need balancing but may present special challenges due to potential structural weakness.
Common Issues in Rotor Balancing
- Time-consuming: Balancing a well-maintained chopper may take about an hour, while machines requiring repair can take a day or more.
- Structural weakness: Structural problems, like unseen cracks, may arise from severe vibration during operation. This weakens the chopper housing, making it prone to resonance phenomena and hindering stable amplitude and phase readings.
- Loose components: Loose or dangling parts, such as a straw spreader, can cause inconsistencies in the balancing process. These should be either removed or securely welded to the rotor housing.
- Bearing issues: Worn or improperly tightened bearings can cause excessive vibration. Always replace old bearings and avoid over-tightening new ones.
Pre-Balancing Checklist
- Check old weights: Inspect the condition of existing balancing weights. If mounting nuts are worn, remove the weights to prevent them from shifting during operation.
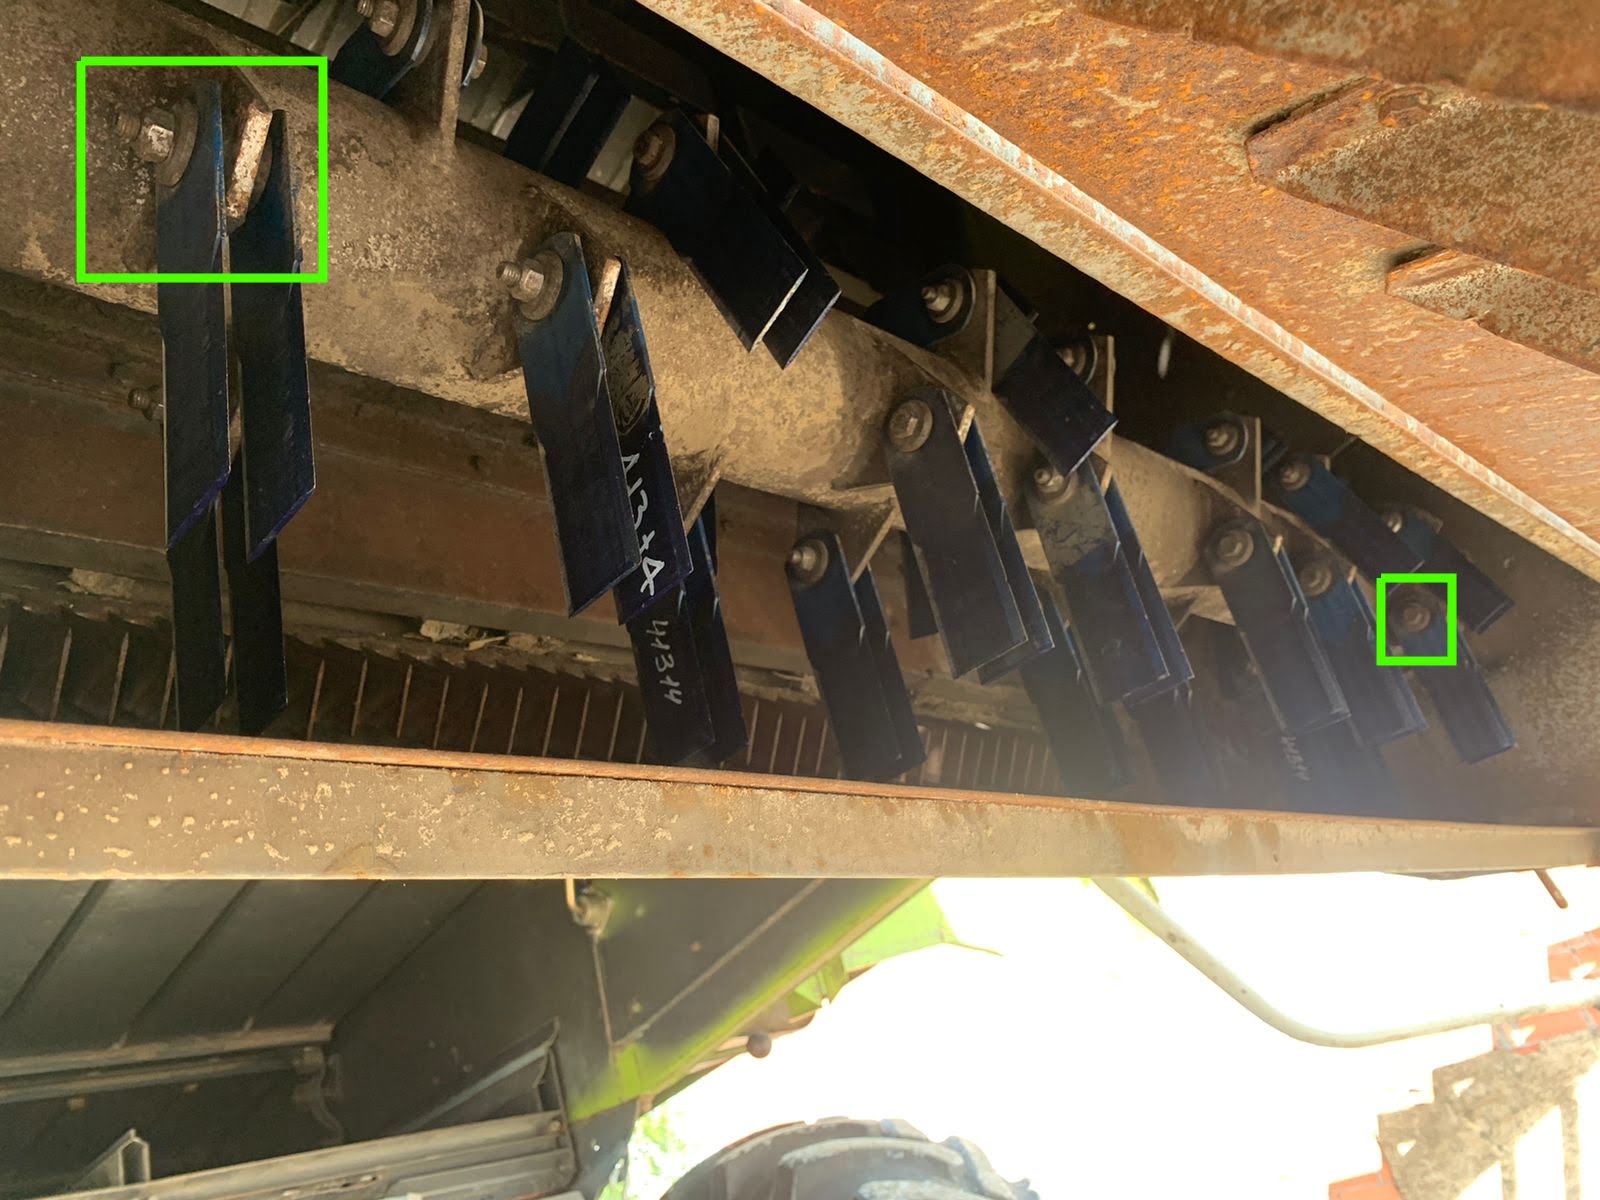
- Blade integrity: Check for jammed or shifted blades on the straw chopper, which may not self-correct due to centrifugal force, leading to intermittent imbalance.
- Tensioners and belts: Inspect tensioners and remove belts to check for bearing play. Replace bearings if necessary.
- External interference: When using a vibrometer, be aware that rollers operating at speeds close to the chopper may interfere with vibration measurements. Watch for anomalies in the vibrometer mode readings.
- Shaft straightness: Use a dial indicator to check for shaft runout or bending. Self-aligning bearings can provide some compensation.
Balancing Procedures
Step-by-Step Balancing
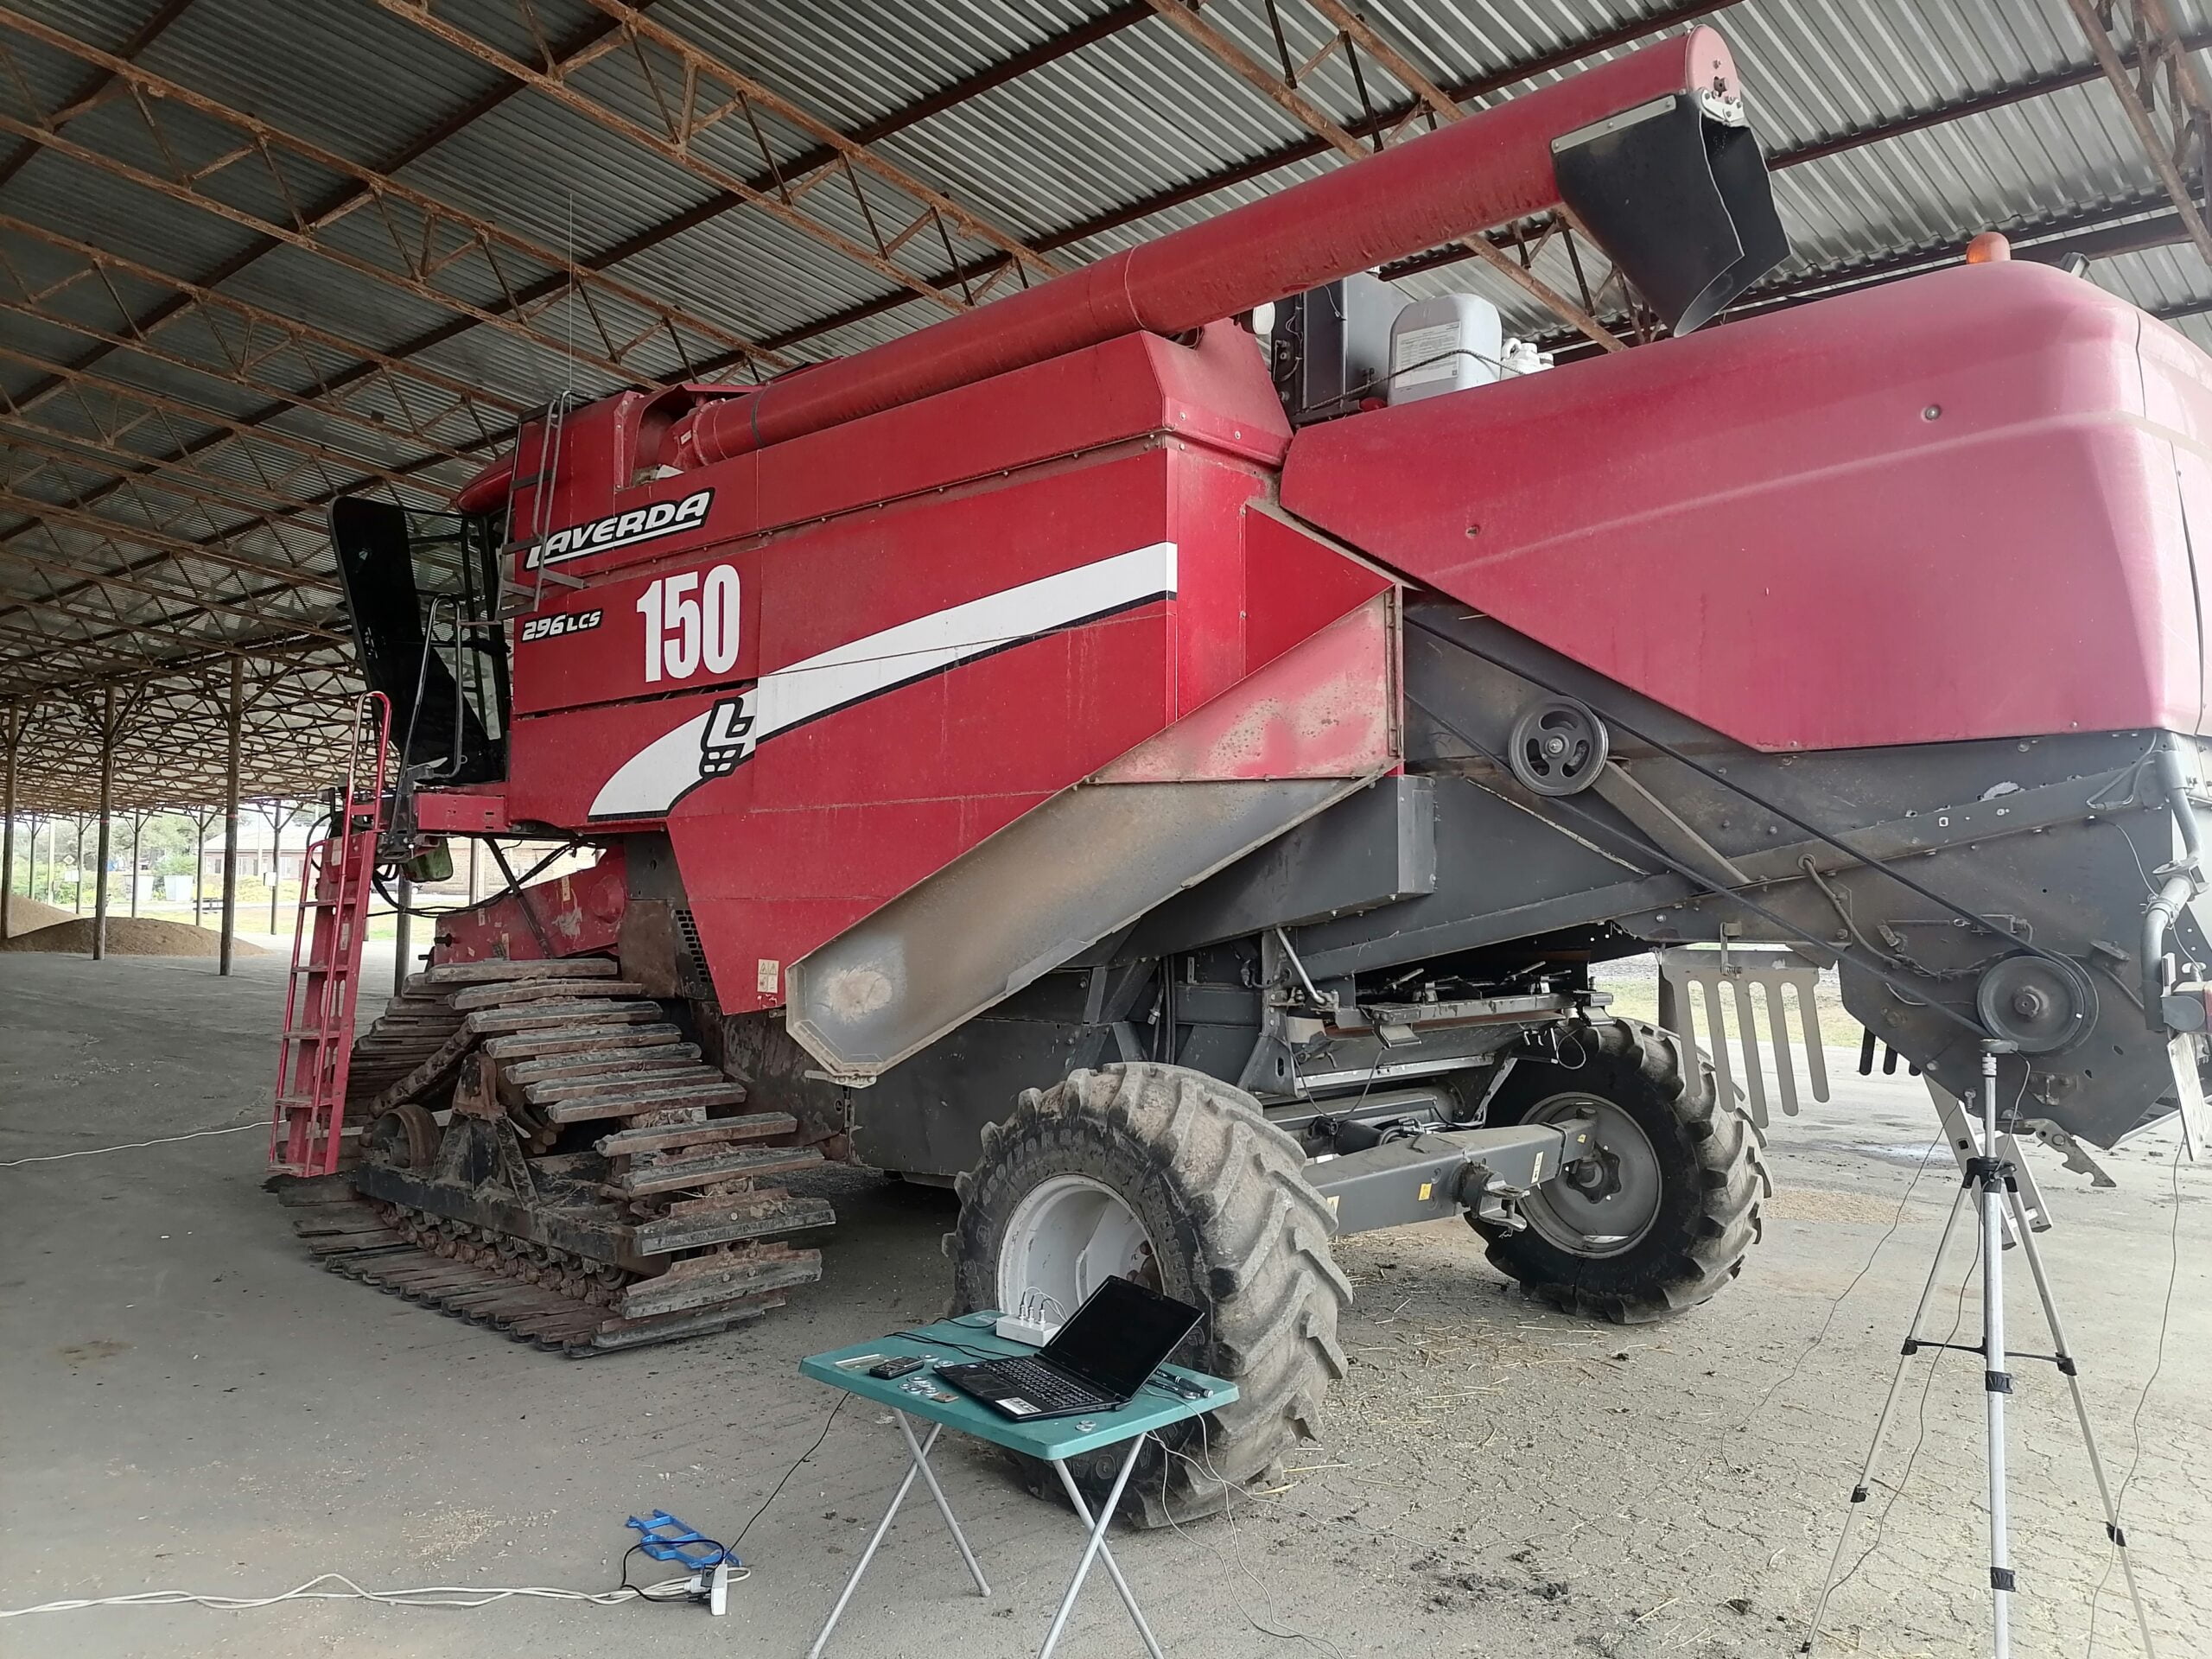
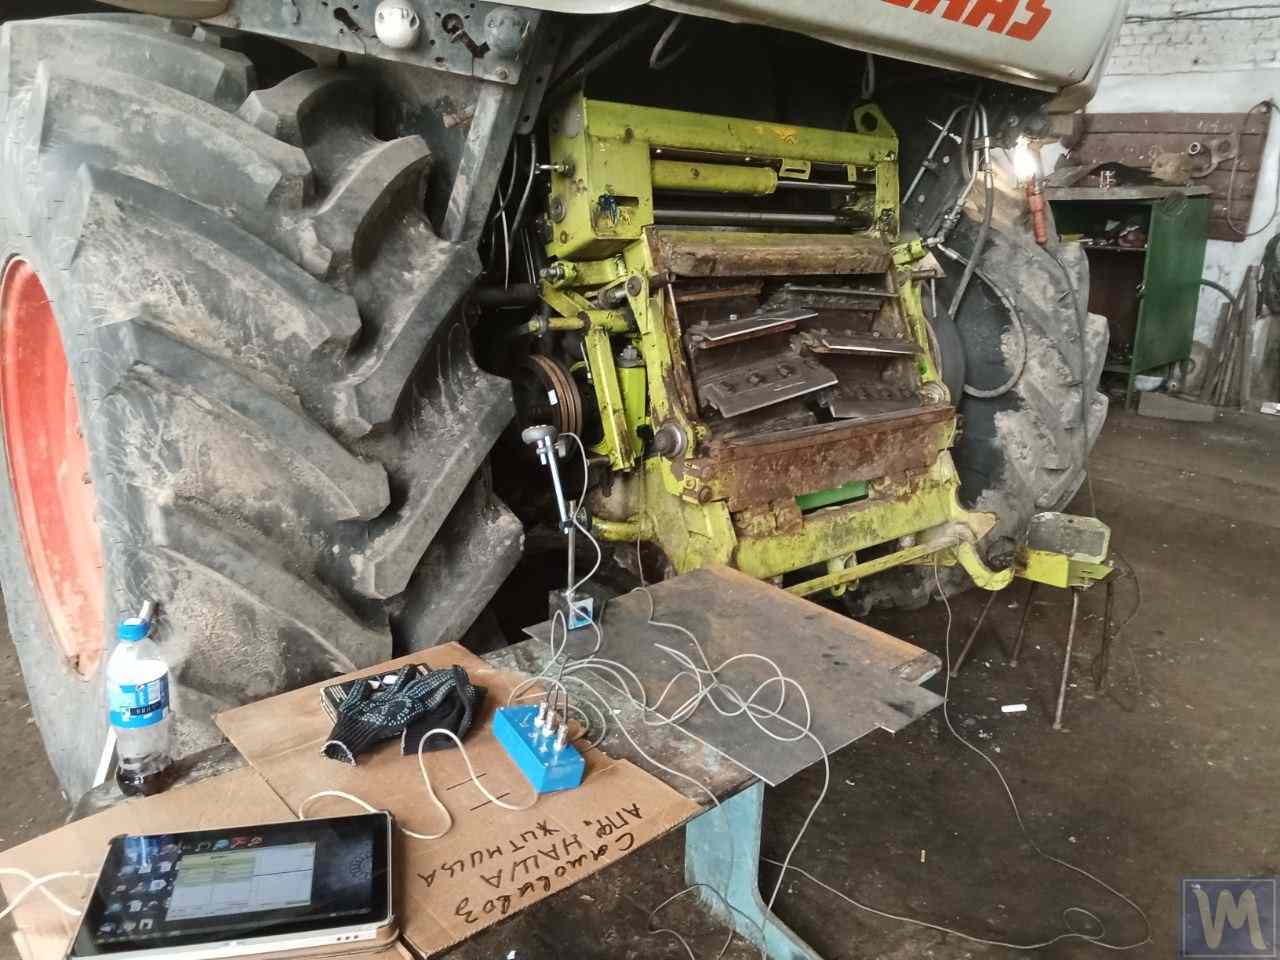
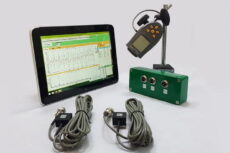
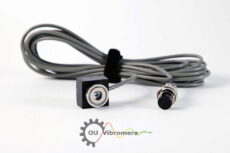
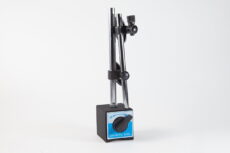
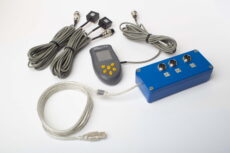
- Sensor installation: Install vibration sensors perpendicular to the rotor’s axis and secure the tachometer on a magnetic stand. Attach reflective tape to the pulley for tachometer targeting. Connect all sensors to the Balanset-1A device, which should be connected to a laptop with specialized balancing software.
- Software initialization: Launch the software and select two-plane balancing. Weigh the test weight, record its mass and the radius at which it will be installed. Start the rotor and measure its initial vibration levels.
- Test weight installation: Place the test weight on the first plane corresponding to the side of the first sensor. Spin the rotor and record vibration data again, ensuring a change in amplitude or phase of at least 20%. Remove the test weight from the first plane and place it on the second plane associated with the second sensor. Spin and measure a third time.
- Data analysis: Based on these measurements, the software will indicate the optimal mass and angular position for the corrective weights in both planes. Remove the test weight, then measure and weld the corrective weights at the specified angles.
- Verification: Verify the rotor balance by spinning it again and observing vibration levels. If the software recommends additional weight, weld it in place and reconfirm the balance.
- Multi-step balancing: In case of very high vibration levels, perform balancing two or three times:
- Start by balancing the rotor at low speed.
- Repeat the process at medium speed.
- Finally, balance at operational speed.
Corrective Weights
Installation
When installing corrective weights, use only half the weight recommended by the software to account for system non-linearity.
Placement
Use washers of various sizes as corrective weights, preferably placing them on special perforated disks at the rotor edges. If these are unavailable, weights can be attached to the bolts securing the blades.
Conclusion
Rotor balancing in grain harvesters is a crucial task requiring a careful approach. Neglecting this process can lead to structural problems, reduced efficiency, and a shortened machine lifespan. Following a systematic pre-balancing checklist and step-by-step balancing procedures can significantly improve the reliability and performance of your harvester.

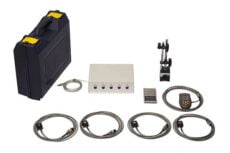

Balanset-1A: Your Reliable Partner in Balancing
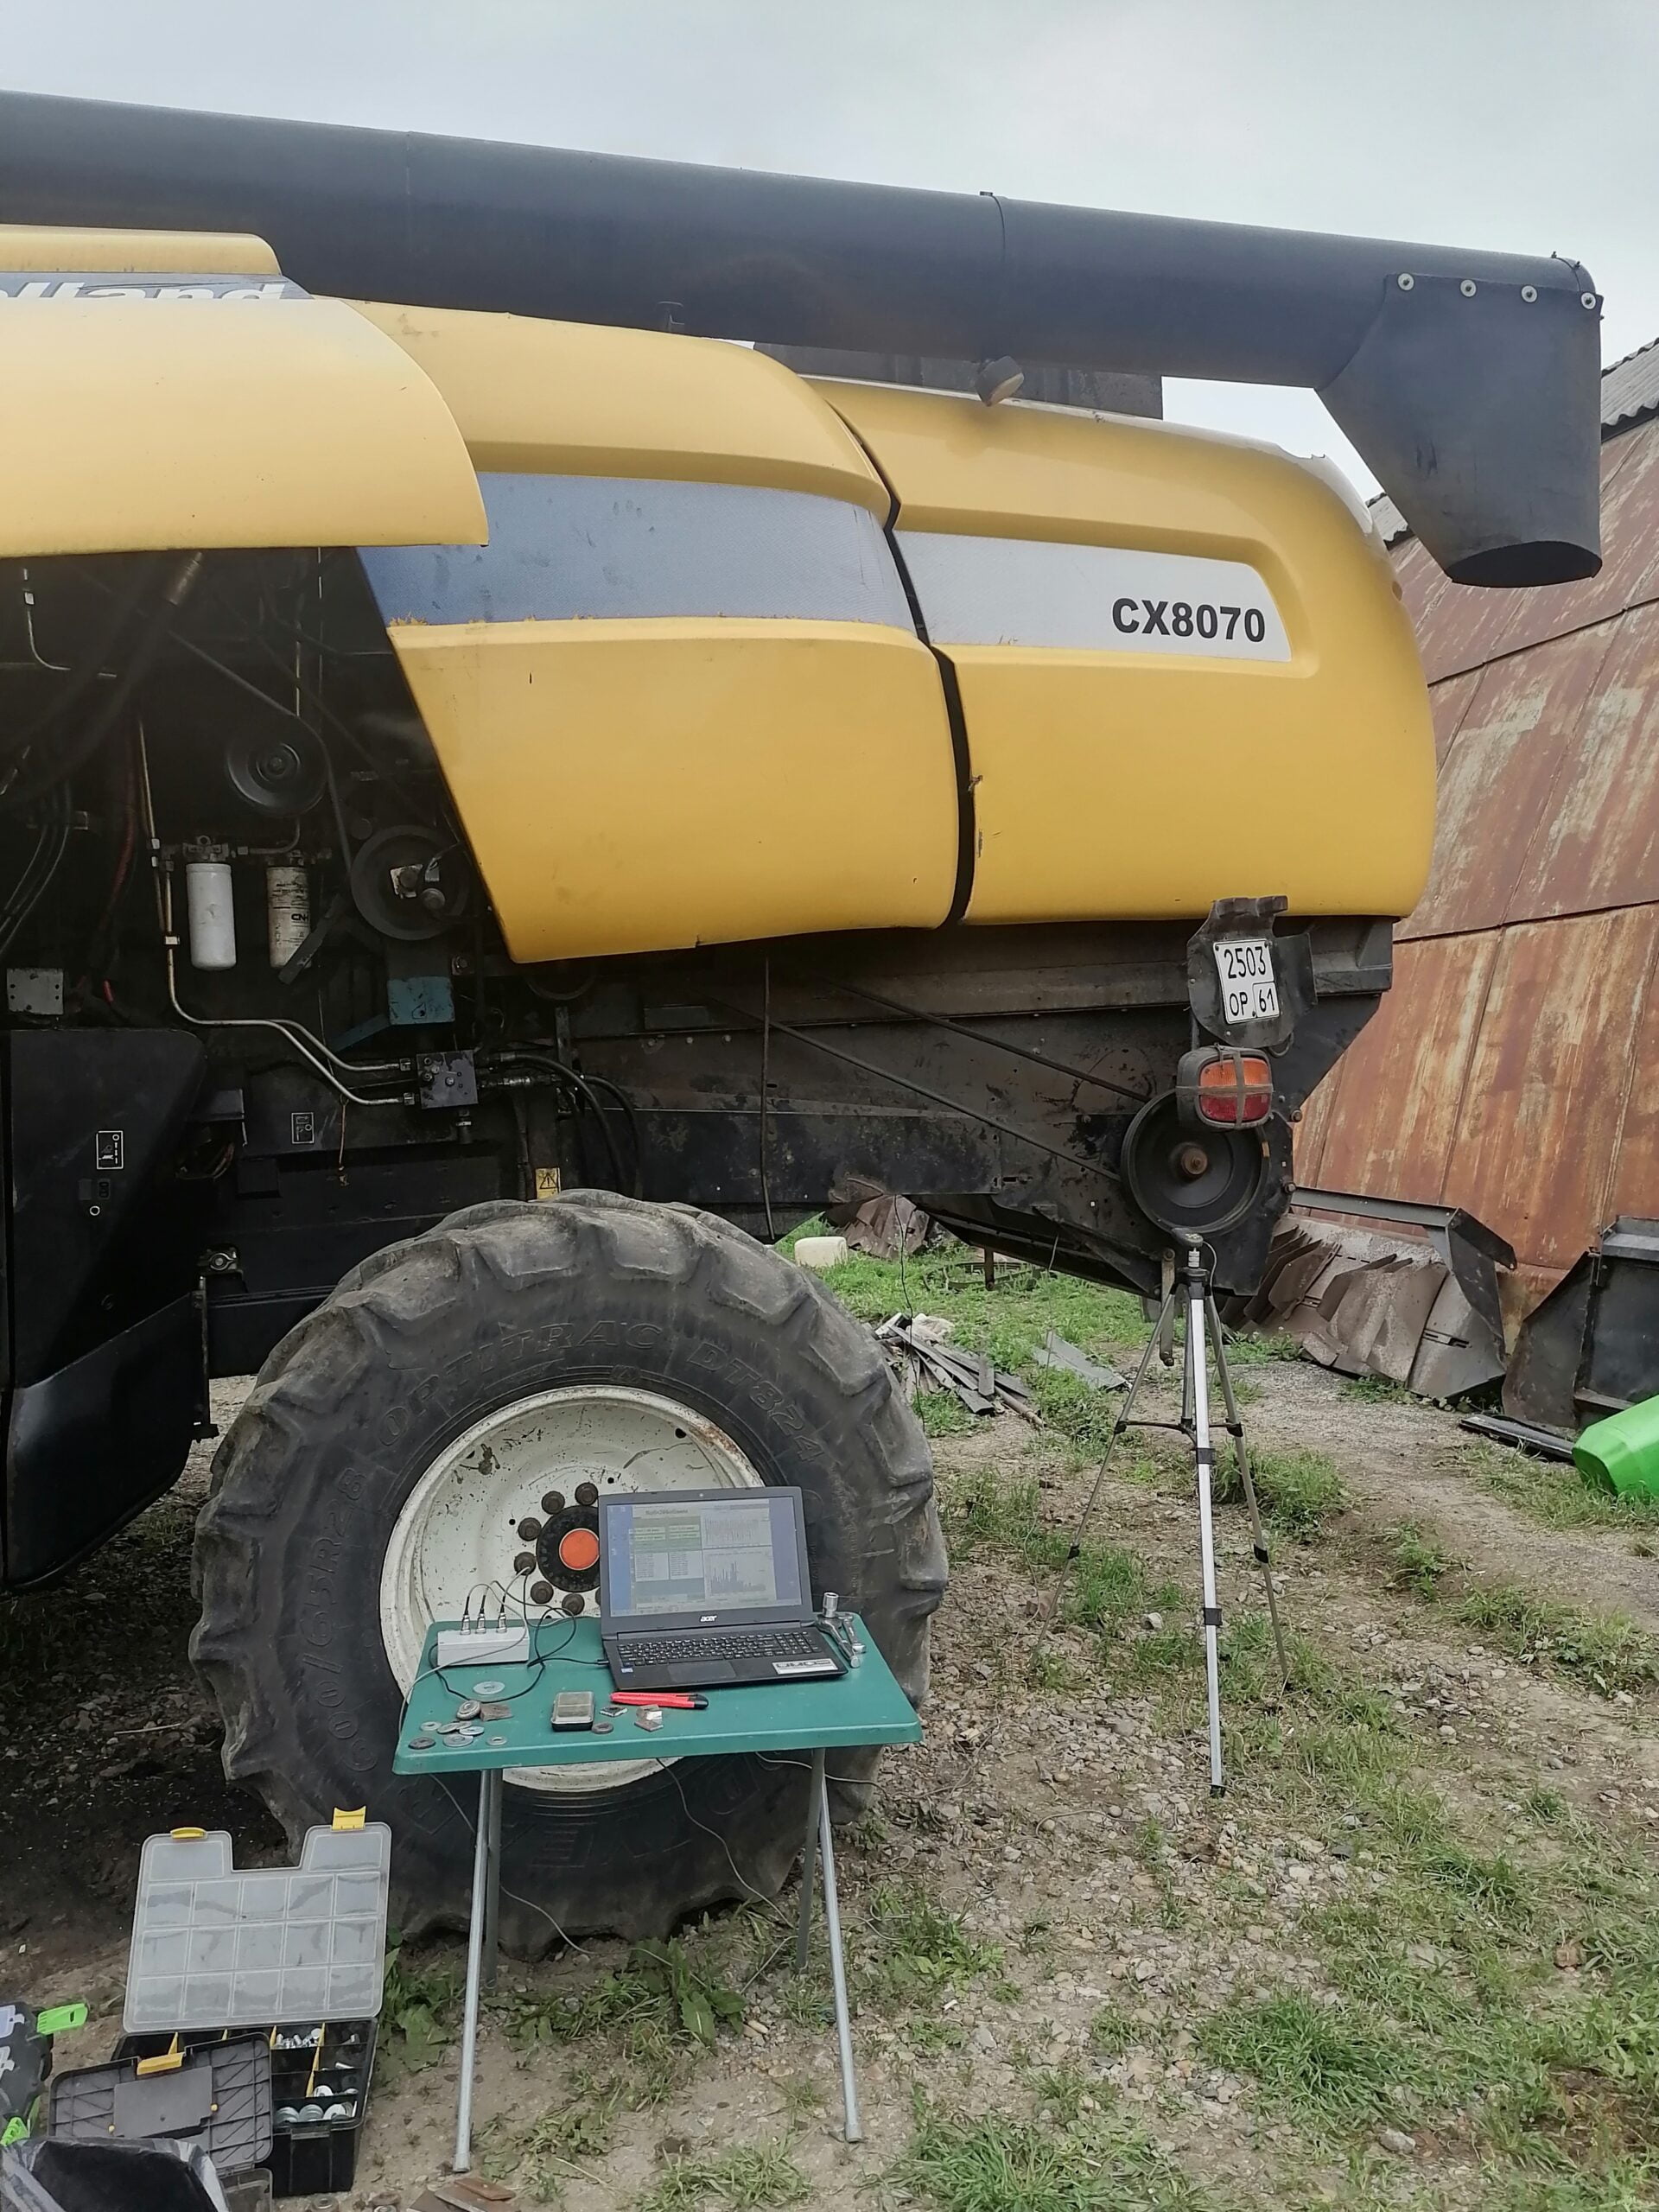
Balanset-1A is a portable balancer and vibration analyzer, ideally suited for balancing threshing drums, choppers, and other rotating components of agricultural machinery.
Main Advantages of Balanset-1A
- Ease of use: The device is easy to learn and use, even for those without specialized knowledge in vibration analysis.
- Portability: The compact and lightweight device is easy to transport and use on-site.
- High accuracy: Balanset-1A provides high measurement accuracy, ensuring quality balancing.
- Multifunctionality: The device can be used not only for balancing but also for vibration analysis and equipment diagnostics.
- Affordable price: Balanset-1A offers excellent value for money, making professional balancing accessible to a wide range of users.
Technical Specifications of Balanset-1A
- Vibration measurement range: 0.02 – 80 mm/s
- Frequency range: 5 – 550 Hz (for vibration measurement), 10 – 1000 Hz (for vibrometer mode)
- Number of correction planes: 1 or 2
- Rotational speed measurement range: 100 – 100,000 RPM
Package Contents
- USB interface block
- Two vibration sensors
- Optical sensor (laser tachometer) with magnetic stand
- Scales
- Software
- Plastic carrying case
Benefits of Using Balanset-1A
- Reducing maintenance and repair costs: Balancing reduces wear on harvester components, leading to lower maintenance and repair costs.
- Improving harvest efficiency: A balanced drum or chopper operates more efficiently, improving harvest quality.
- Extending harvester lifespan: Balancing reduces the load on components, prolonging their lifespan.
- Enhancing operator comfort: Reduced vibration makes the operator’s work more comfortable and safer.
- Saving time and money: On-site balancing saves time and money on disassembly, transportation, and repair.
Final Thoughts
Rotor balancing in grain harvesters is a crucial procedure that ensures their efficient and reliable operation while extending the machine’s lifespan. Regular balancing, especially after intensive use, repairs, or signs of imbalance, helps prevent major breakdowns and reduces maintenance costs.
With the portable balancer and vibration analyzer “Balanset-1A,” you can easily and quickly balance harvester rotors directly on the machine, in the field, saving time and money while enhancing harvest efficiency and prolonging the lifespan of your machine. Don’t neglect balancing, and your harvester will serve you well for many years!