Penyeimbangan Rotor pada Mesin Bubut: Solusi Hemat Biaya untuk Meningkatkan Kualitas Produk
Dalam manufaktur modern, di mana kualitas produk sangatlah penting, penyeimbangan rotor menjadi bagian penting dari proses teknologi. Namun, pembelian peralatan penyeimbangan khusus dapat memakan biaya besar bagi usaha kecil dan menengah. Dalam artikel ini, kami mengeksplorasi kemungkinan penggunaan mesin bubut untuk rotor penyeimbangan, yang dapat secara signifikan mengurangi biaya peralatan dan meningkatkan efisiensi produksi.
Mesin Bubut sebagai Alat untuk Menyeimbangkan
Mesin bubut, berkat desain dan fungsinya, dapat digunakan dengan efektif untuk menyeimbangkan rotor dari berbagai jenis dan ukuran. Keuntungan utama pendekatan ini adalah penghematan biaya, karena tidak perlu membeli peralatan khusus yang mahal. Selain itu, penggunaan mesin bubut memungkinkan penyeimbangan dilakukan langsung selama proses pembuatan rotor, yang mempersingkat waktu produksi dan meningkatkan kualitas produk.
Persiapan untuk Menyeimbangkan
Sebelum memulai proses penyeimbangan, beberapa langkah persiapan harus dilakukan:
- Memilih mesin bubut yang sesuai: Mesin bubut harus memiliki kekakuan dan presisi yang cukup untuk memastikan pemasangan rotor yang andal dan pengukuran getaran yang akurat.
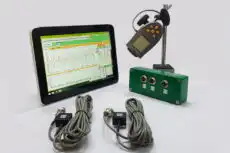
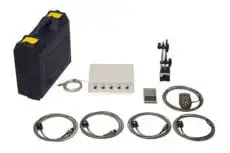
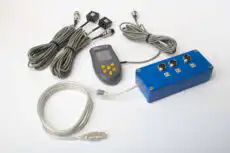
- Memasang sistem pengukuran: Untuk mengukur rotor getaran pada mesin bubut, dapat digunakan alat penyeimbang portabel seperti Balanset-1A dapat digunakan. Alat ini mencakup sensor getaran, sebuah takometer, dan perangkat lunak untuk analisis data serta perhitungan massa koreksi.
- Menangani ketidakseimbangan spindel itu sendiri: Anda tidak perlu menyeimbangkan spindel mesin bubut itu sendiri. Jalankan mesin bubut dengan chuck saja (rotor dilepas) dan catat vektor getarannya: itulah baseline yang disumbangkan oleh spindel dan chuck. Jika ini merupakan bagian yang signifikan dari pembacaan rotor, kurangi nilainya, atau — lebih baik — gunakan putaran indeks 180° (fungsi “Mandrel eccentricity elimination”, “F7 - Run Ecc”), yang secara otomatis memisahkan semua hal yang tidak ikut berputar bersama rotor.
- Menyesuaikan rotor dengan mesin, bukan dengan spindel: Yang penting adalah bahwa gaya ketidakseimbangan rotor menghasilkan respons yang terukur pada rumah bantalan. Mesin bubut yang berat dan kaku merespons sangat sedikit per gram ketidakseimbangan, sehingga pada rotor yang sangat ringan sinyalnya hilang dalam noise, sementara rotor yang sangat berat dapat melebihi beban nominal chuck atau bantalan. Dalam praktiknya, pastikan bobot uji dengan ukuran yang tepat menghasilkan perubahan amplitudo dan fase yang bersih dan dapat diulang sebelum Anda memercayai koefisien pengaruh mana pun.
- Memeriksa runout penutup karet sebelum menyeimbangkan: Pada poros berlapis karet, ketidakseimbangan massa dan keolengan geometris (runout) pada lapisan pelapisnya adalah dua cacat yang berbeda. Penyeimbangan menghilangkan gaya 1×; itu tidak dapat membuat lapisan yang eksentrik atau oval menjadi bulat. Pasang dial indicator pada permukaan yang dilapisi dan putar poros dengan tangan: jika total indicated runout melebihi toleransi produk, gerinda atau bubut lapisan tersebut agar konsentris terlebih dahulu — pada mesin bubut yang sama — dan baru kemudian lakukan penyeimbangan. Poros yang sudah diseimbangkan namun masih mengalami runout akan terus menghasilkan gauge band, guratan, dan variasi tekanan jepit (nip pressure) berapa pun rendahnya pembacaan getaran.
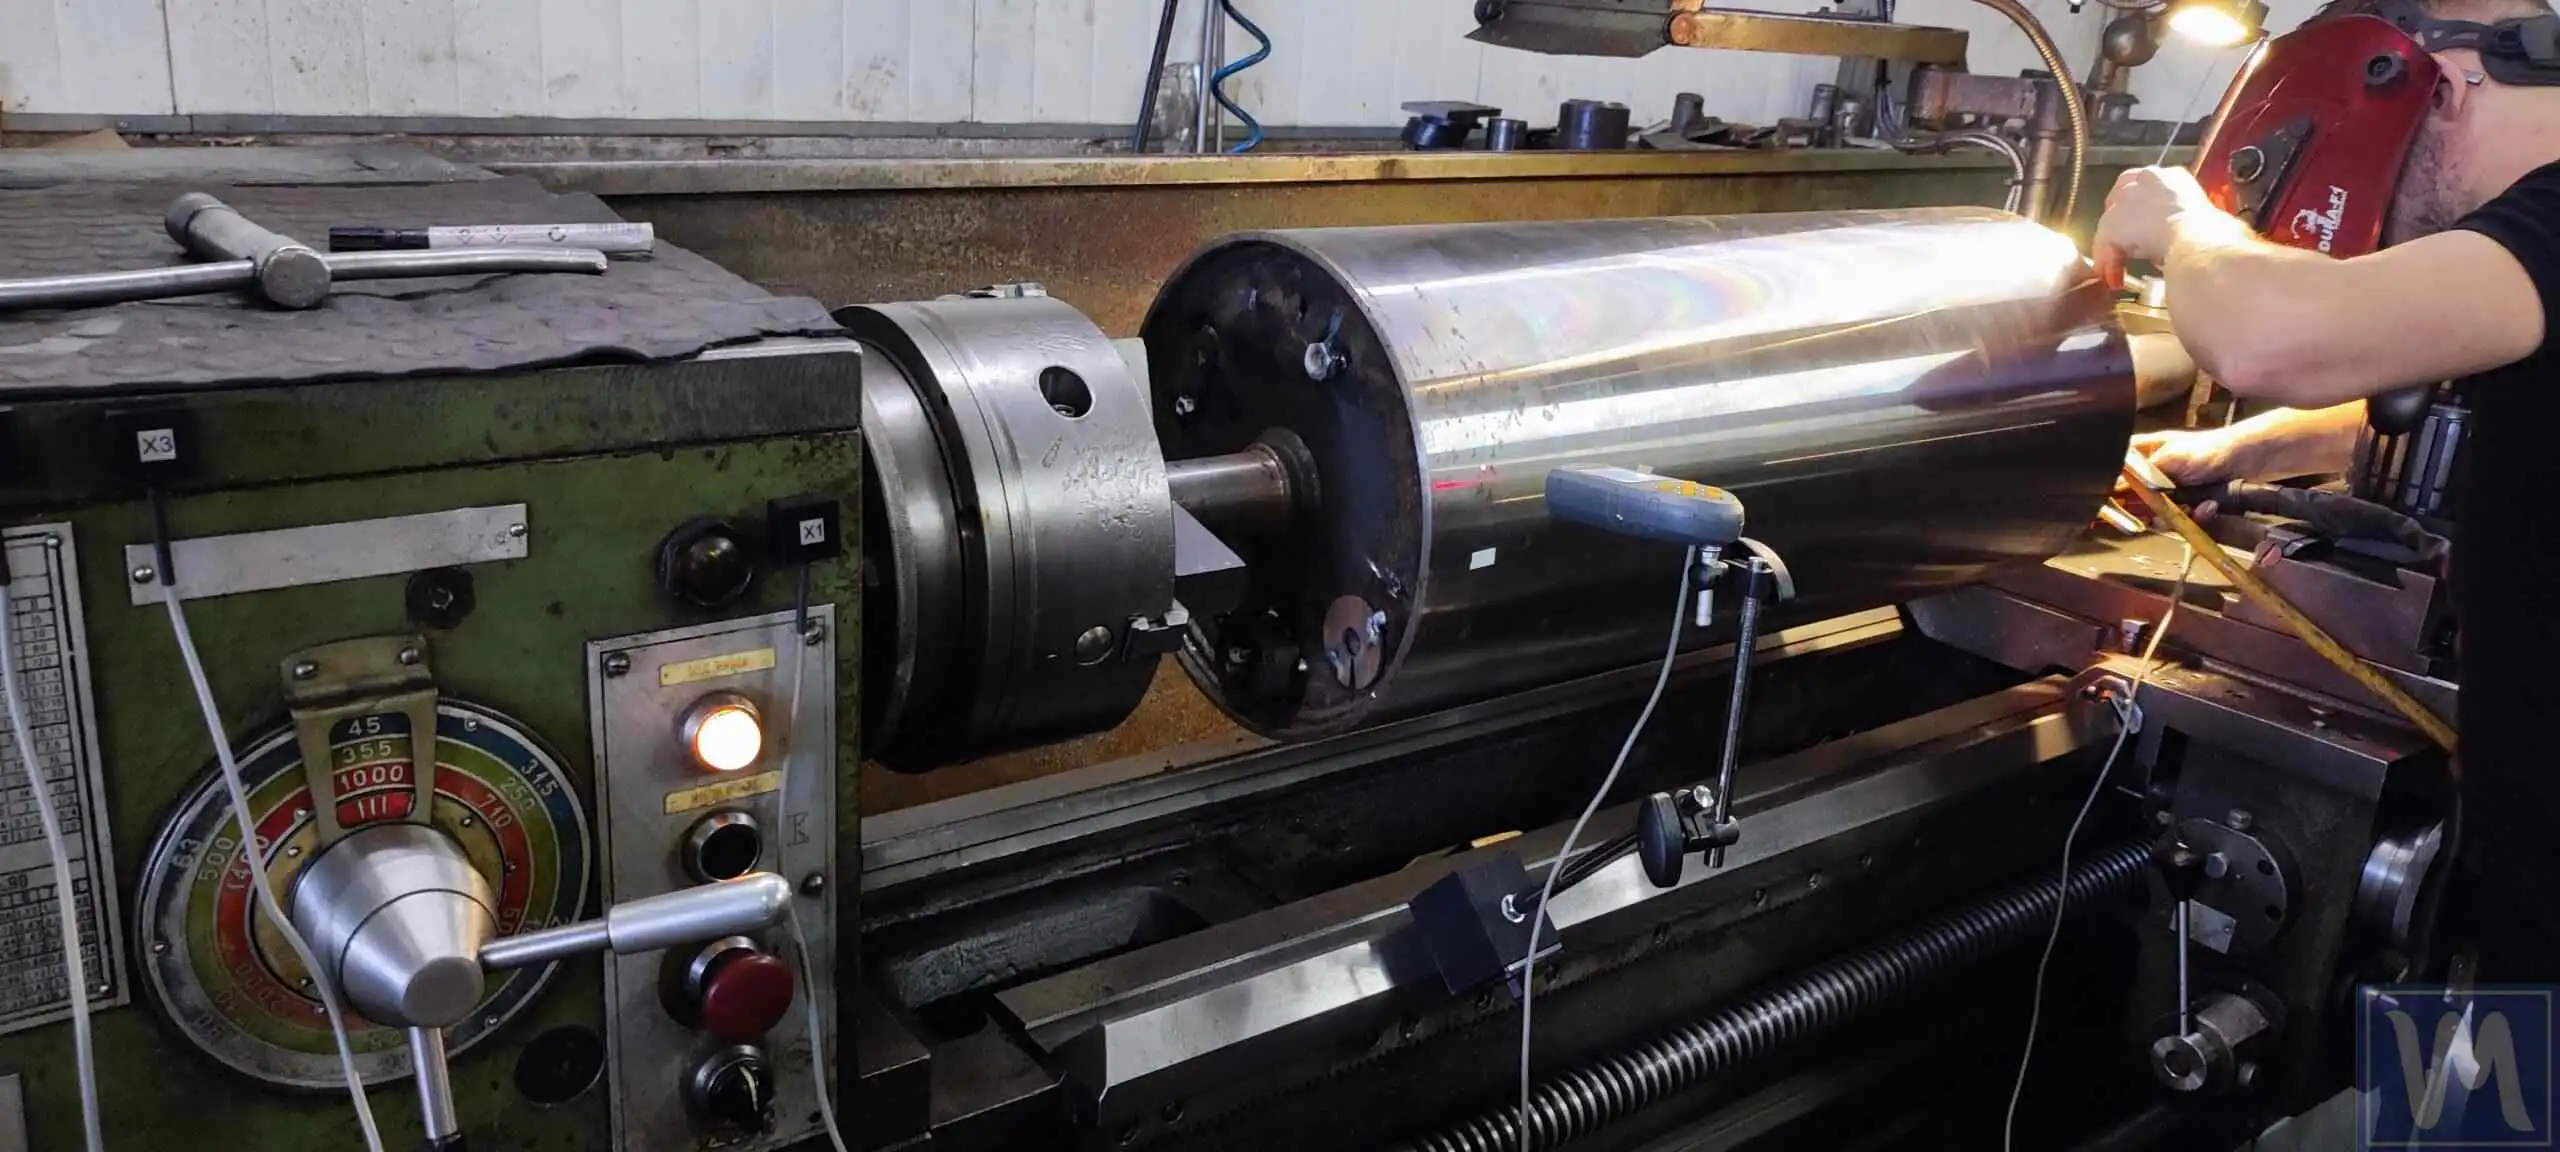
Dalam artikel ini, saya akan menjabarkan pengalaman dan metodologi kami dalam penyeimbangan dinamis poros berlapis karet pada mesin bubut – sebuah solusi yang, harus diakui, awalnya saya ragukan mengingat kekakuan bawaan dan bobot yang besar dari mesin semacam itu. Ternyata, pekerjaan tersebut berhasil dilaksanakan dengan mulus, mencapai tingkat kualitas keseimbangan G 6.3 (ISO 21940-11, sebelumnya ISO 1940-1).
Proses Penyeimbangan Rotor pada Mesin Bubut secara teori
Proses penyeimbangan rotor pada mesin bubut melibatkan langkah-langkah berikut:
Mengamankan Rotor
Rotor dipasang dengan aman di chuck mesin bubut atau di bagian tengah untuk memastikan stabilitas selama proses penyeimbangan.
Memasang Sensor
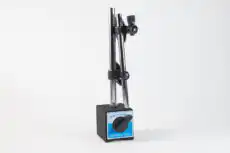
Pasang satu sensor getaran per bidang koreksi — satu pada rumah bantalan headstock dan satu pada rumah tailstock atau steady-rest — secara radial, sedekat mungkin dengan bantalan, pada permukaan logam yang telah dimesinkan dengan bersih menggunakan dudukan magnetik. Jangan memasang sensor pada bed mesin bubut, apron, atau pelindung: sinyal 1× di sana teredam dan didominasi oleh struktur. Tempelkan pita reflektif pada permukaan logam (ujung poros atau chuck), bukan pada lapisan karet, dan arahkan tachometer laser tegak lurus terhadapnya.
Mengukur Getaran Awal
Tingkat getaran awal diukur pada kecepatan yang akan Anda gunakan untuk seluruh pekerjaan. Semua pengukuran — Run 0, pengukuran uji, dan pengukuran trim — harus dilakukan pada kecepatan yang sama, karena koefisien pengaruh hanya berlaku untuk kecepatan saat koefisien tersebut diukur.
Memperhitungkan Eksentrisitas (segera setelah Run 0)
Fixture dan mandrel eksentrisitas menambahkan vektor ke pembacaan Run 0 yang bukan ketidakseimbangan, dan mengoreksinya akan salah. Atasi hal ini sebelum bobot uji dipasang, bukan sesudahnya: centang kotak “Mandrel eccentricity elimination” pada perangkat lunak Balanset-1A, selesaikan Run 0, lalu putar rotor 180° pada fixture dan tekan “F7 - Run Ecc”. Perangkat lunak mengambil setengah-jumlah vektor sebagai eksentrisitas dan setengah-selisih vektor sebagai ketidakseimbangan sebenarnya, dan baru setelah itu putaran uji coba terbuka. Melakukan ini setelah pemberat koreksi sudah dilas berarti harus menghitung ulang dan mengerjakannya kembali.
Seberapa besar berat percobaan yang seharusnya?
Titik awal yang aman adalah pemberat yang gaya sentrifugal tetap berada dalam 5–10% dari berat rotor. Sebagai rumus:
mtrial = k · M · g / (R · ω²), k = 0.05–0.10
di mana M adalah massa rotor (kg), g = 9.81 m/s², R adalah radius pemasangan pemberat (m), dan ω = 2π·RPM/60 (rad/s). Contoh: rotor 50 kg pada 3.000 rpm dengan beban di R = 0,2 m menghasilkan m ≈ 0,07·50·9,81/(0,2·314²) ≈ 1.7 g — gram, bukan ratusan gram. Angka ini tampak mengejutkan kecil untuk rotor 50 kg, tetapi periksa gayanya: pada 3.000 rpm, 1,7 g tersebut sudah menarik dengan F = m·R·ω² ≈ 34 N — sekitar 7% dari berat rotor. Memulai dengan kecil itulah intinya: menambah bertahap itu murah, sedangkan bobot yang berlebihan merupakan beban nyata bagi bantalan dan lasan. Pemeriksaan gaya yang sama berlaku sebaliknya untuk bobot apa pun yang akan Anda pasang.
Anda tidak perlu menghitungnya secara manual: perangkat lunak Balanset sudah mencakup Estimator Bobot Uji Pertama yang merekomendasikan massa dan sudut awal berdasarkan data rotor Anda, dan sebuah Uji Tabrakan untuk memastikan Anda tidak bekerja di dekat frekuensi alami.
Berat percobaan yang baik mengubah pembacaan sebesar minimal 20–30% dalam amplitudo atau 20–30° dalam fase. Jika responsnya lebih kecil, tingkatkan beban secara bertahap — jangan pernah langsung melompat ke beban berat “hanya supaya terjadi sesuatu.”
Memasang Bobot Uji
A berat uji coba dengan massa yang diketahui dipasang pada rotor, dan getaran diukur kembali. Untuk penyeimbangan dua bidang, hal ini dilakukan secara bergantian pada setiap bidang — pengukuran uji dengan bobot pada bidang 1 (Run 1), kemudian pengukuran uji dengan bobot pada bidang 2 (Run 2) — sehingga perangkat lunak dapat mengukur pengaruh setiap bidang koreksi secara terpisah.
Menghitung Massa Korektif
Perangkat lunak Balanset-1A menganalisis hasil pengukuran dan menghitung massa koreksi yang diperlukan serta sudut penempatannya.
Mengoreksi Massa Rotor
Tergantung pada desain rotor dan kemampuan mesin bubut, koreksi massa dapat dilakukan dengan pengeboran, penggilingan, pengelasan, atau metode lainnya.
Verifikasi Penyeimbangan
Setelah melakukan koreksi, pengukuran getaran kontrol dilakukan. Proses ini diulangi jika perlu sampai tingkat keseimbangan yang diperlukan tercapai.
Penyeimbangan Dinamis dalam Praktik
- Frekuensi Rotasi: Biasanya, kecepatan putaran kerja poros ini berkisar antara 300 hingga 500 putaran per menit (rpm). Dalam kasus khusus ini, kami melakukan penyeimbangan pada 550 rpm.
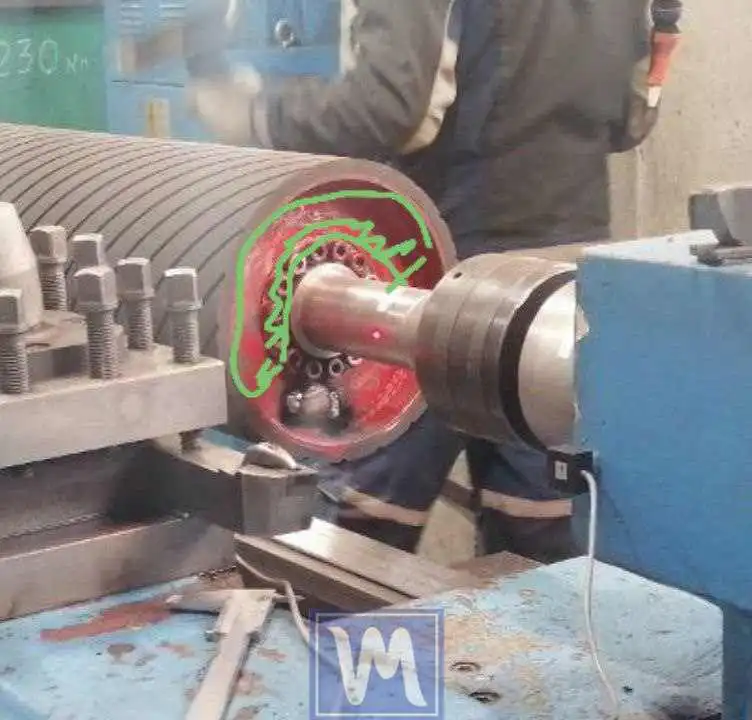
- Pengaturan: Poros karet dipasang pada mesin bubut, diikuti oleh penempatan sensor yang strategis, seperti yang digambarkan dalam foto-foto yang menyertainya.
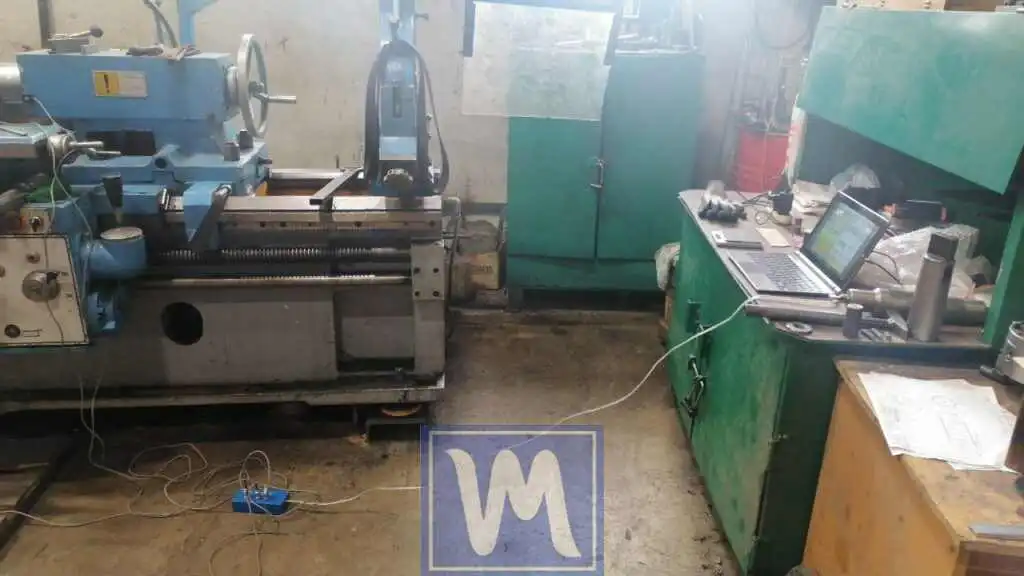
Penyeimbangan Dinamis Poros Karet di Tempat Menggunakan Mesin Bubut
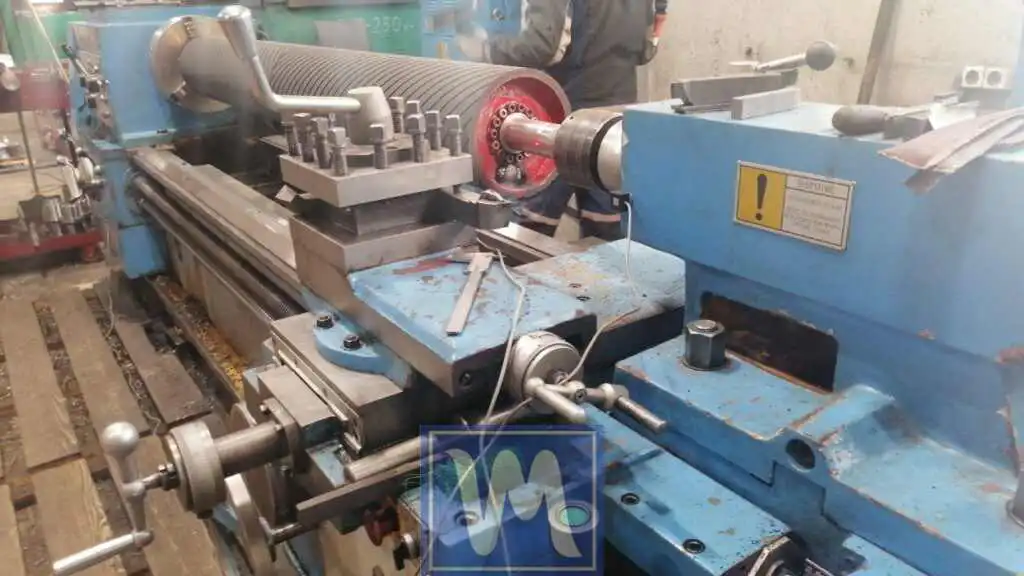
Penyeimbangan Dinamis Poros Karet
- Pembacaan Getaran Awal: Sebelum penyeimbangan, awal pembacaan getaran menunjukkan 9 mm/s dan 17 mm/s.
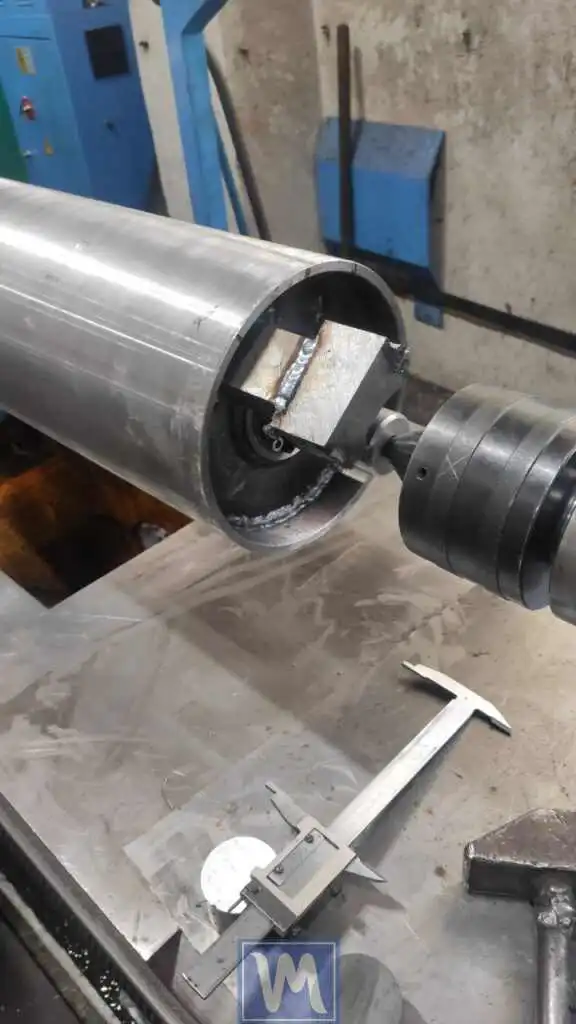
- Uji Coba: Pekerjaan dua bidang memerlukan trial run di setiap bidang secara bergantian — Run 1 dengan beban di bidang 1, kemudian Run 2 dengan beban di bidang 2. Beban percobaan seberat 340 gram dilas; ini mengubah getaran dan fase pembacaan sekitar 10%. Anggap respons seperti itu sebagai batas minimum: untuk pengukuran yang jelas dan meyakinkan, kami biasanya menargetkan beban percobaan yang menggeser vektor getaran sebesar 25–50%, tetapi mesin bubut yang berat dan kaku merespons sangat sedikit per gram massa percobaan.
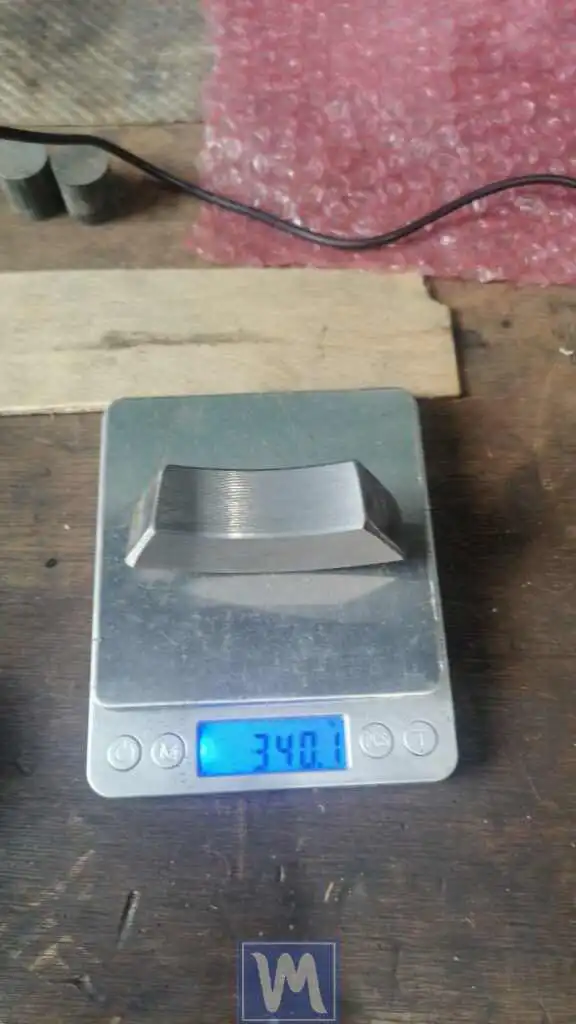
- Penyesuaian Keseimbangan: Setelah trial run dengan beban percobaan, instrumen Balanset-1A kami menunjukkan perlunya penambahan 3.100 gram pada satu sisi poros dan 4.300 gram pada sisi lainnya, sesuai dengan koreksi pada dua bidang. Setelah penyesuaian ini, tingkat getaran menurun menjadi 2 mm/s dan 4 mm/s.
Penyeimbangan Dinamis Poros Karet di Tempat Menggunakan Mesin Bubut
Penyeimbangan Dinamis Poros Karet di Tempat Menggunakan Mesin Bubut
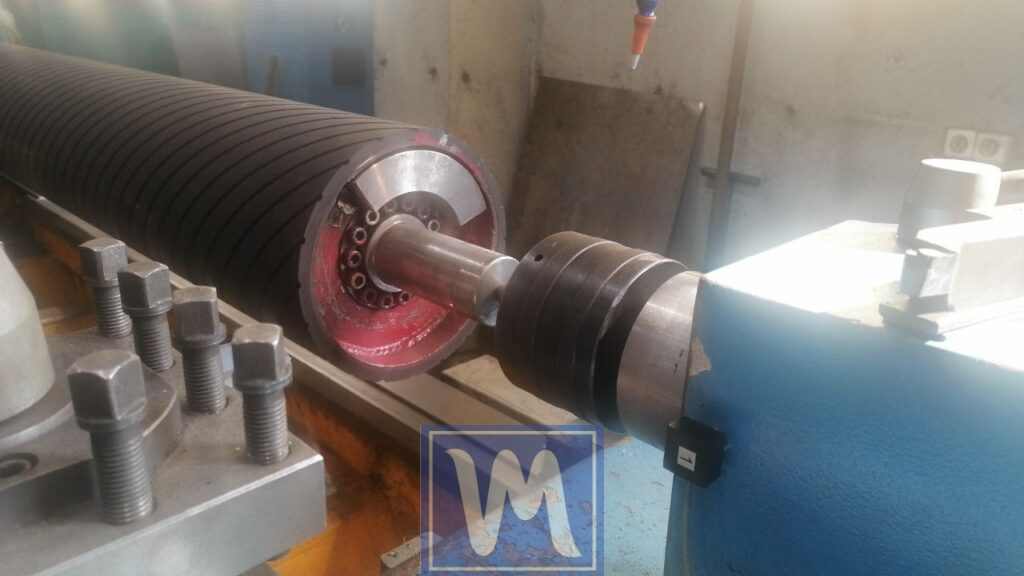
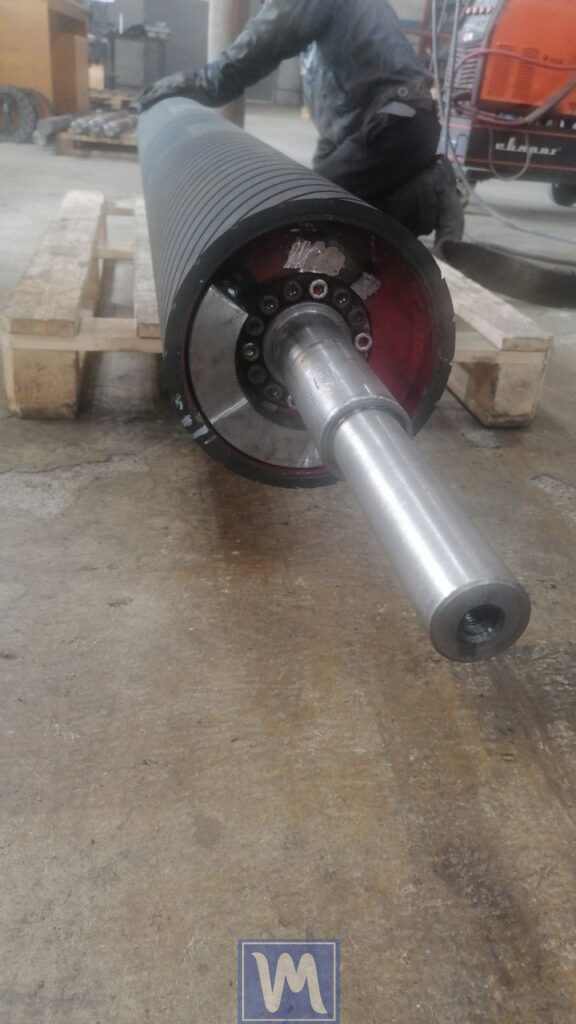
- Penyempurnaan: Untuk lebih mengoptimalkan hasil, kami melanjutkan dengan menambahkan pemberat 400 gram dan 700 gram. Selanjutnya, putaran penyesuaian halus lainnya dilakukan dengan menambahkan 200 gram dan 400 gram. Karena keterbatasan ruang, pemberat-pemberat tersebut dilas bertumpuk satu sama lain. Pada akhirnya, pemberat sementara ini diganti dengan pemberat penyeimbang presisi yang dipotong khusus dan estetis, dibuat khusus untuk poros ini. Pembacaan getaran akhir mencapai angka yang mengesankan yaitu 0,1 mm/s pada kedua bidang (angka yang dibulatkan — di bawah 1 mm/s instrumen itu sendiri menampilkan pembacaan hingga tiga angka desimal).
Penyeimbangan Dinamis Poros Karet di Tempat Menggunakan Mesin Bubut
Penyeimbangan Dinamis Poros Karet di Tempat Menggunakan Mesin Bubut
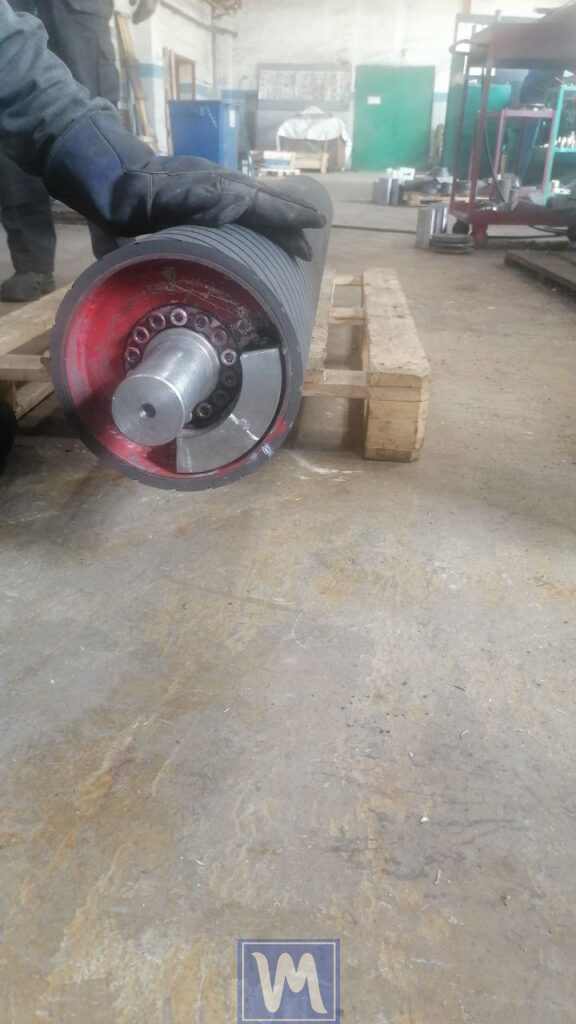
Penyeimbangan Dinamis Poros Karet di Tempat Menggunakan Mesin Bubut

Keuntungan dari Penyeimbangan Rotor pada Mesin Bubut
Efektivitas Biaya
Menggunakan mesin bubut untuk penyeimbangan menghindari biaya pembelian peralatan penyeimbangan khusus.
Kenyamanan
Penyeimbangan dapat dilakukan secara langsung selama proses pembuatan rotor, sehingga mengurangi waktu produksi.
Kualitas Tinggi
Penyeimbang portabel modern, seperti Balanset-1A, memberikan akurasi penyeimbangan yang tinggi, sehingga memungkinkan tingkat getaran yang rendah dan kualitas produk yang lebih baik.
Kesimpulan
Penyeimbangan rotor pada mesin bubut merupakan solusi yang efektif dan ekonomis untuk bisnis yang ingin meningkatkan kualitas produk dan mengurangi biaya produksi. Penggunaan penyeimbang portabel seperti Balanset-1A membuat proses ini menjadi sederhana dan mudah diakses, bahkan untuk bengkel kecil.
Pengingat Penting
- Untuk mencapai hasil terbaik, disarankan untuk menggunakan instrumen pengukur berkualitas tinggi dan mengikuti prosedur penyeimbangan dengan ketat. Anda dapat memperkirakan nilai yang diizinkan ketidakseimbangan sisa untuk rotor Anda dengan kalkulator ketidakseimbangan sisa (ISO 1940).
Menyeimbangkan rotor pada mesin bubut merupakan langkah menuju masa depan produksi Anda, yang akan terbayar melalui peningkatan kualitas produk, pengurangan biaya, dan peningkatan daya saing bisnis Anda.

Nikolai Shelkovenko
Nikolai Shelkovenko adalah insinyur analisis getaran sekaligus pendiri dan CEO Vibromera. Selama lebih dari 15 tahun ia telah menyeimbangkan peralatan berputar langsung di lapangan, bukan di bangku uji: mulcher, kipas industri, penghancur, sentrifus, poros, dan spindel. Dari pekerjaan itulah lahir alat-alat Balanset — dirancang sebagai alat yang dapat dibawa oleh seorang spesialis ke mesin dan digunakan sendiri, di lokasi, bukan sebagai peralatan laboratorium. Vibromera didirikan pada tahun 2017 dan sejak 2023 berbasis di Porto, Portugal. Pengembangan, perakitan, dan dukungan untuk lini Balanset semuanya dilakukan di sini. Instrumen andalannya adalah Balanset-1A, penganalisis portabel untuk penyeimbangan satu dan dua bidang serta diagnostik getaran. Nikolai terlibat langsung dalam dukungan pelanggan, penanganan kasus penyeimbangan yang rumit, dan pengembangan perangkat lunak. Ia bekerja dengan pelanggan di seluruh dunia, dalam bahasa apa pun.


Komentar 0